Assign Task
This action will allow you to assign a task to a particular person(someone who is involved or is managing the workflow) in the form of an email. The person then accepts or rejects the task based on the details included.
Fields
- Name - By default, it is prefilled by the name of the action. You can change it based on your preferred action name for your workflow's naming convention.
- Task Name - The task title the assignee will see once he/she receives the task in the form of an email. This will give the assignee what the task is for.
- Task Description - You can either fill this section with further details about the task. You can also leave it blank.
Outcomes - Outcomes - Depending on the task, you can create several outcomes other than Accept/Reject. You can also use the different synonyms of the words Accept and Reject and their past tenses like Yes, Agree, Agreed, Ok, Sure or Rejected, No, Disagree and so on. don't forget to separate them with comma. Email
- Assignee's Email - The email address of the person assigned to manage the assigned task.
- Email Subject - The subject of the email to be sent.
- Email Body - List of files you would like to attach to the email.
- Attachments - This will retrieve important attachments that the task Assignee will need to check out.
Expiry
- Number - You can input here a numeric value.
- Time - You can choose a unit of time for the task expiry. It could be in minute(s), hour(s), days(s), or month(s).
- Expiry Outcome - If you input 'Expired', it will appear when the assignee tries to approve/reject the task past its expiry date.
Reminder
- Number of Reminders - Choose how many reminders you would like to send to the assignee, especially if the task is still pending. 1 is the lowest and 3 is the highest number of reminders you can send.
- Remind After - the number of intervals between each reminder. You can choose the unit of time in the next field, be it minute(s), hour(s), days(s), or month(s).
Demonstration on how to use it in a flow
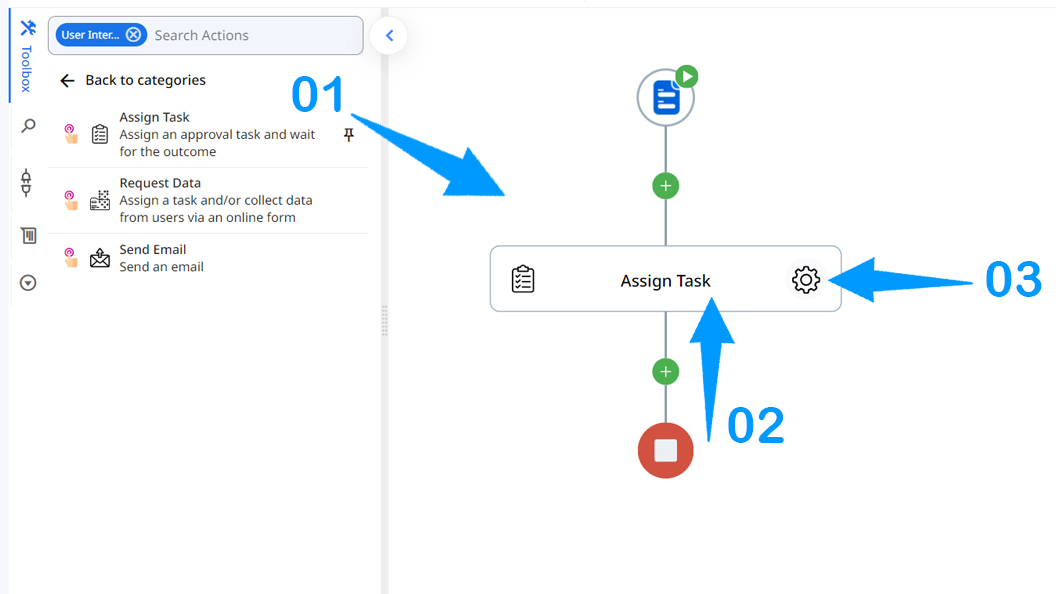
1.Drag and drop the Share Item action into the flow.
2.Set the name of your choice or leave it as it is.
3.Click the gear icon to open its settings.
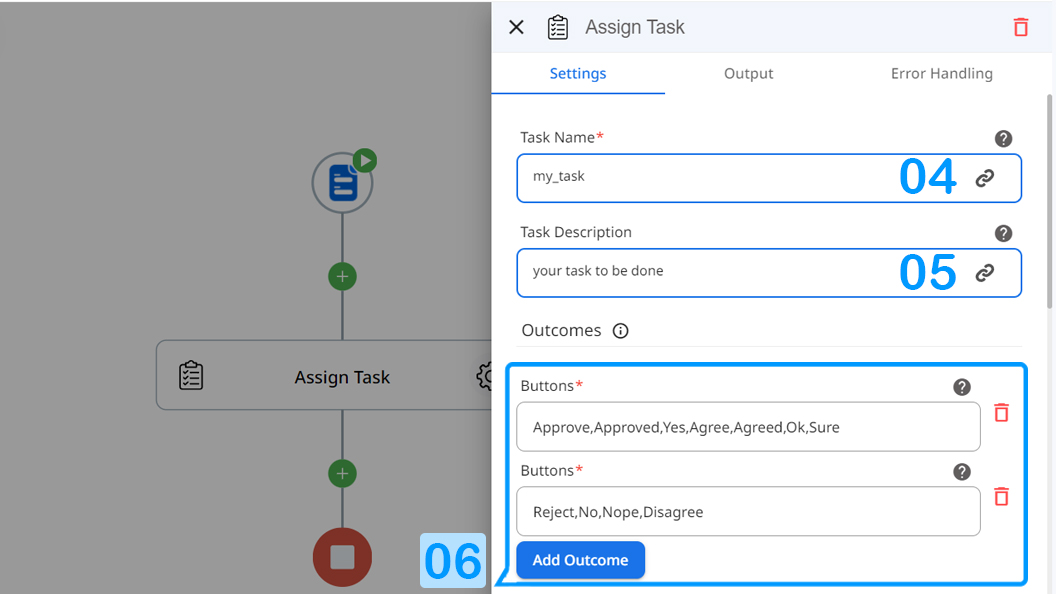
4.For the Name, assign a name that clearly indicates what the task is for.
5.You can add more description or just leave it blank.
6.Create the outcomes you'd like to show. For the most time, it's just accept/reject, but you can definitely add more.
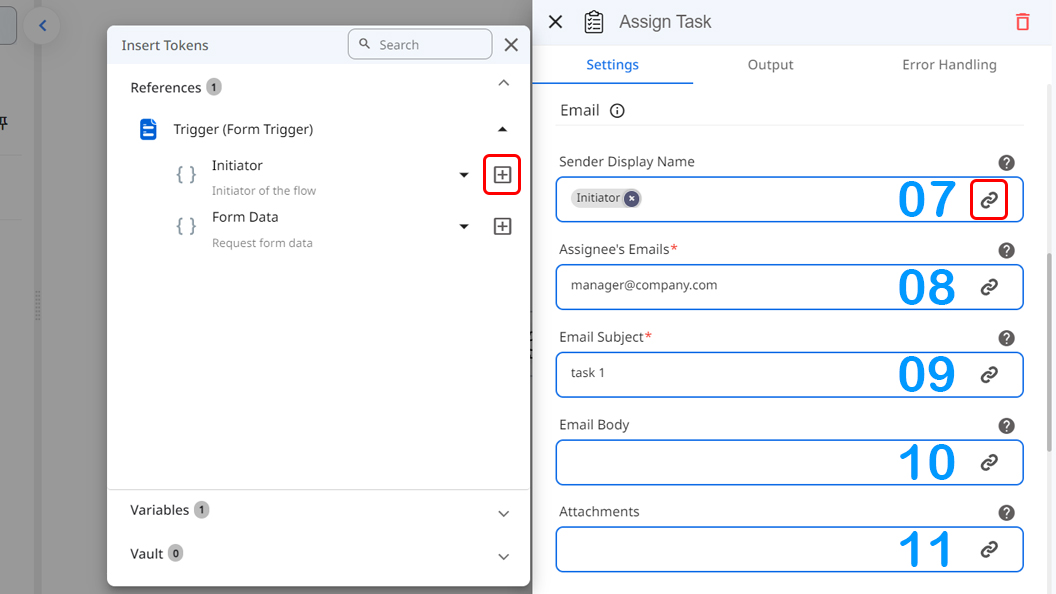
7.Enter Sender name or use token picker to choose available values.
8.Configure the Assignee's Email by clicking the token picker and choosing the right value or by writing it down directly.
9.Enter the Email Subject or use token picker as well.
10.Compose a body that aligns with your specific task. As always, you can utilize the token picker functionality to incorporate the necessary values into your email body.
11.Configure the attachments.
12.At the Expiry section, input the unit of time such as minute(s), hour(s), days(s), or month(s). Then, choose the numerical value. A good example is, you set the task to expire in 7 days.
13.The "Expired" will also pop up if the assignee tries to approve/reject the task past it's due date.
14.Enabling Reminder will allow you to send a maximum of three (3) reminders to the task assignee.
15.Choose the numerical value of the interval of each reminder and the unit of time in minute(s), hour(s), days(s), or month(s).

Result
When this flow is activated, a task will be automatically sent to Assignee(the person who will approve or reject the task) in the form of an email. The email will contain all of the data entered on the action.
Updated 9 months ago