Fill PDF Form
Definition
TheFill PDF Form action in Zenphi is a powerful tool designed to automate the process of populating fillable PDF documents with specific data. This action enables users to dynamically complete forms such as contracts, invoices, applications, or surveys by mapping predefined fields in a fillable PDF to data sources within Zenphi workflows.
Use Cases
The Fill PDF Form action is versatile and can be used in various scenarios, including:
- Generating Contracts: Automatically fill out agreements or contracts with customer or vendor details.
- Invoice Creation: Populate invoice templates with transaction data from a database.
- Application Processing: Fill out application forms using data submitted via online forms.
- Employee Onboarding: Complete HR documents, such as tax forms or onboarding paperwork, using employee-provided information.
- Client Registration: Automate the creation of client registration forms from CRM data.
- Report Generation: Generate pre-filled reports for customers or internal stakeholders.
Inputs
To use the Fill PDF Form action, the following inputs are required:
- File Payload:
- The fillable PDF document you want to populate.
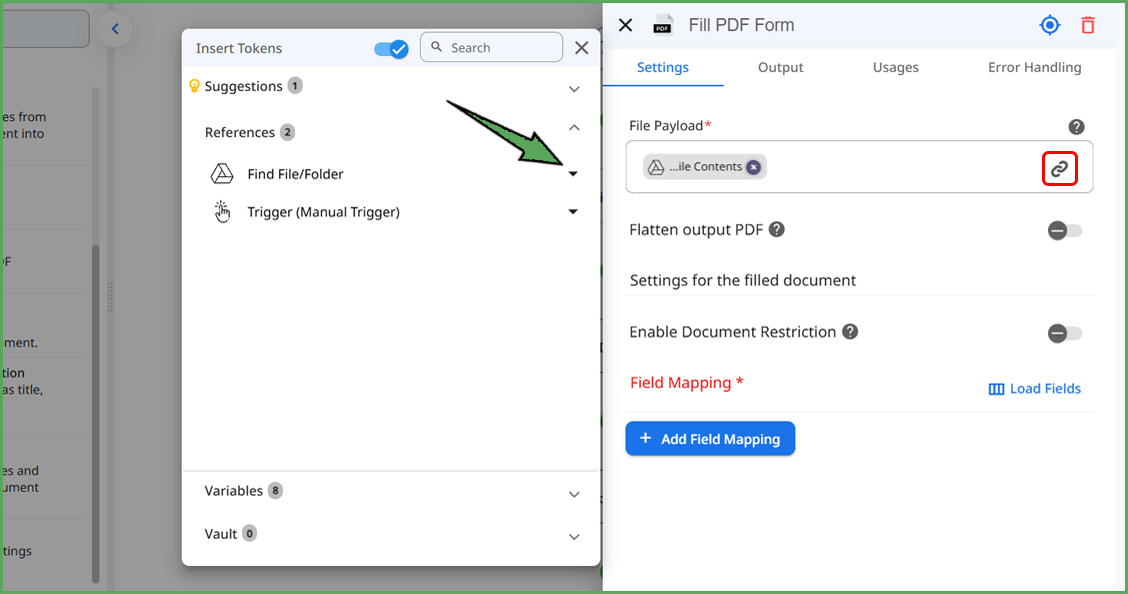
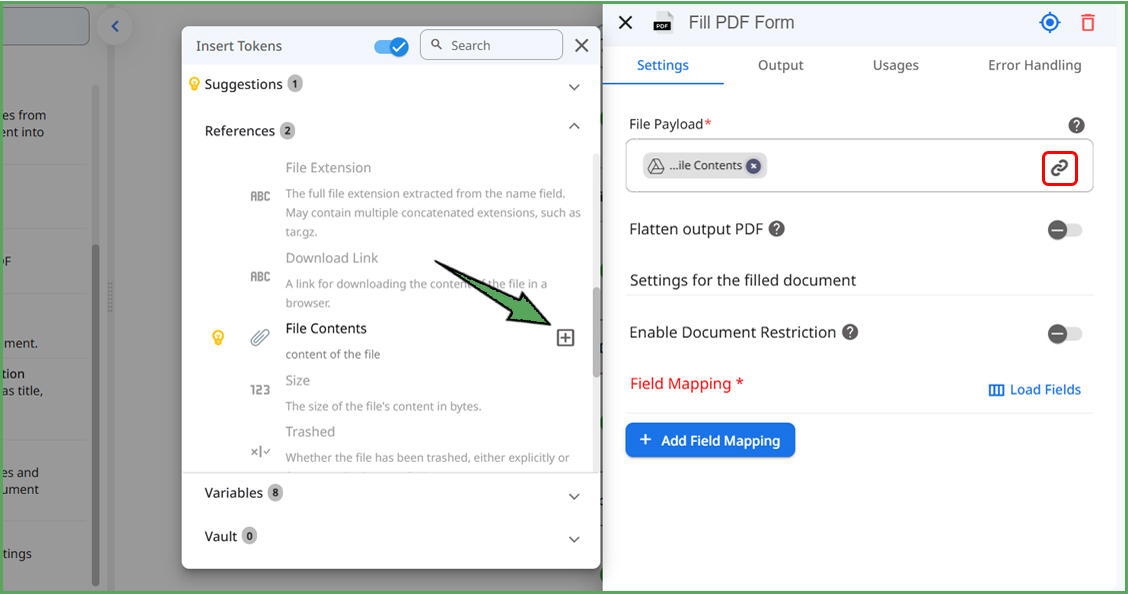
- This file can be obtained from triggers like Gmail attachments or form submissions with files. Alternatively, specific actions can fetch the file from third-party storage services like Google Drive or Dropbox such as Find File/Folder action under Google Drive category.
- Flatten Output PDF: When enabled, this option flattens the filled PDF, converting form fields into static text, ensuring the document cannot be edited further.
- Enable Document Restriction: Enabling this option applies restrictions to the output PDF, such as preventing copying, editing, or printing.
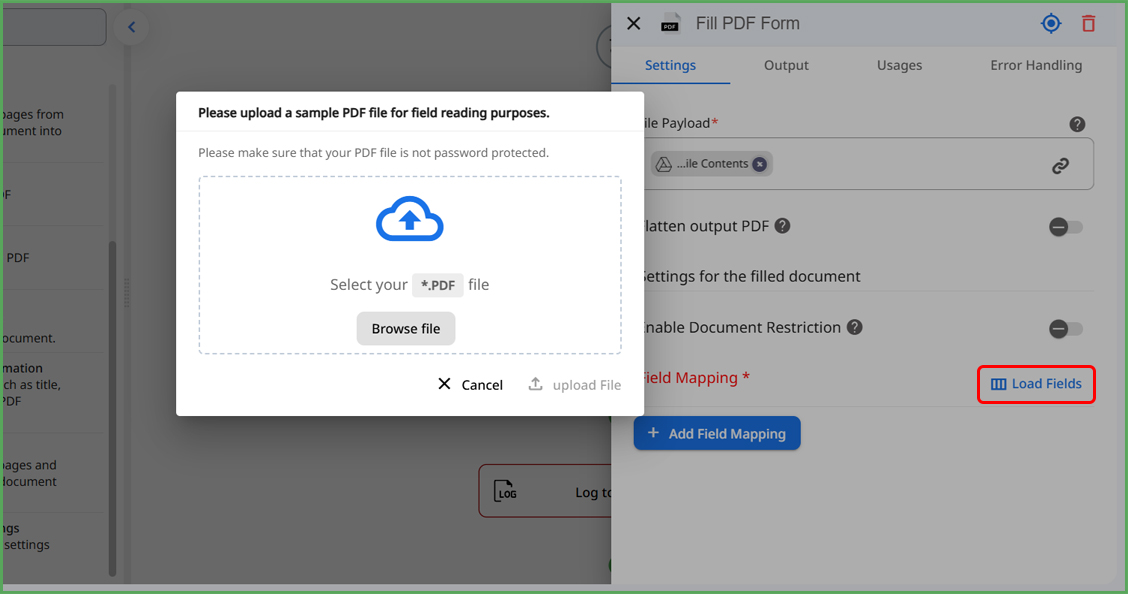
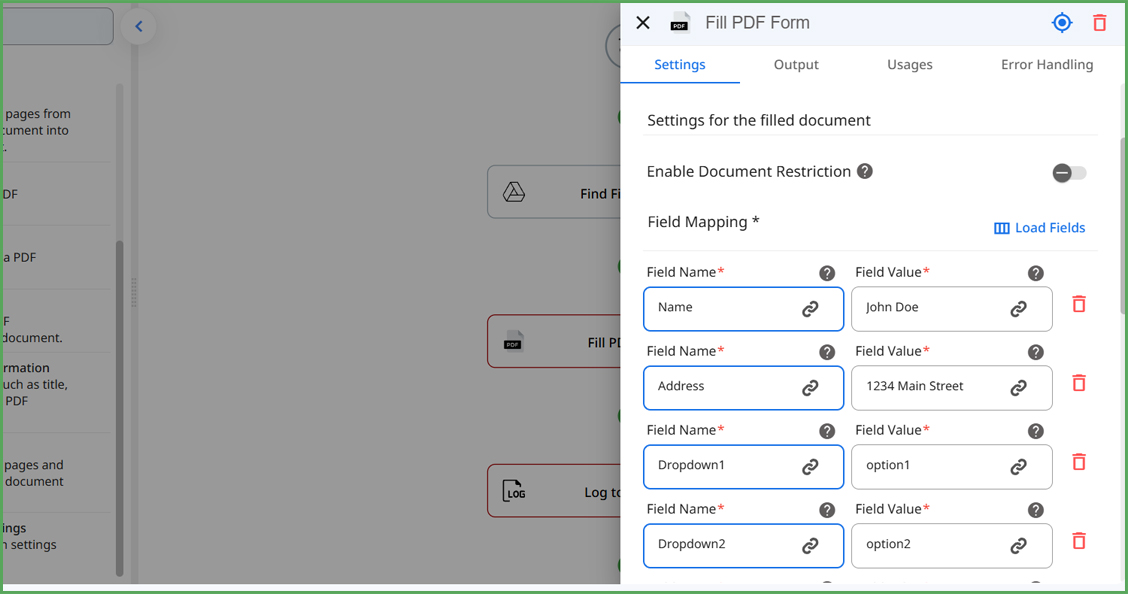
- Field Mapping: This allows you to map fields in the PDF to corresponding data values. Use the Load Fields option to import field names from the PDF for mapping.
Step-by-Step Guide
Step 1: Add the "Fill PDF Form" Action
In your Zenphi flow, locate the Fill PDF Form action in the PDF category from the toolbox. Drag and drop it into your workflow. If you’re new to adding actions, you can follow this guide here.
Step 2: Provide the File Payload
Provide the fillable PDF document for the action. You can:
Fetch the file from triggers, such as attachments of the Gmail trigger or Form submissions.
Use specific Zenphi actions such as Find File/Folder action to acquire the file from third-party storage like Google Drive or Dropbox.


Step 3: Configure Field Mapping
Under the action’s settings, map the fields in the PDF to their respective data sources. Use dynamic tokens or static values to assign data to each field.


Step 4: Adjust Output Options
Configure additional options for the output:
- Enable Flatten Output PDF if you want the filled form fields to become static text.
- Enable Enable Document Restriction to apply restrictions like preventing copying or editing.
Specify how the filled PDF should be handled:
- Save the completed form to a connected cloud storage.
- Attach the file to an email.
- Pass it along to subsequent Zenphi actions for further processing.
Step 5: Test and Run
Once all configurations are complete, test your flow to ensure the data populates the PDF correctly. Check the output for accuracy and adjust mappings if necessary.
Updated 10 months ago
