Lesson 2: Automating your very first process
Create a Space, and your first Flow. Learn the Flow basics: Trigger, Actions, Flow Designer, Connections, and more.
Now, as we got familiar with our Workspace, it's time to automate our very first process. In this lesson, we'll learn:
- What is a Space and how to create one
- Creating your very first Flow and understanding all of its parts
- Trigger
- Flow Designer
- Connection
- Actions
- Token
-
Testing your first Flow.
-
Publishing and managing your first Flow.
Creating a Space
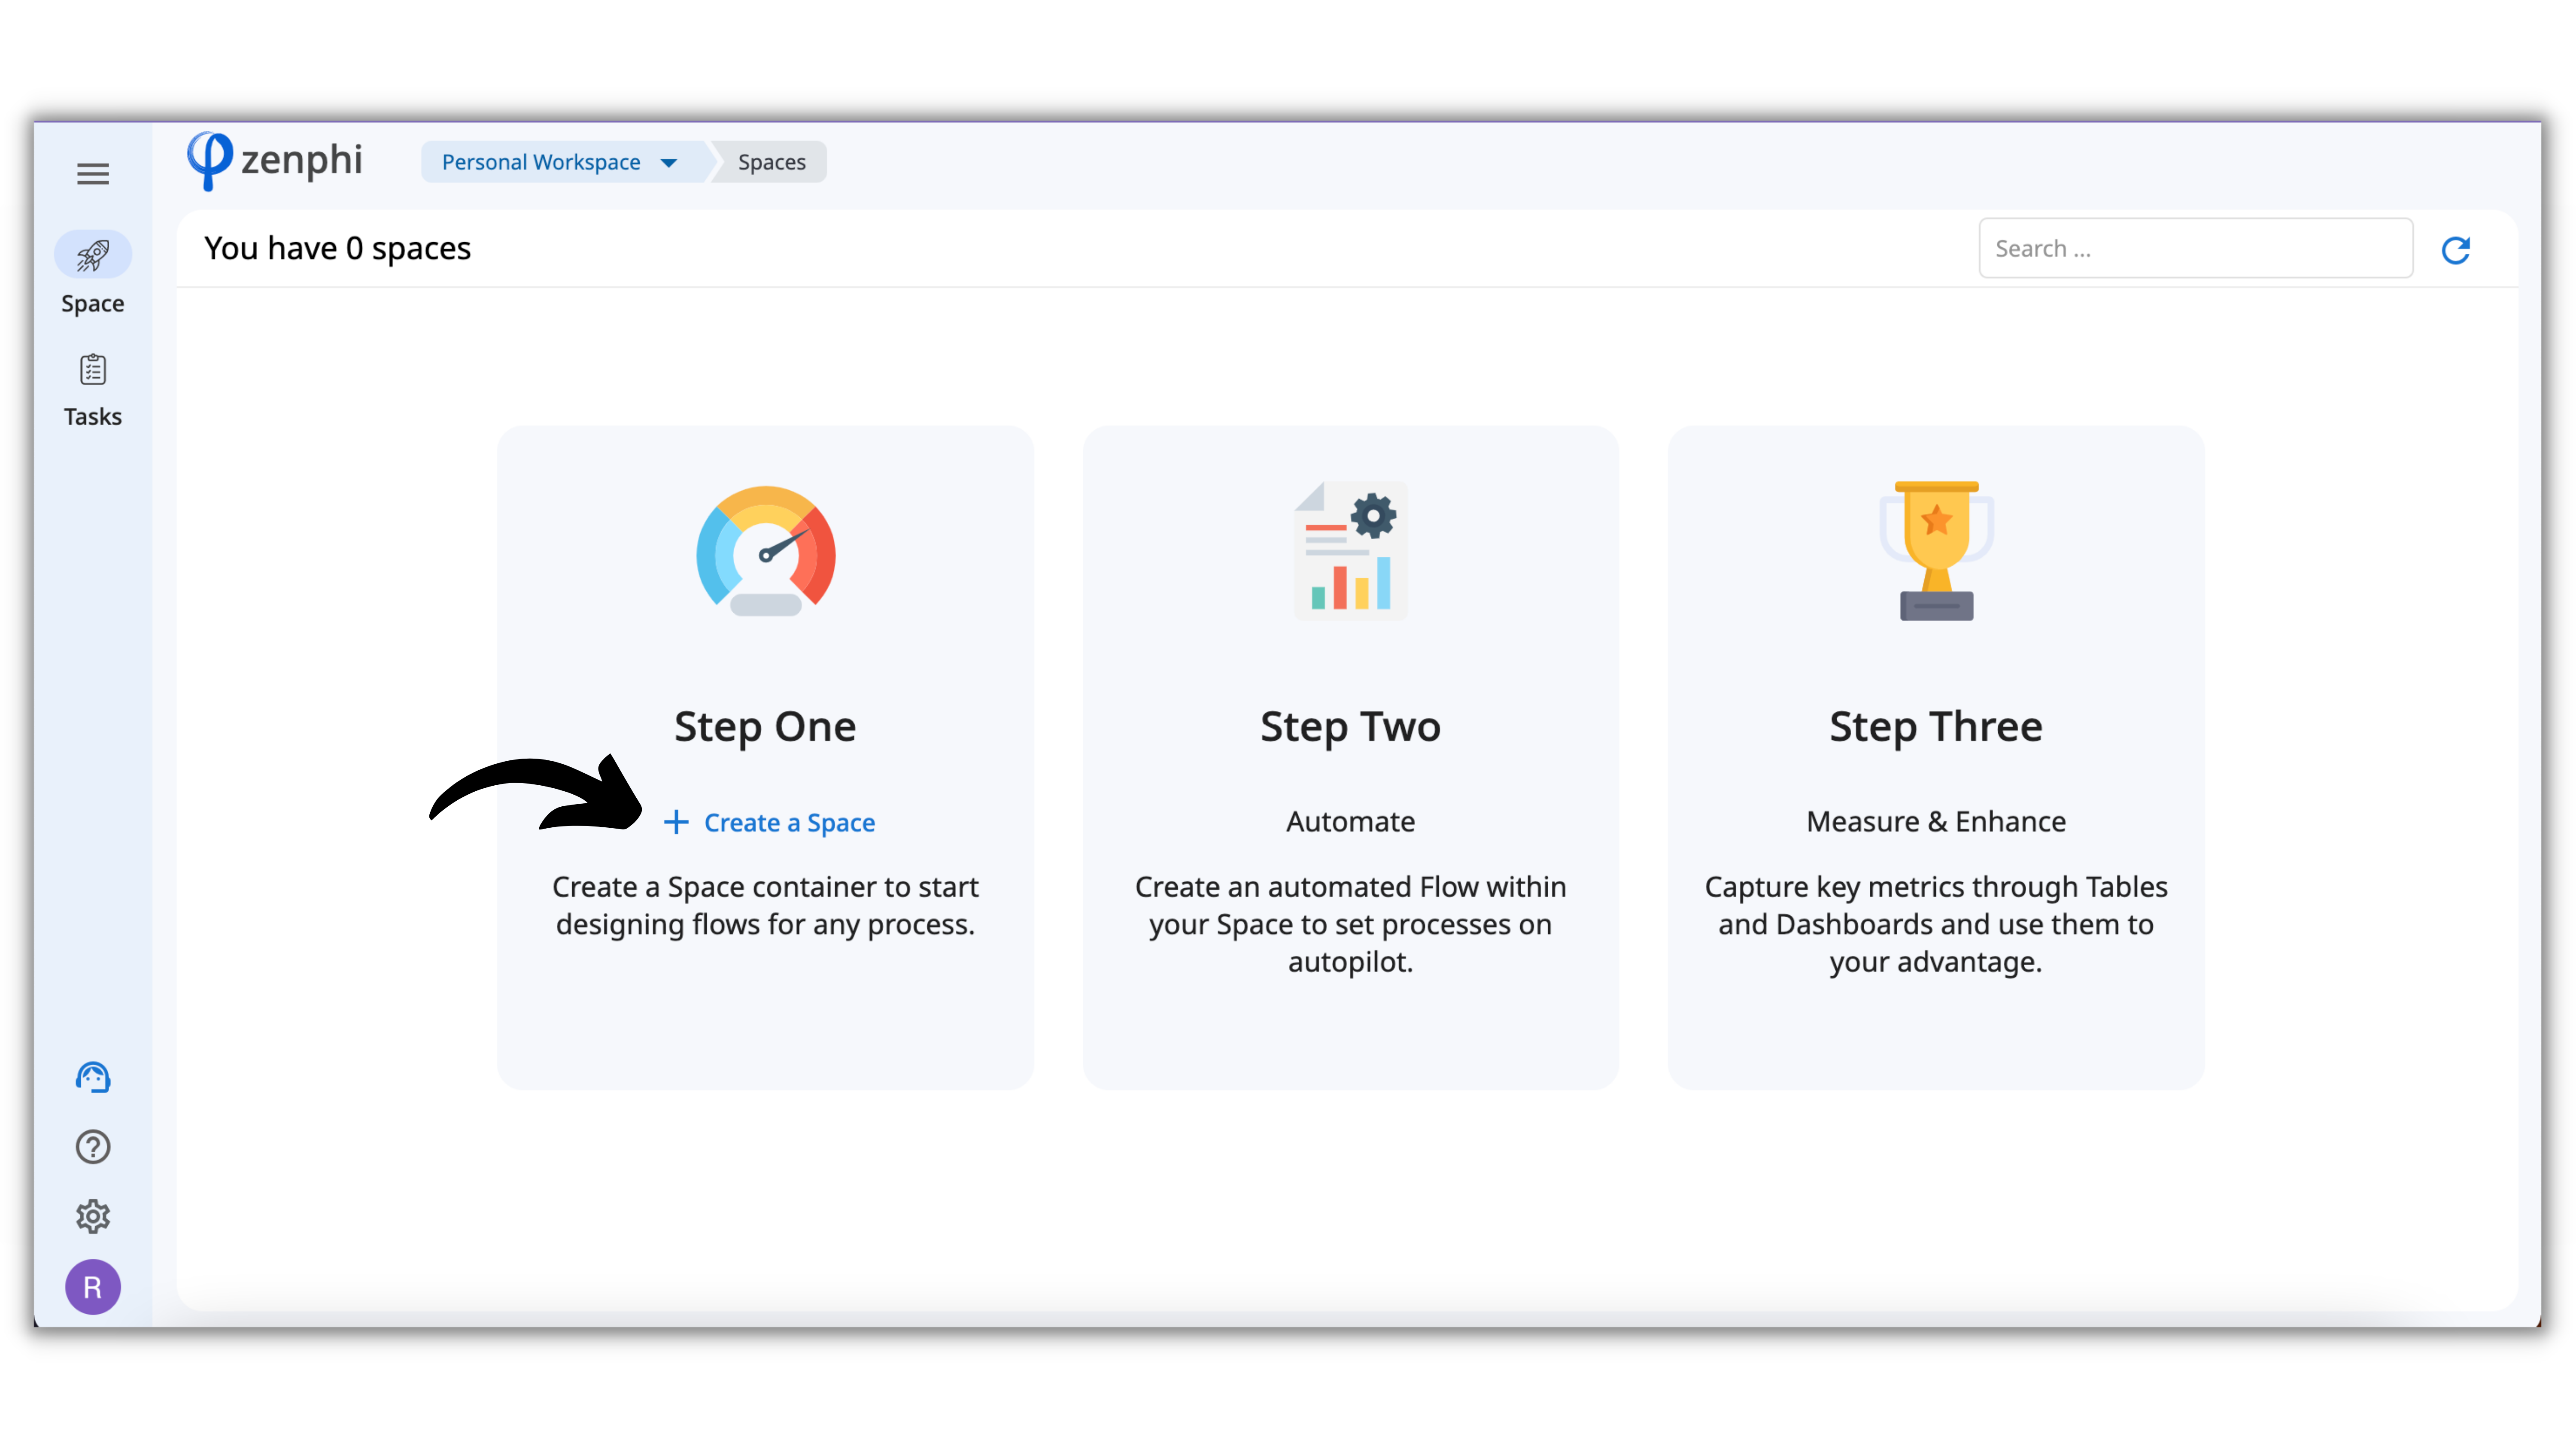
The process automation usually starts with creating a Space.
You can think of a Space as a container for all the assets related to a process or as a Project for your process automation. For example, when you want to automate Employee Onboarding Leave Requests or any other processes, you create a Space.
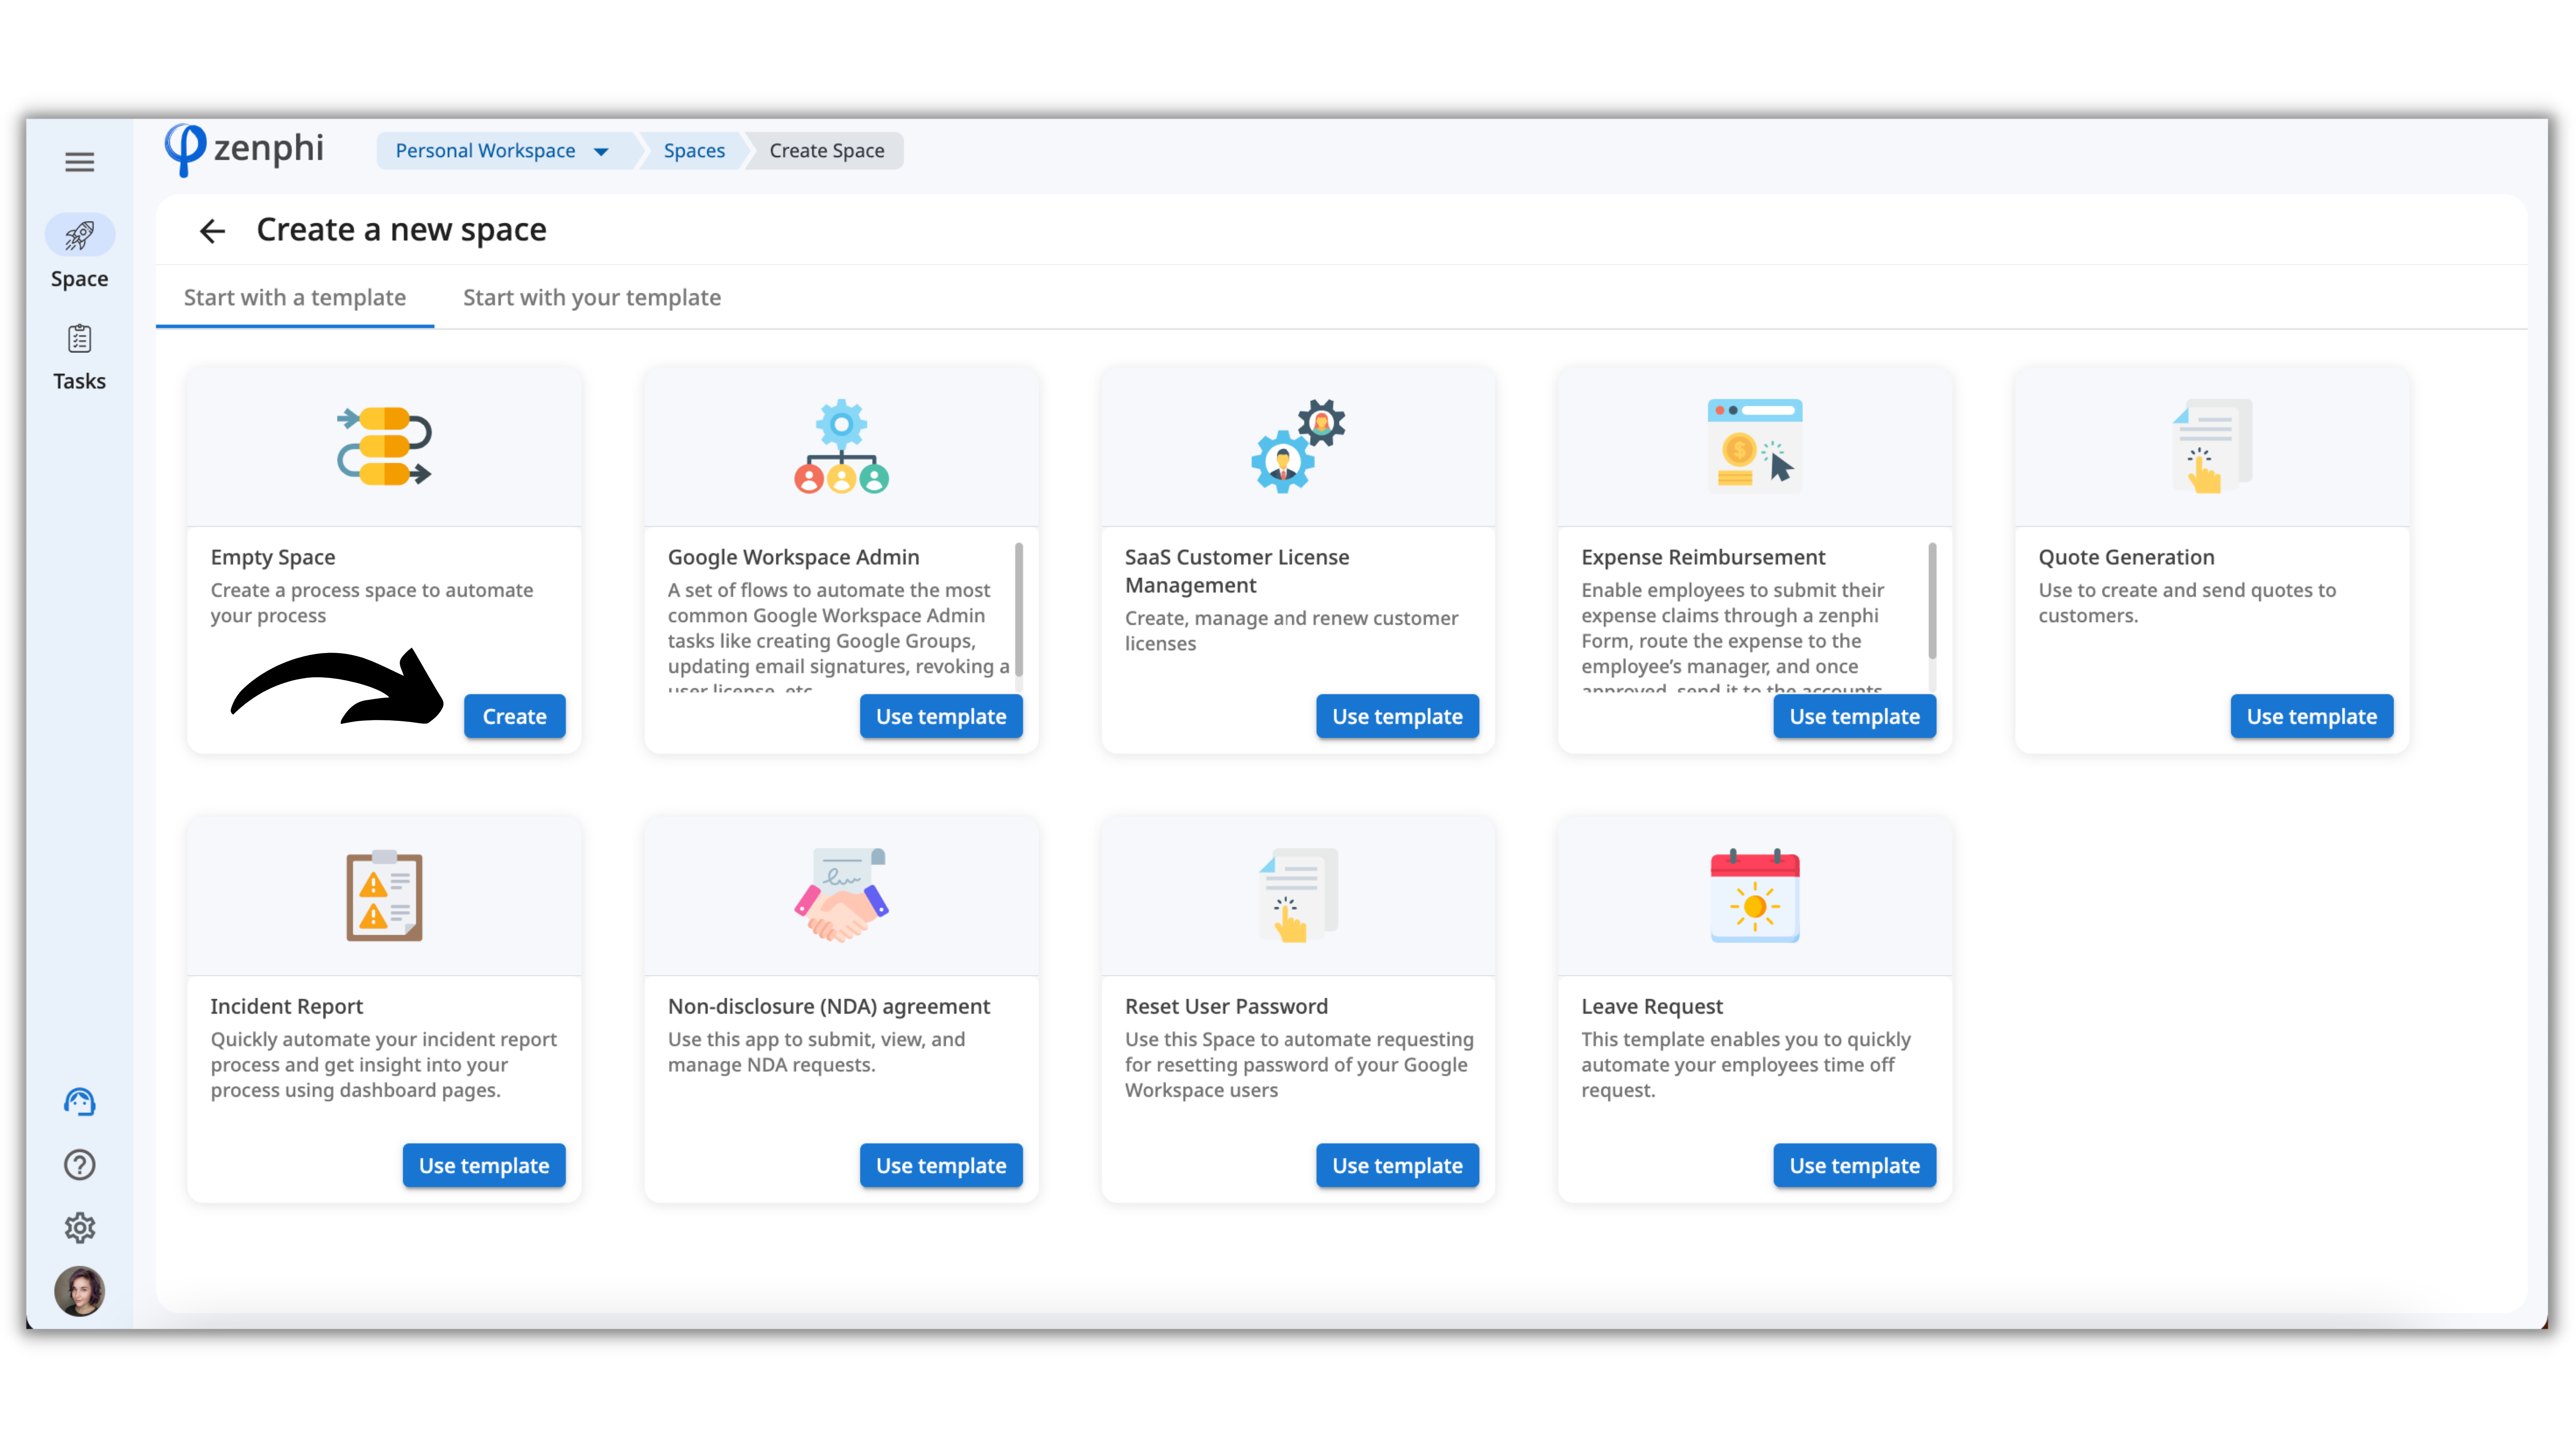
Once you click on Create, you'll see two options you can start with:
- Empty Space
- Space Templates
Space Templates are a great way to explore automation use cases and find inspiration for your process building. When you're ready, just launch the Template you like, authorize the required Connections, read through the welcome tutorial and you're all set.
However, in this lesson, we'll learn how to create a Space from scratch, so we need to click on the Empty Space.
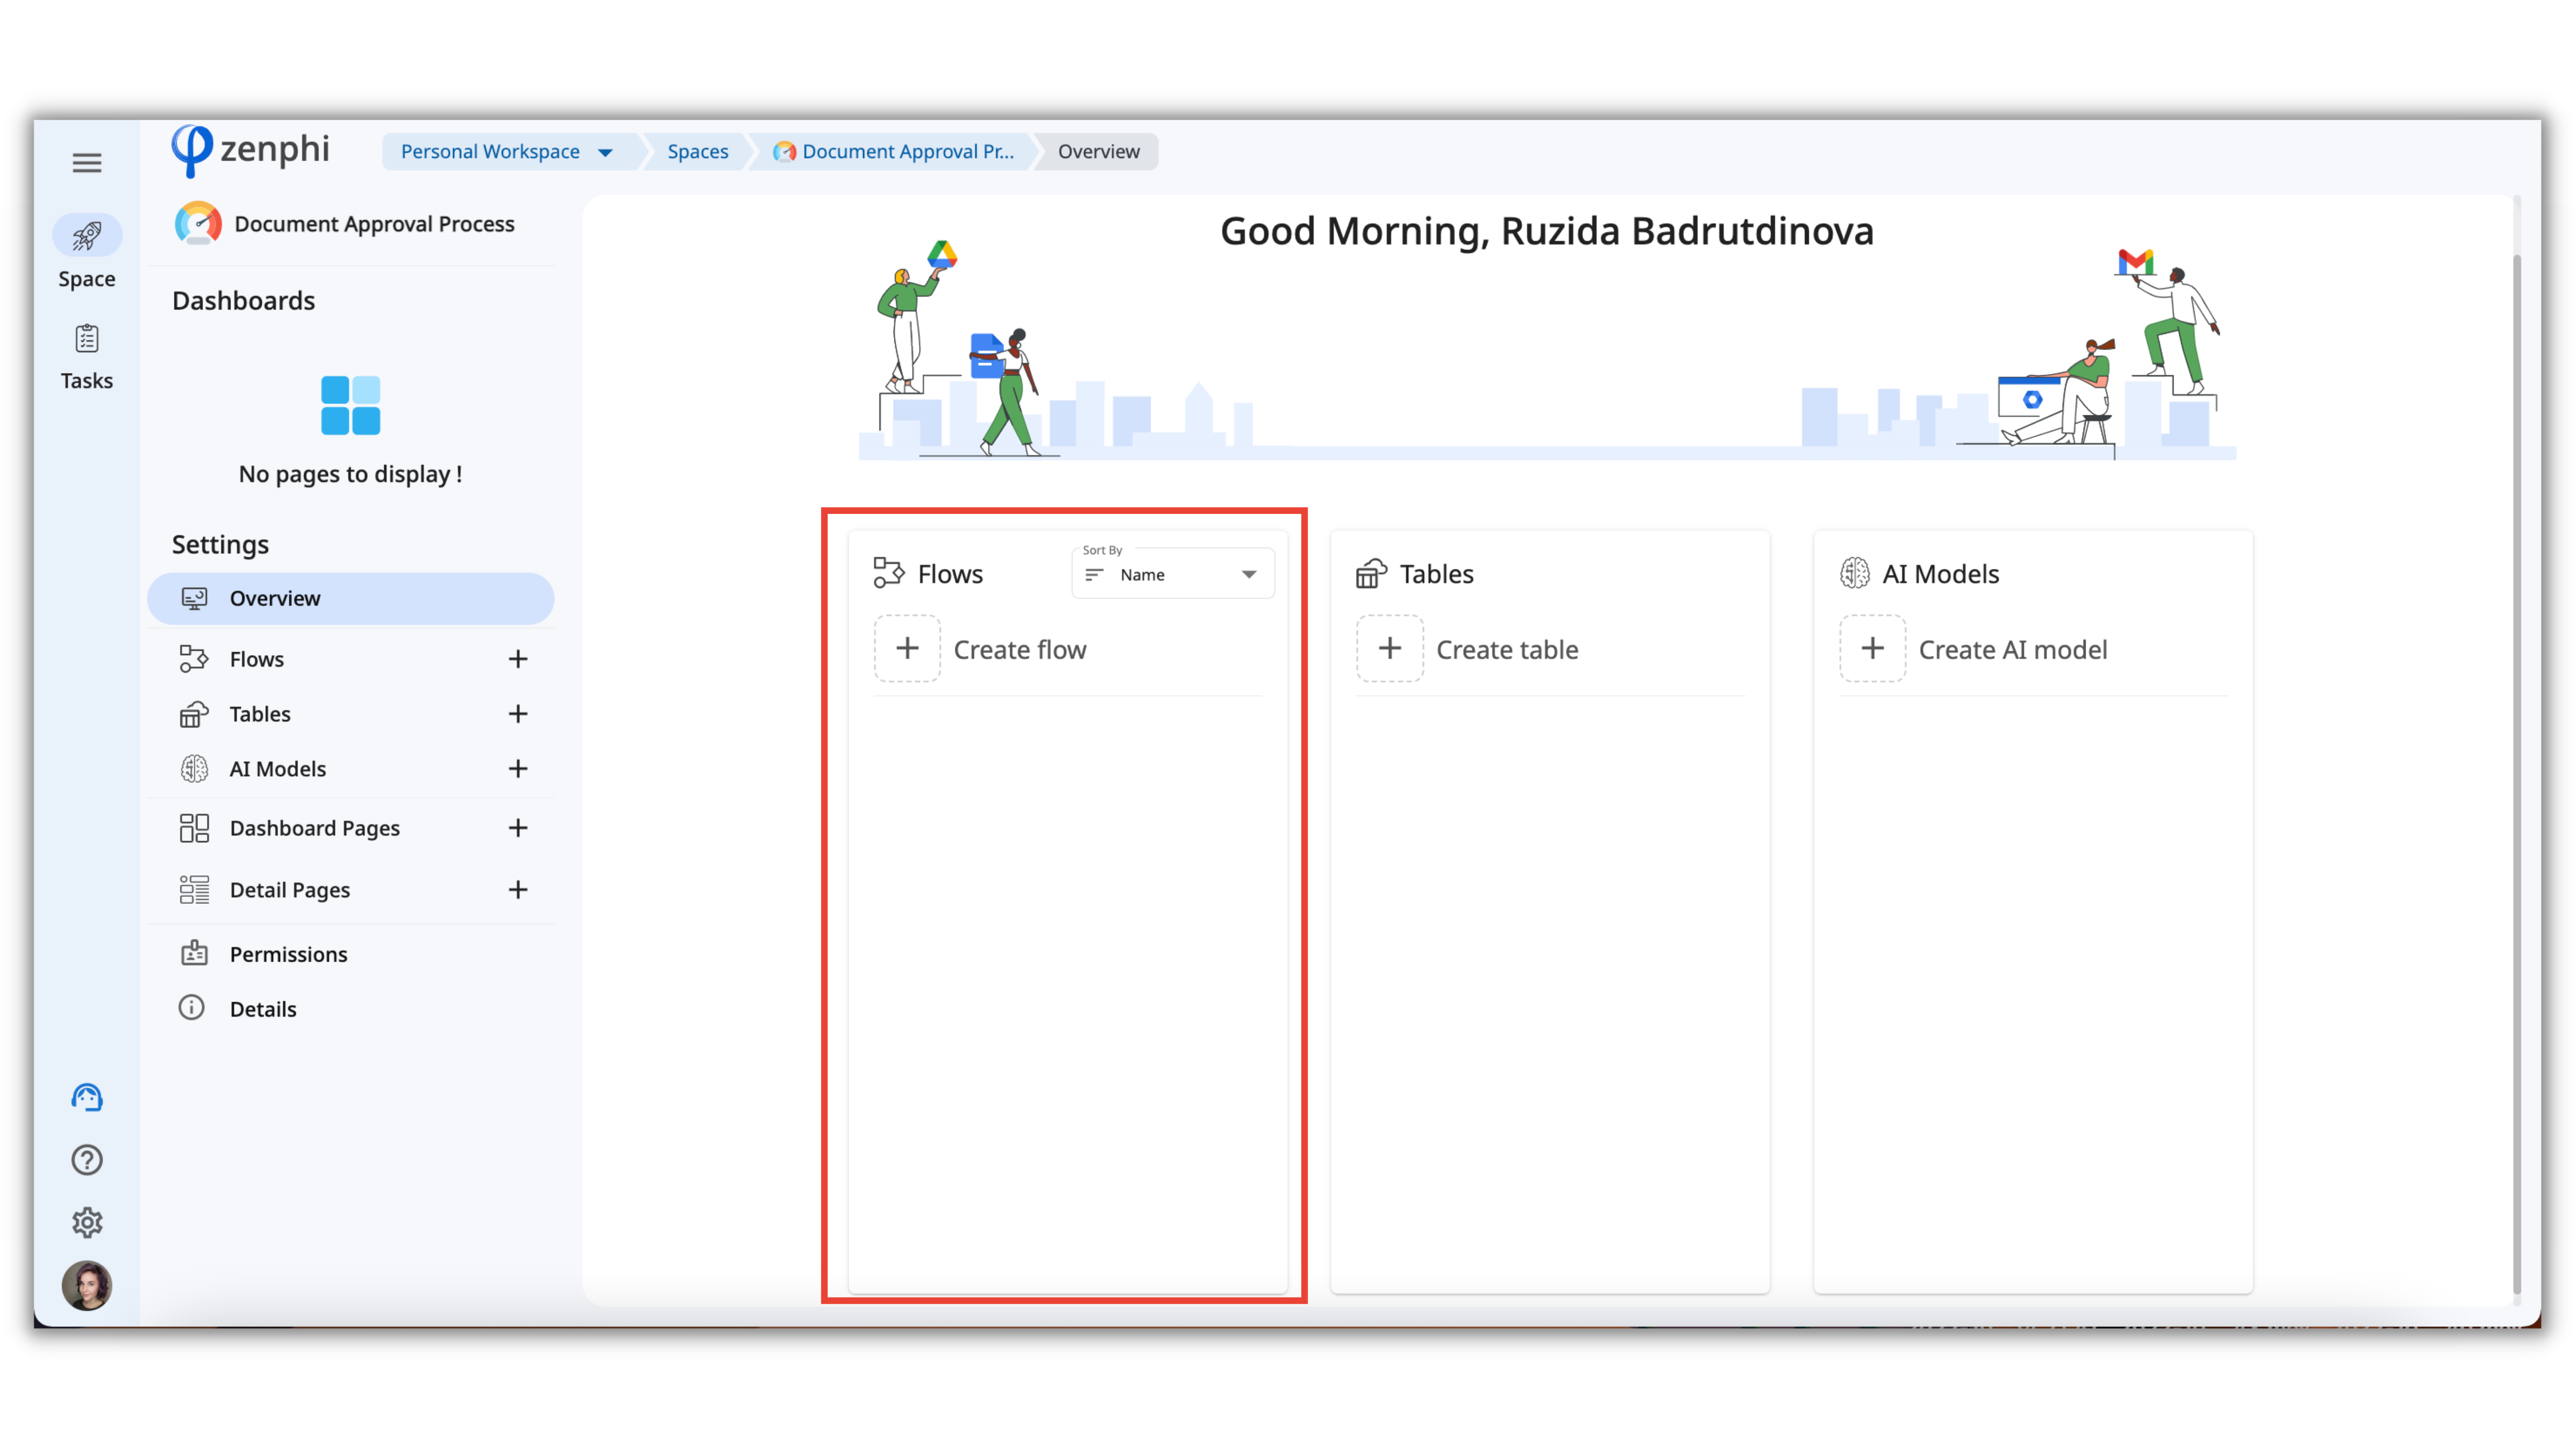
One Space can contain multiple:
- Flows - automated workflows;
- Tables - databases with the information from your Flows;
- Dashboards - interactive charts with the process performance and other metrics;
- AI Models - which allows you to automatically extract data from all kinds of documents like Invoices, Utility Bills, Forms, etc., and transfer this data to other systems to use further in the process.
Once you created a Space the next logical step in your process automation is creating a Flow. In the next section of this lesson, we'll dive deeper into the Flows, and in the following lessons, we'll explore all the other assets like Tables, Dashboards, and AI Models.
Creating a Flow
Flow is an automated workflow that connects the steps of your process together.
For example, we’re all familiar with the situation when a document should be approved by one or multiple parties at some stage of the process. When executed manually, this process may get stuck on one side, it’s complicated to track the document statuses, document approval time, etc.
Automating this mundane workflow is a great way to save time and optimize the results. And you can easily do it by creating a zenphi Flow.
To automate this process, we'll create a Flow that starts with a Google Drive File upload trigger (where the document that needs to be approved is uploaded); the Flow then assigns a task for a manager to approve or reject the request. When the manager gives the response, all the information about this document request and the outcome will be transferred to Google Sheet.
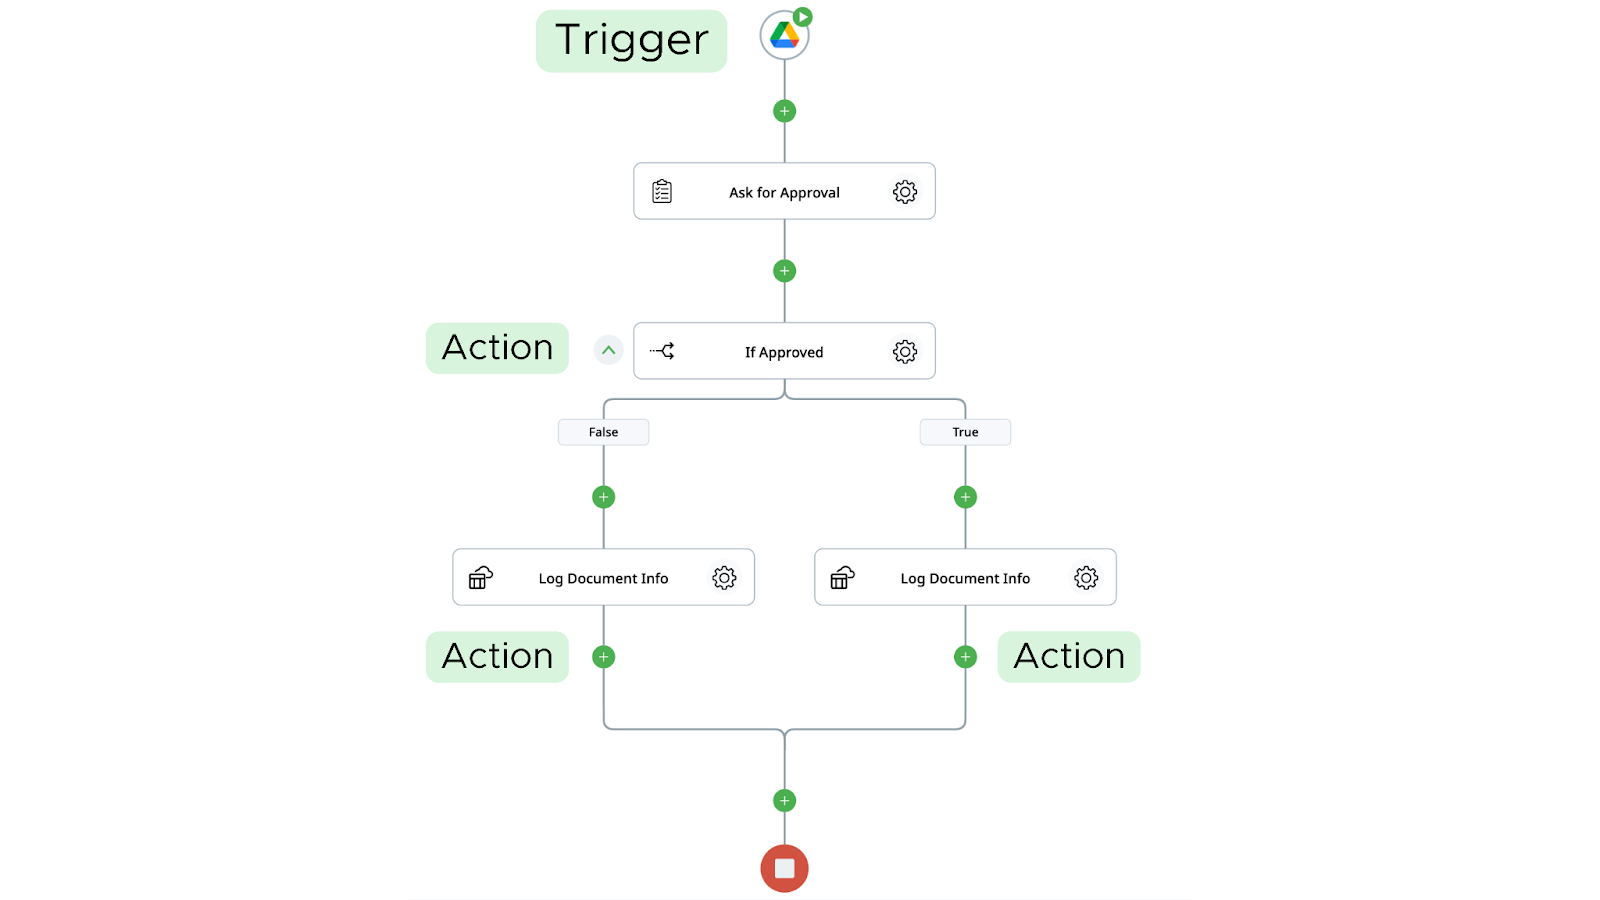
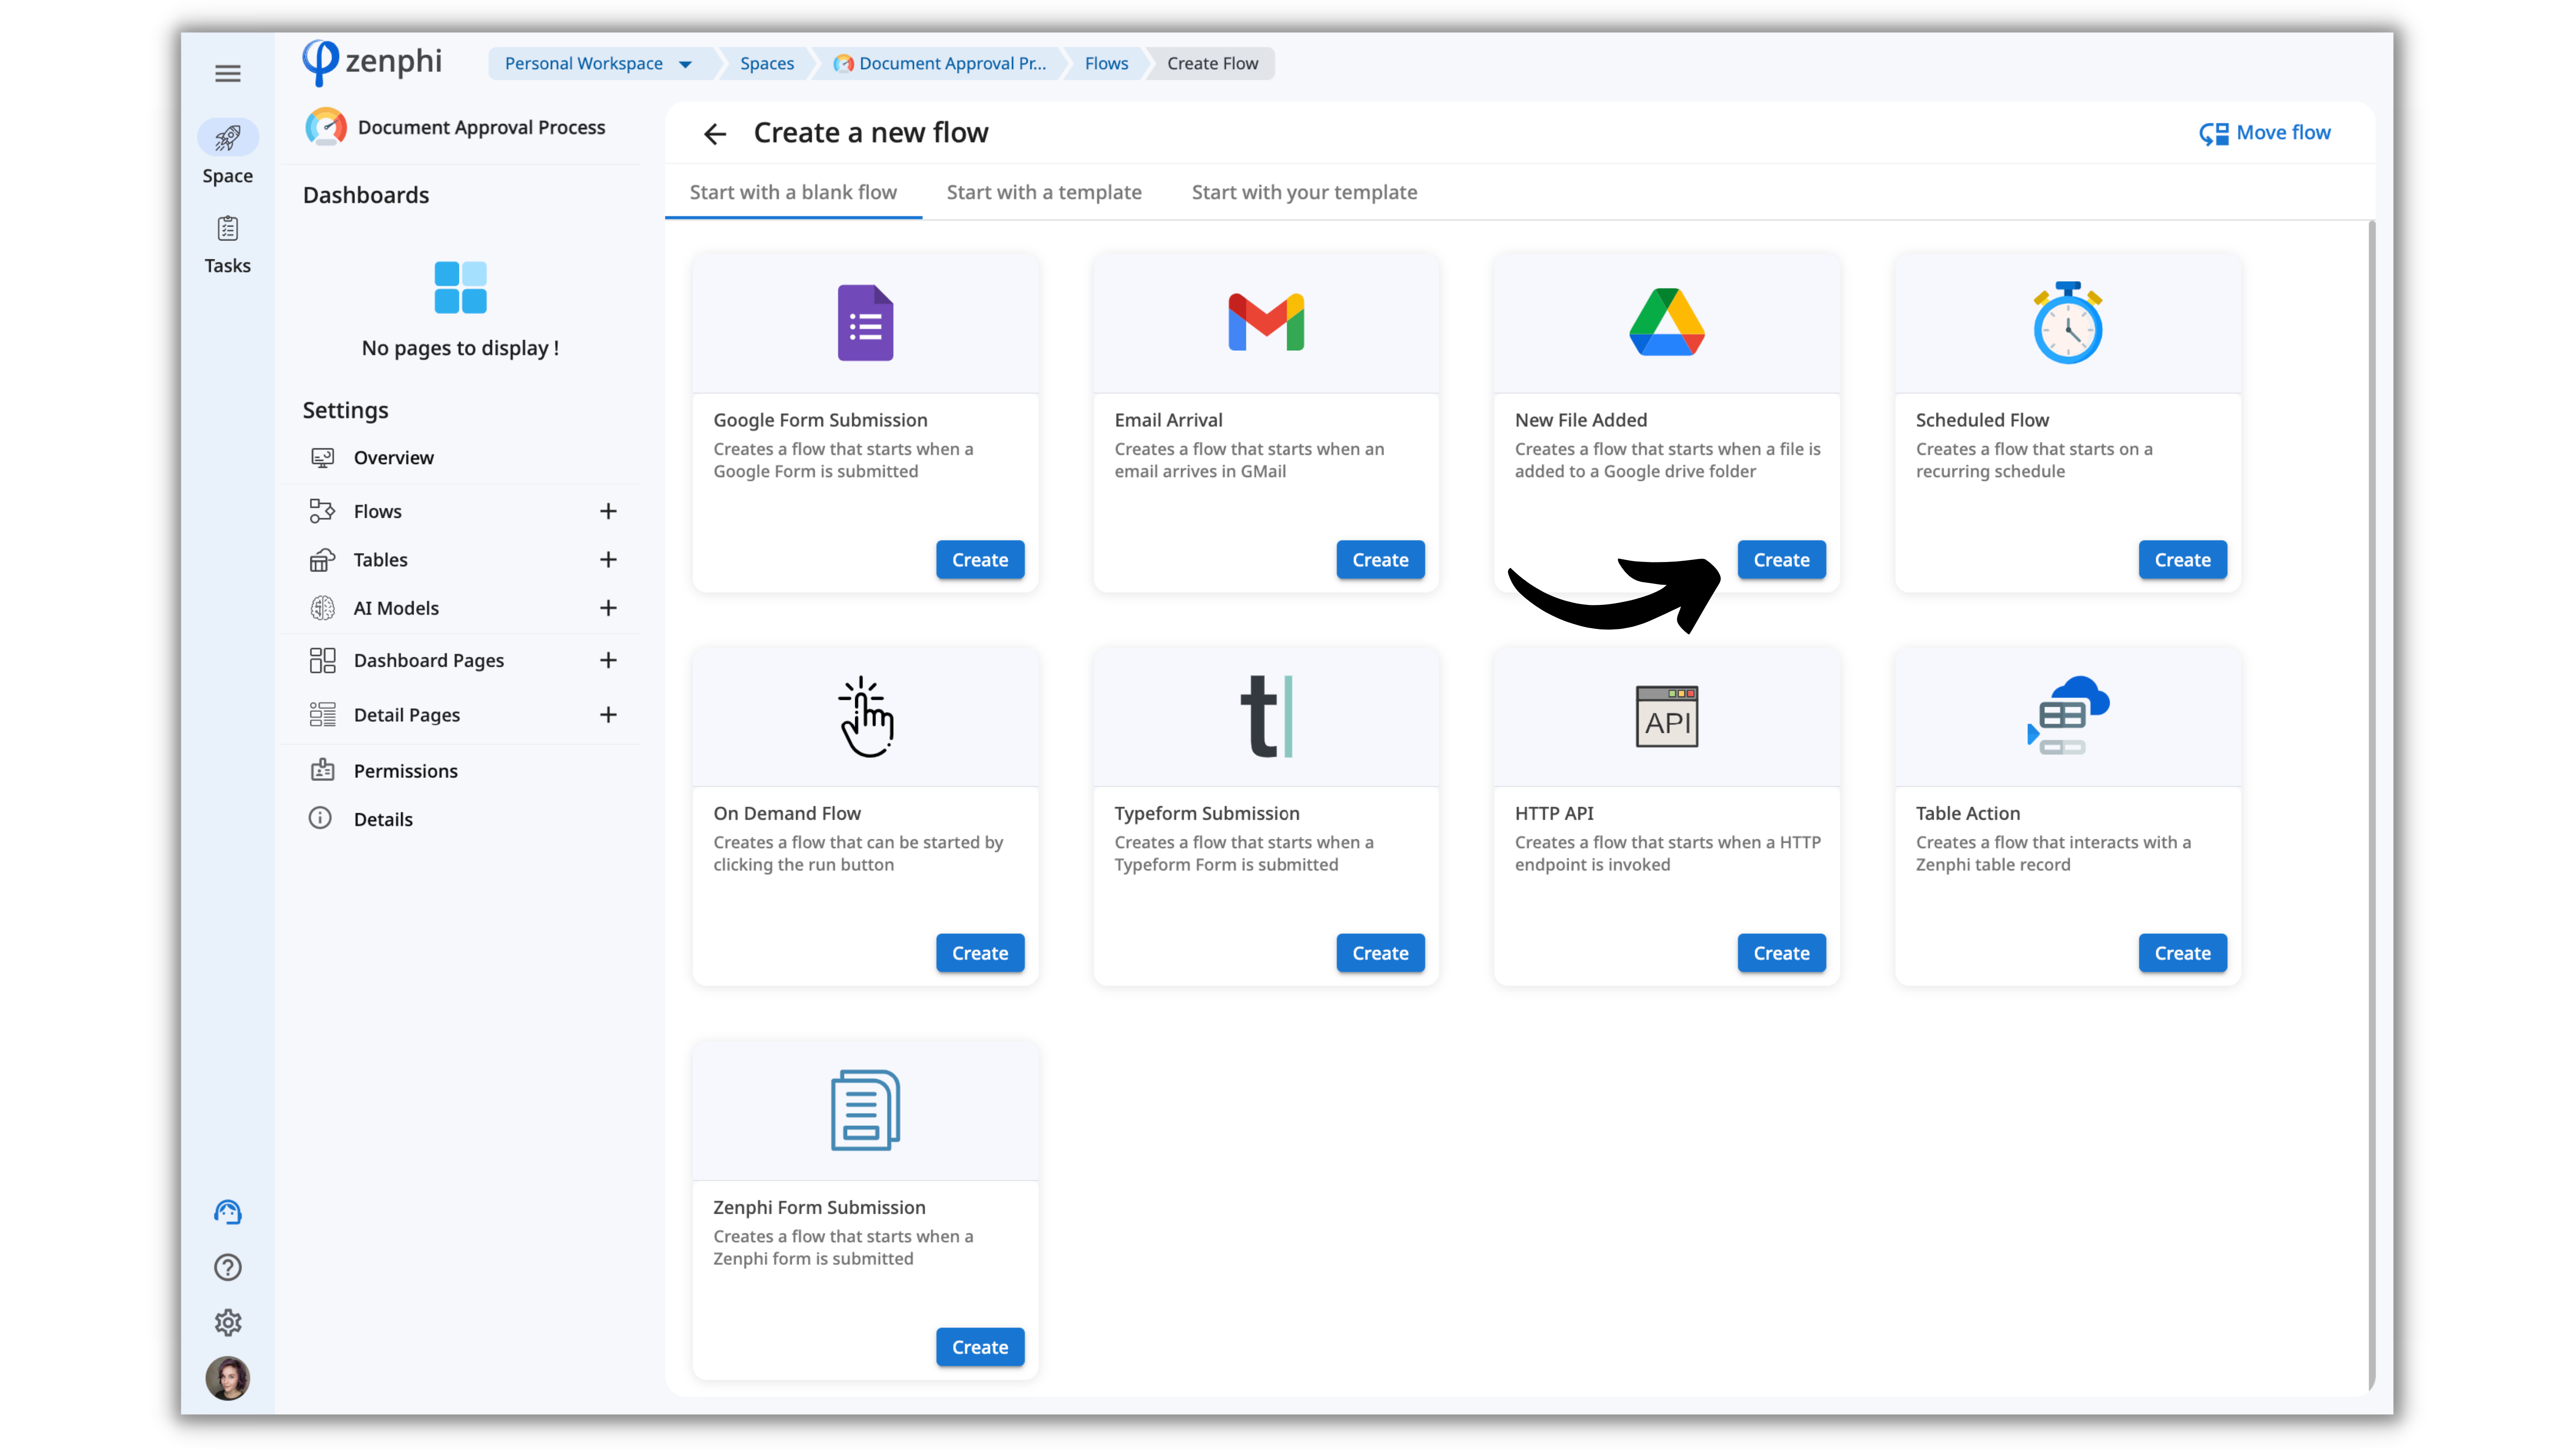
So let's walk through the creation process step-by-step. First, click on the Create Flow button. Then, you should choose a Flow Trigger.
What is the Trigger?
We call the event that initiates your process (or Flow in this case) a Trigger. Like you may want your Flow to start when a specific Google Forms is submitted or when an email arrives in a particular Gmail inbox.
As you can see, the events that trigger a Flow to start are not limited to the world of Google Workspace. They also can be events from other systems that you use or even manual events that you or your colleagues initiate.
Once you tell zenphi the systems you want to monitor and the events you’re interested in, zenphi continuously keeps an eye on it.
Each Trigger may have output data that you'll be able to use further in your Flow steps. For example, your Google Drive File upload trigger captures File Name, Download link, File Size, File Owners, and more parameters.
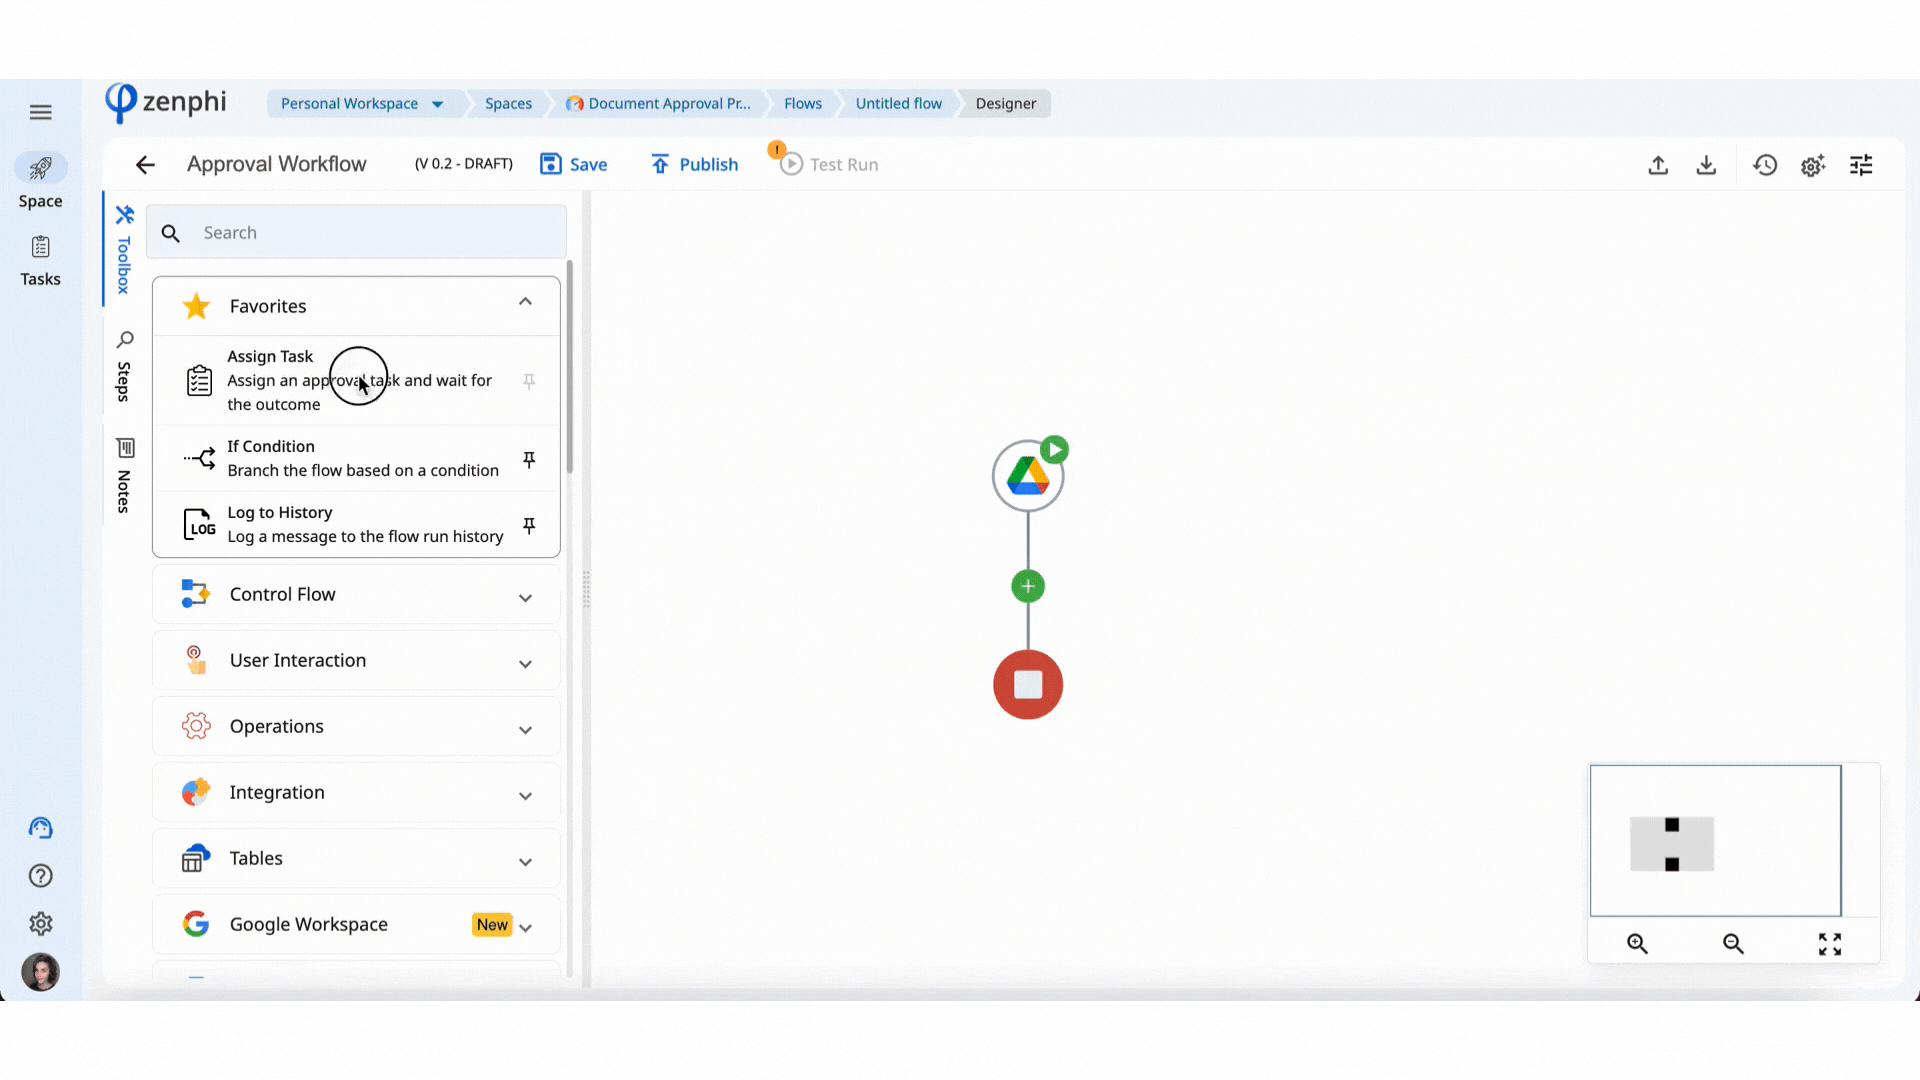
Flow Designer
When you've chosen the Trigger, the Flow Designer will open. That's where you'll be able to drag & drop steps of your Flow.
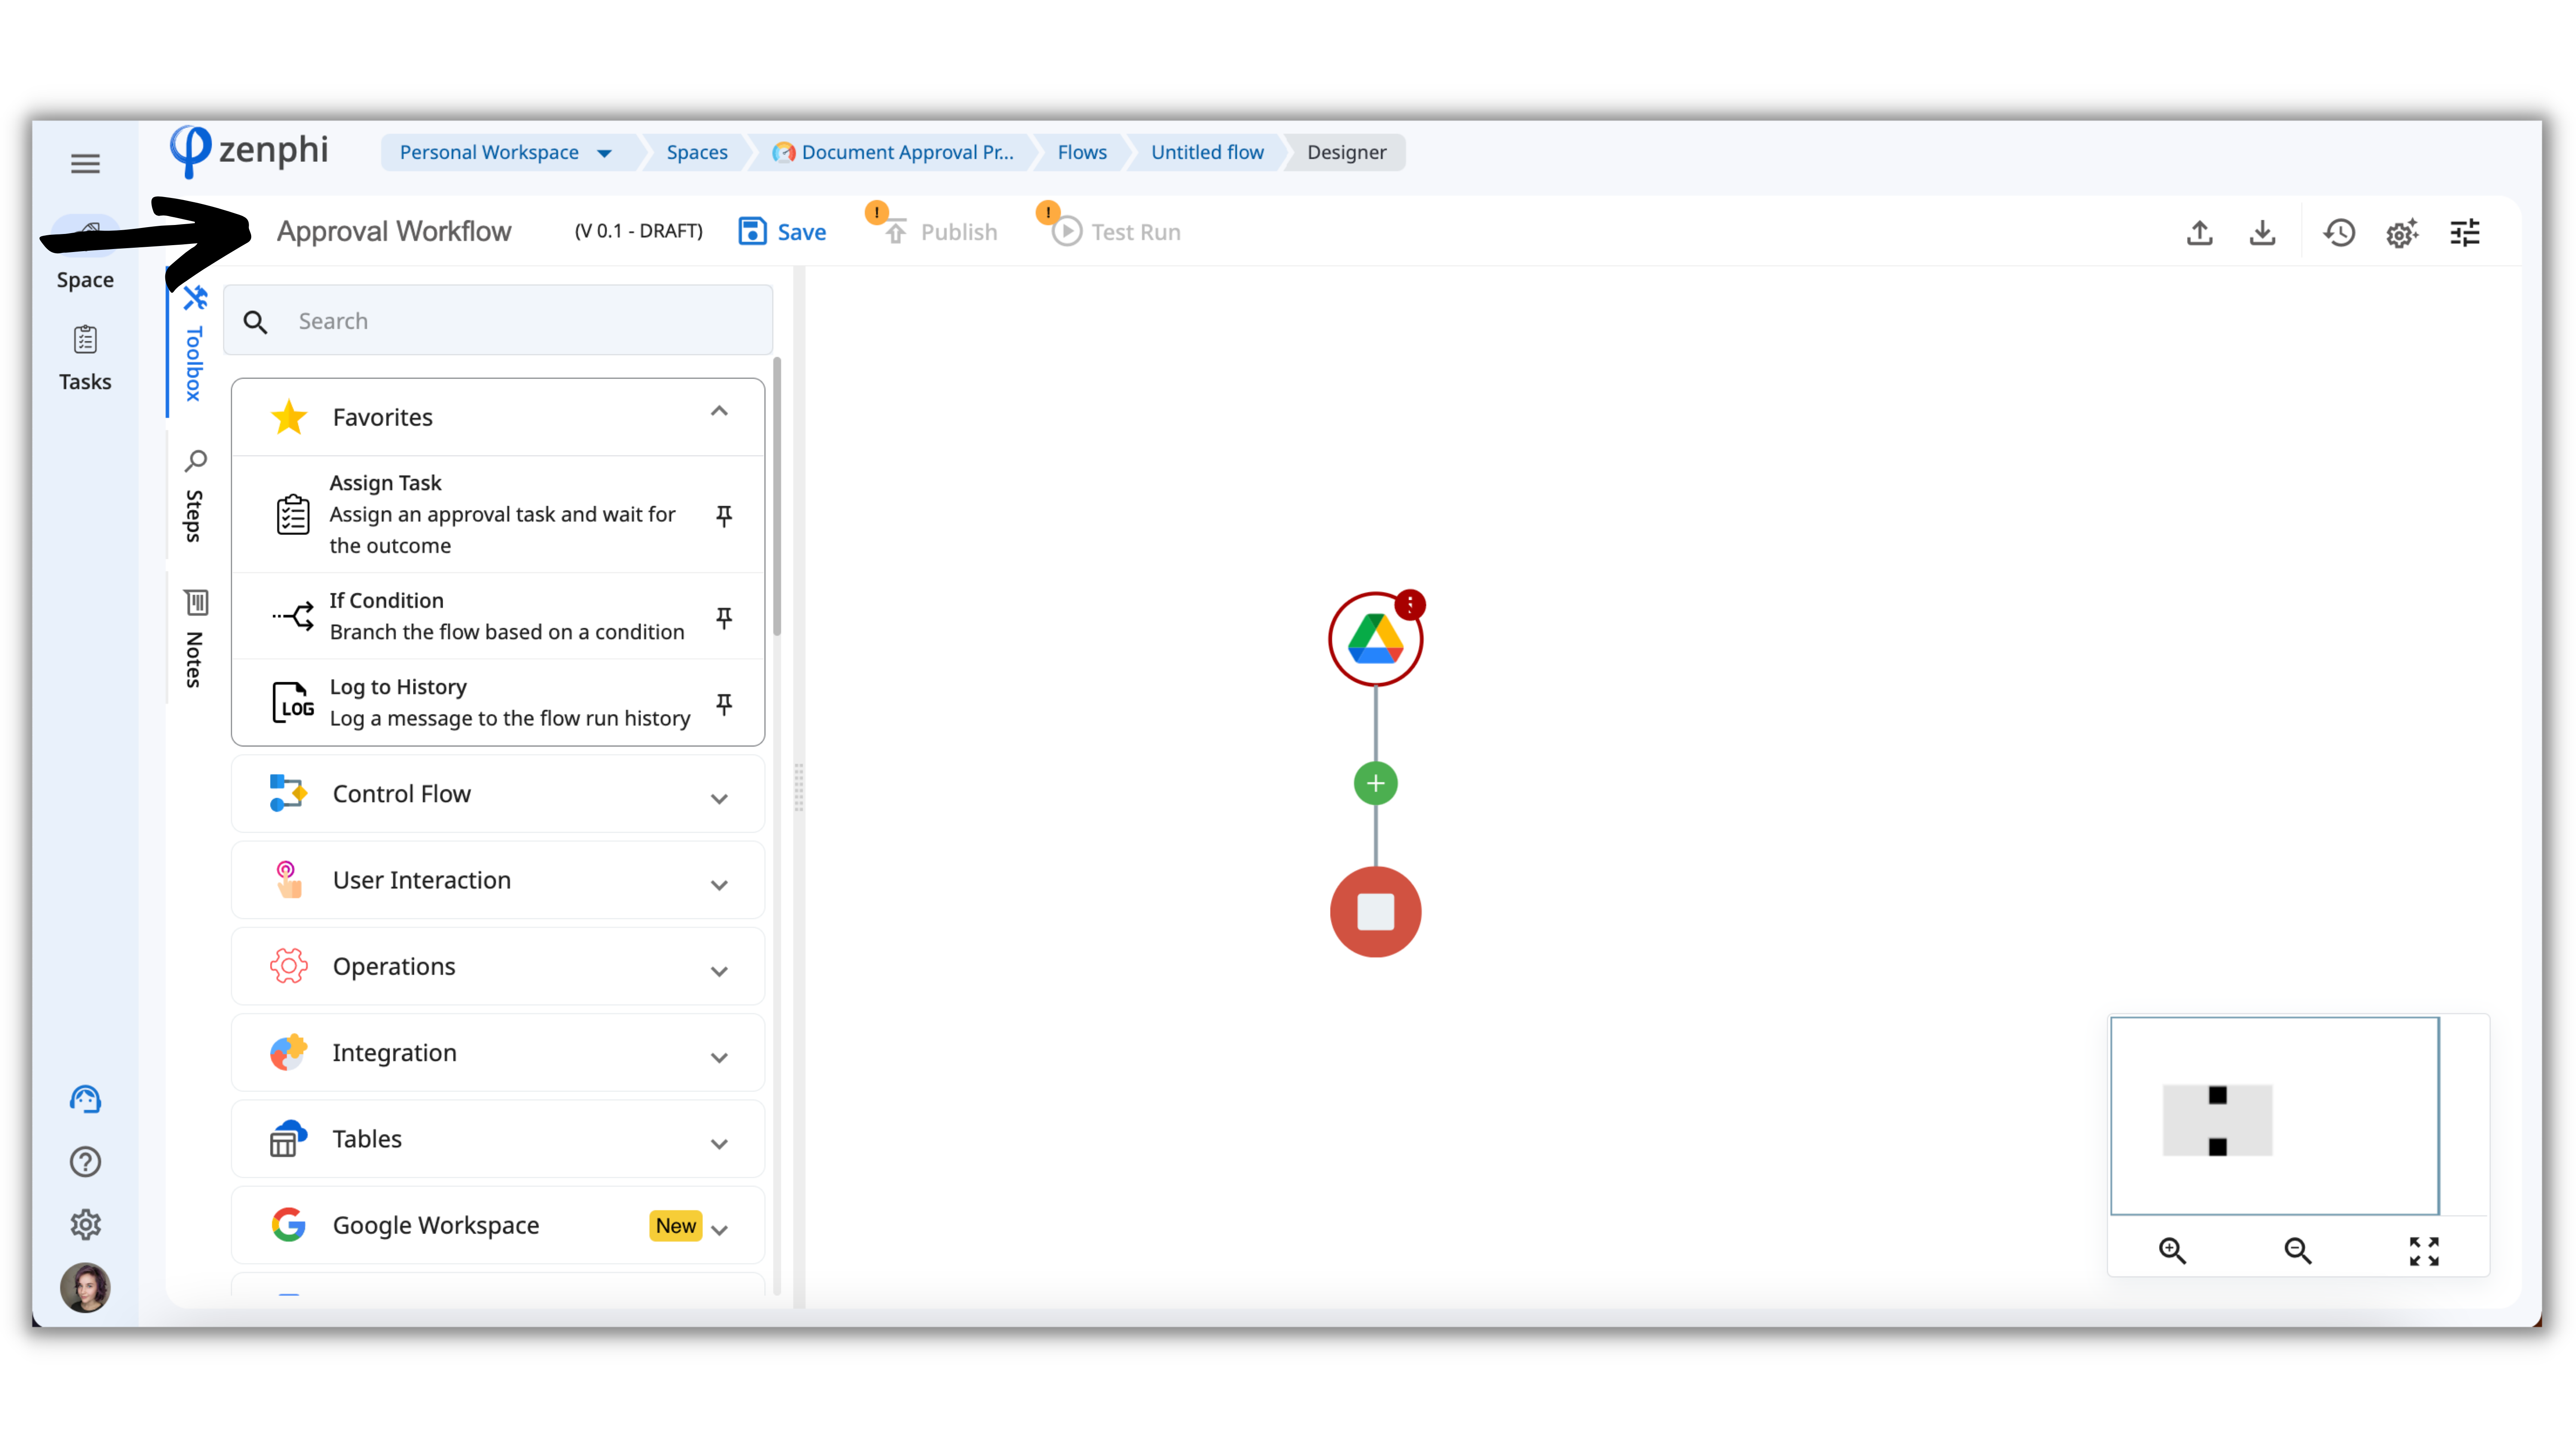
On the top sidebar, you can name your Flow, Save the changes you've made, and Test and Publish this Flow later.
From the left sidebar you'll see a Toolbox with the Actions you can perform within your process. We'll talk about them shortly.
Now, let's click on the Google Drive icon to set up the Trigger.
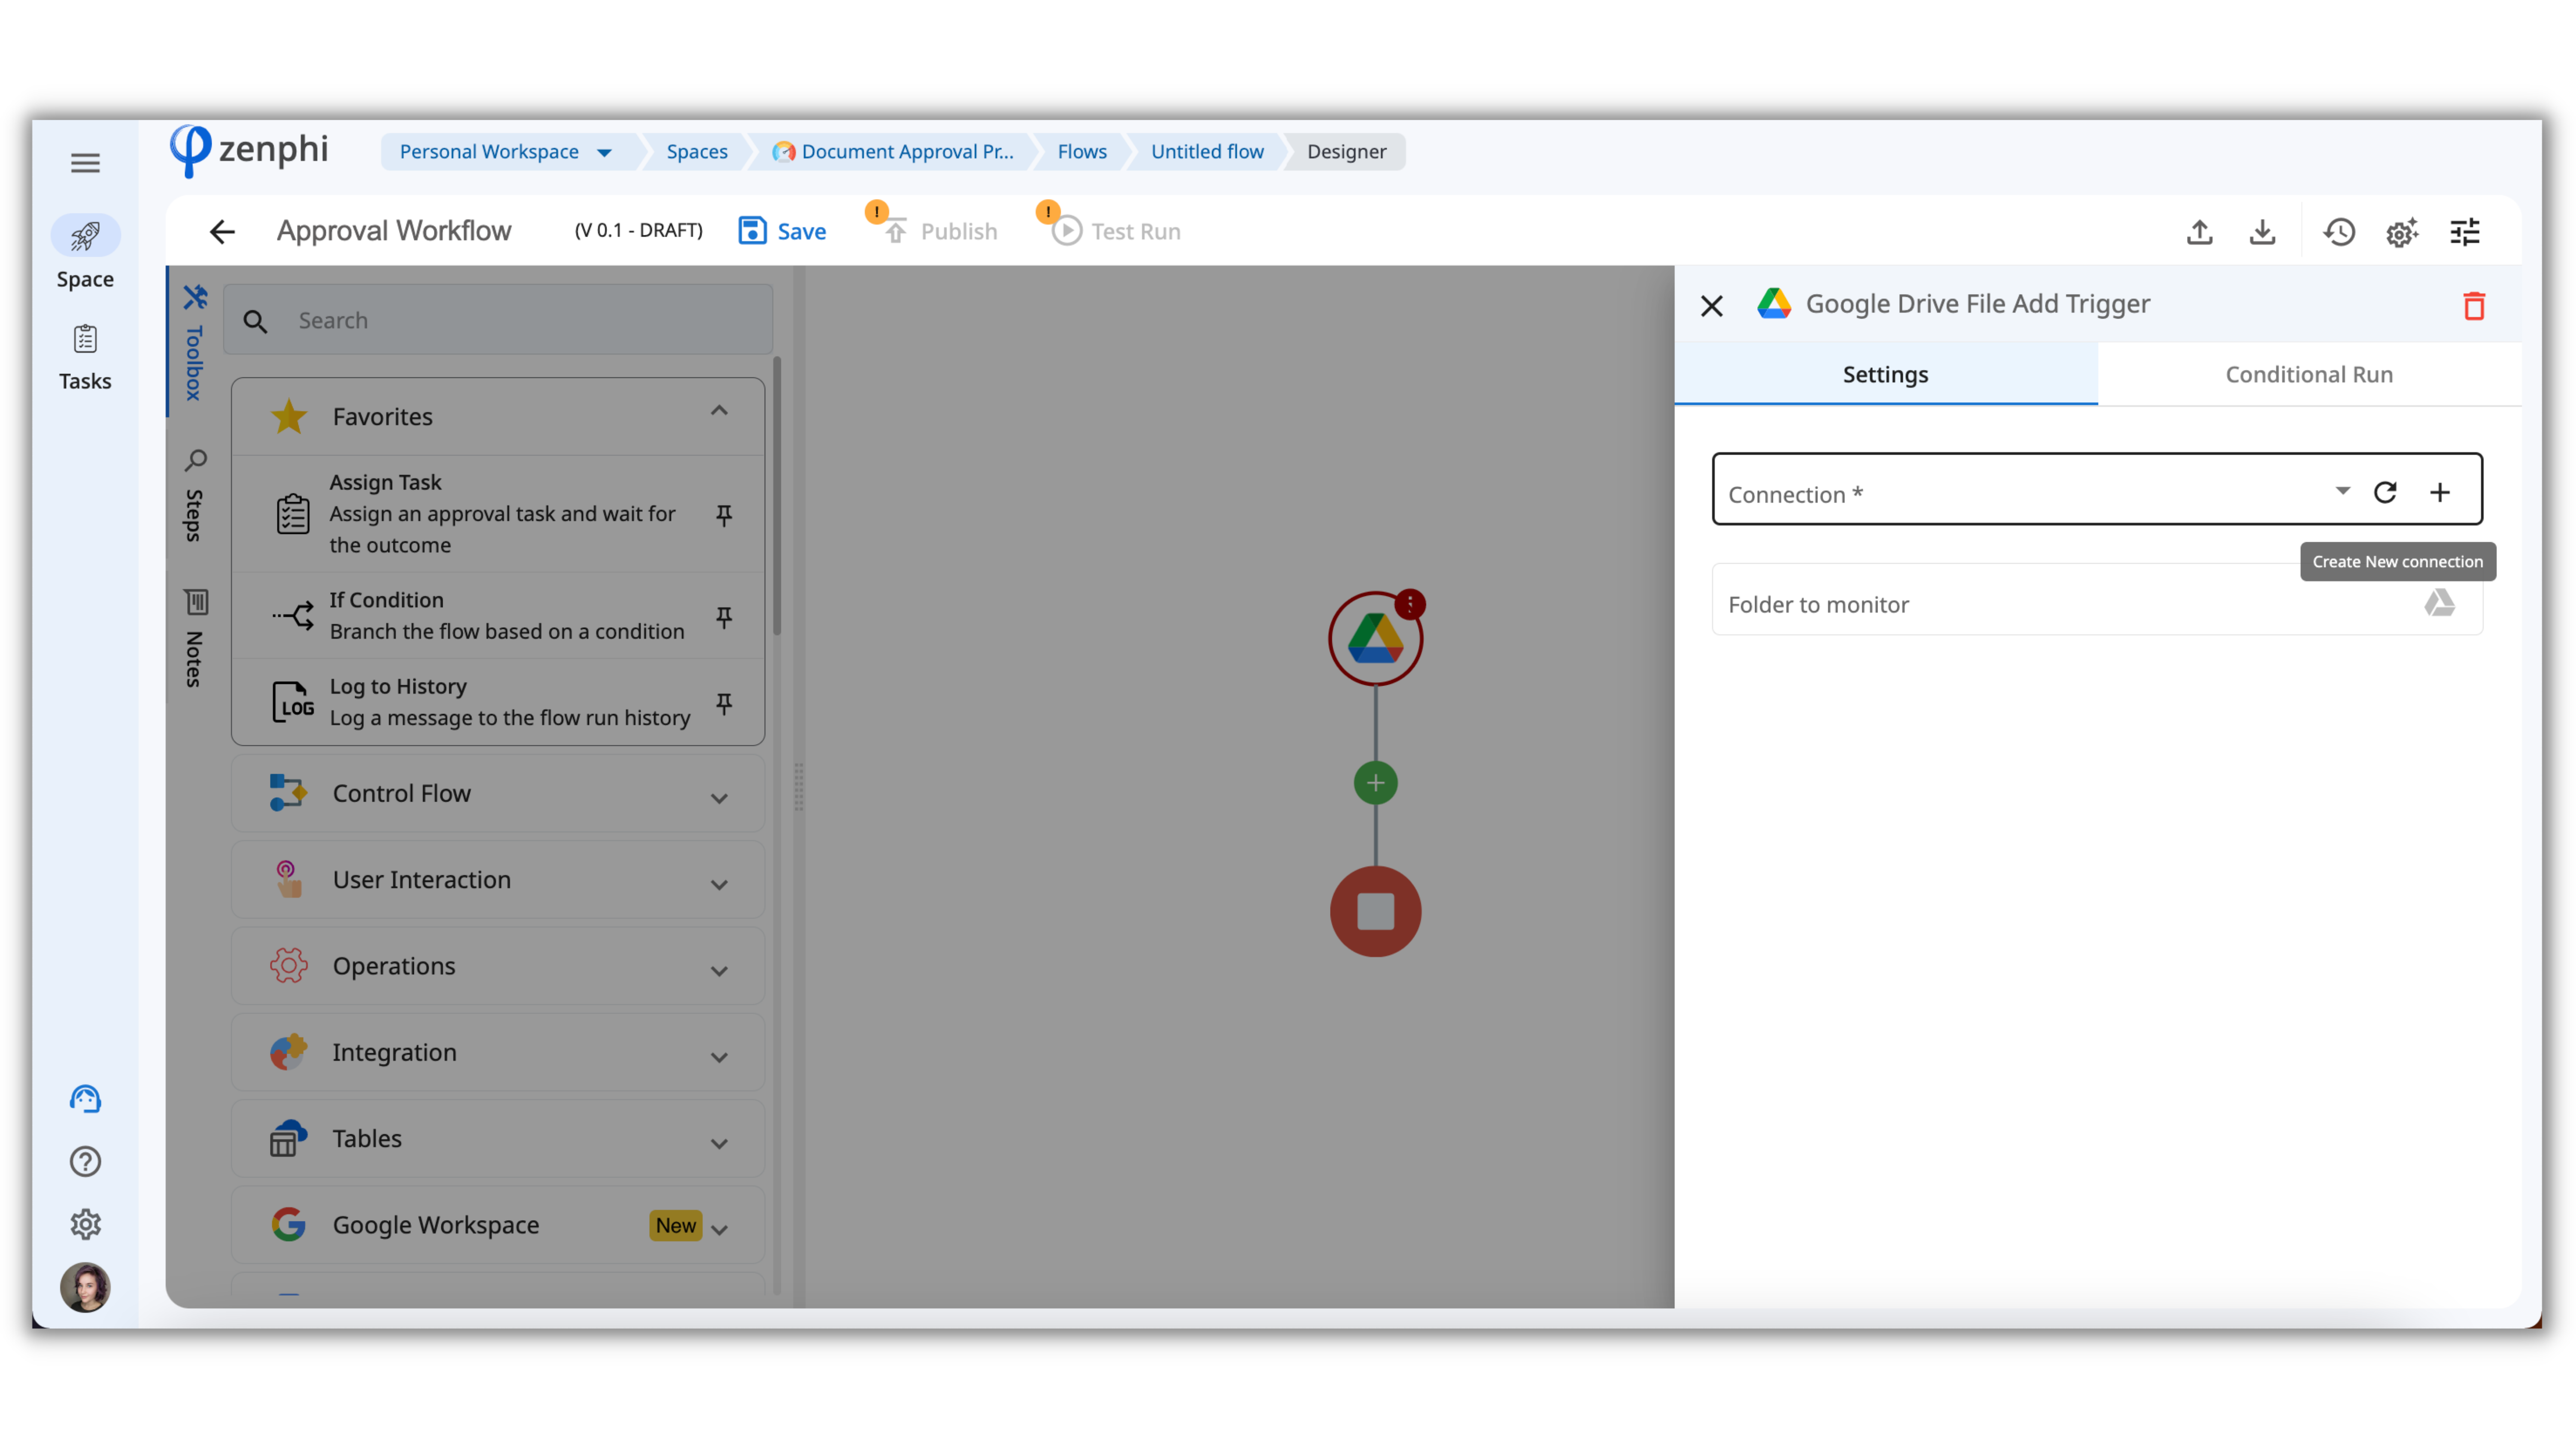
Once you click on each step of your Flow, from the right sidebar you'll see the editing window. If the Flow step requires interaction with another system, like Google Drive, for example, we need to establish a Connection.
What is the Connection?
For zenphi to successfully run Flows and interact with other systems (like Google Forms, Drive, etc), it needs your permission to do it.
Note: Some of the Connections are read-only. Those are good enough if you only need to read data from those systems. If your process needs to edit anything in a system, you should use the standard Connection.
Let's click on the plus in the Connection field. You'll see the following window:
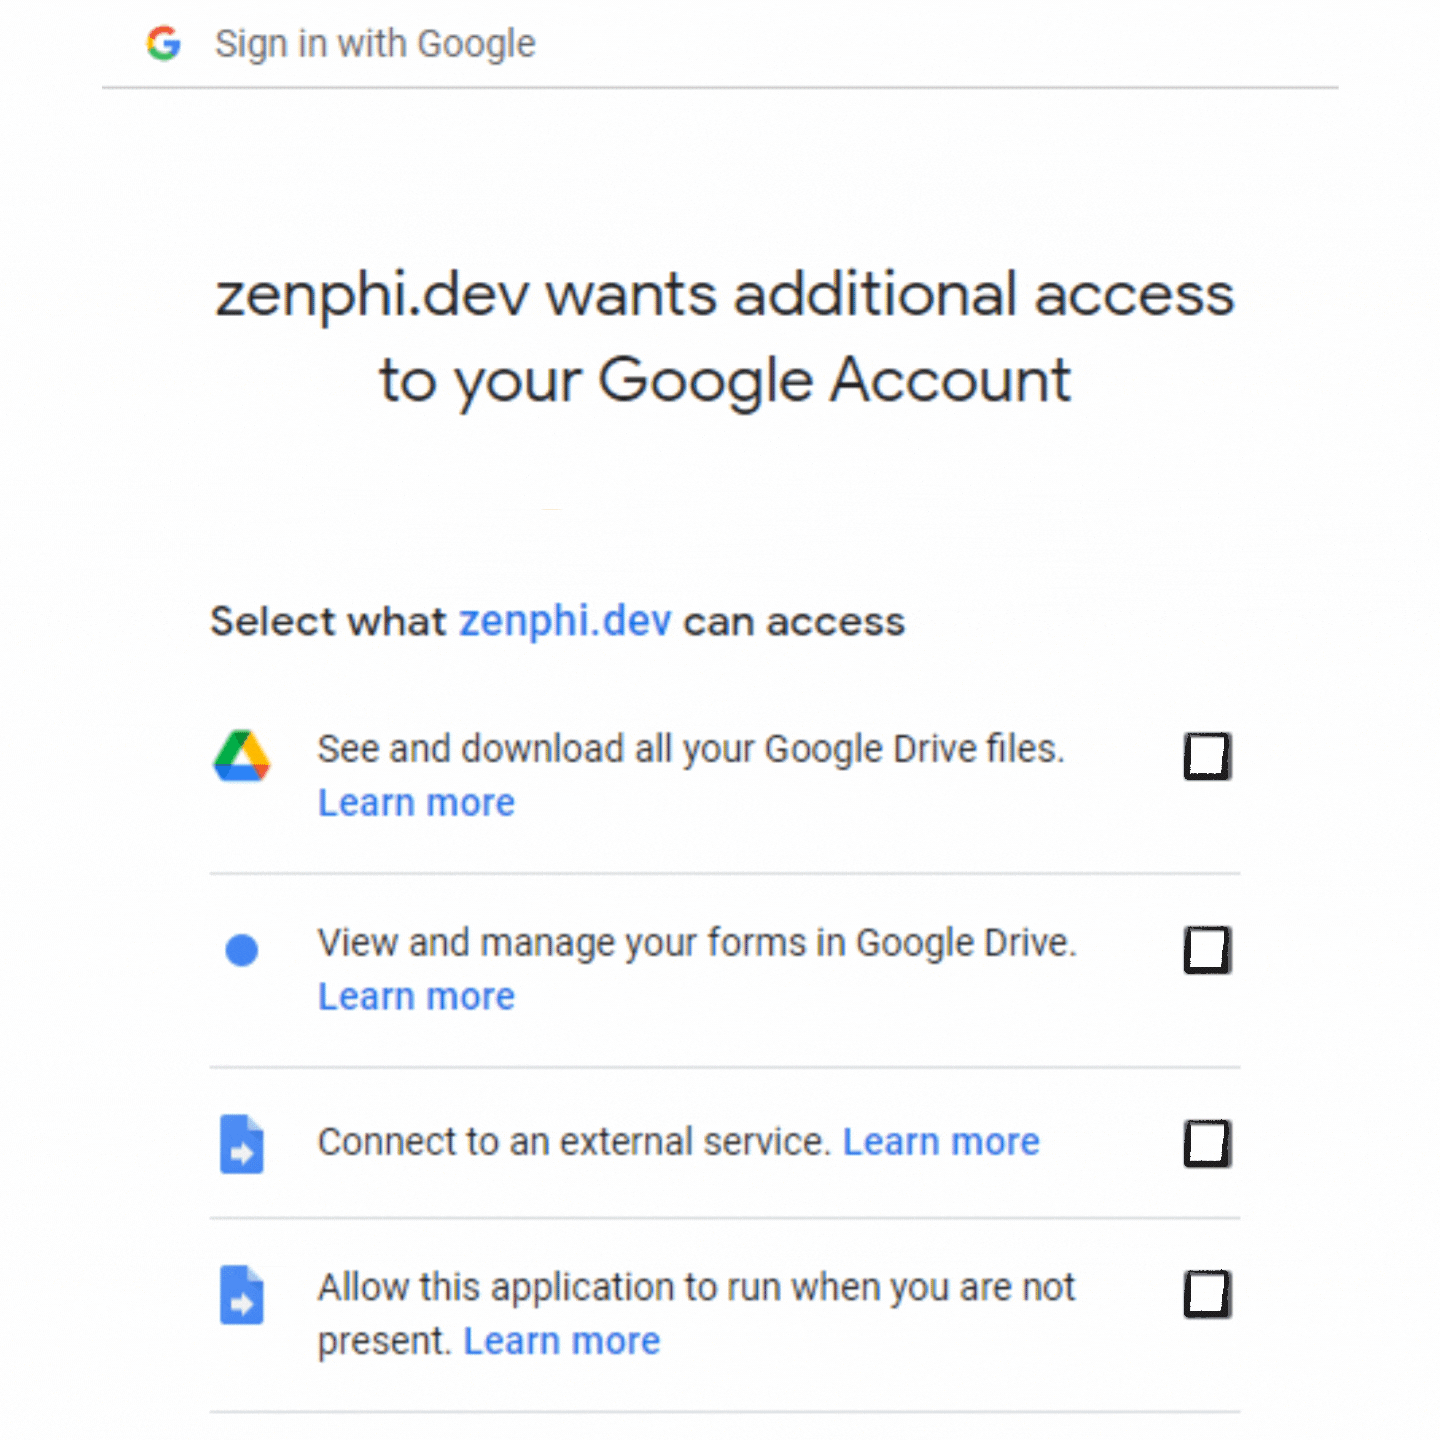
Make sure you ticked all the boxes. It's absolutely safe. Check this article where we explain how we care about your data security.
Once the Connection is successfully created, click on the Drive icon in the second field which says "Folder to monitor" and choose the Folder that you want zenphi to track files from. Now, the Trigger is set up.
What is the Action (Step)?
Actions or Steps are the building blocks of your Flow. Each Action can perform one of the following tasks:
Interact with another system or person. (add a row to Sheets, post a message to Slack, send an email, or assign a task to a person)
Evaluate a condition. (if condition, switch based on a certain value, state machine, loop until).
Perform an operation. (format a date or a number, convert a number, get the current date and time, and multiply/add/subtract/divide numbers)
Auditing and debugging. (log to history)
Depending on how you define your process, Actions happen one after the other (sequentially) or at the same moment (in parallel). To add an Action to your process, just drag-drop and configure it.
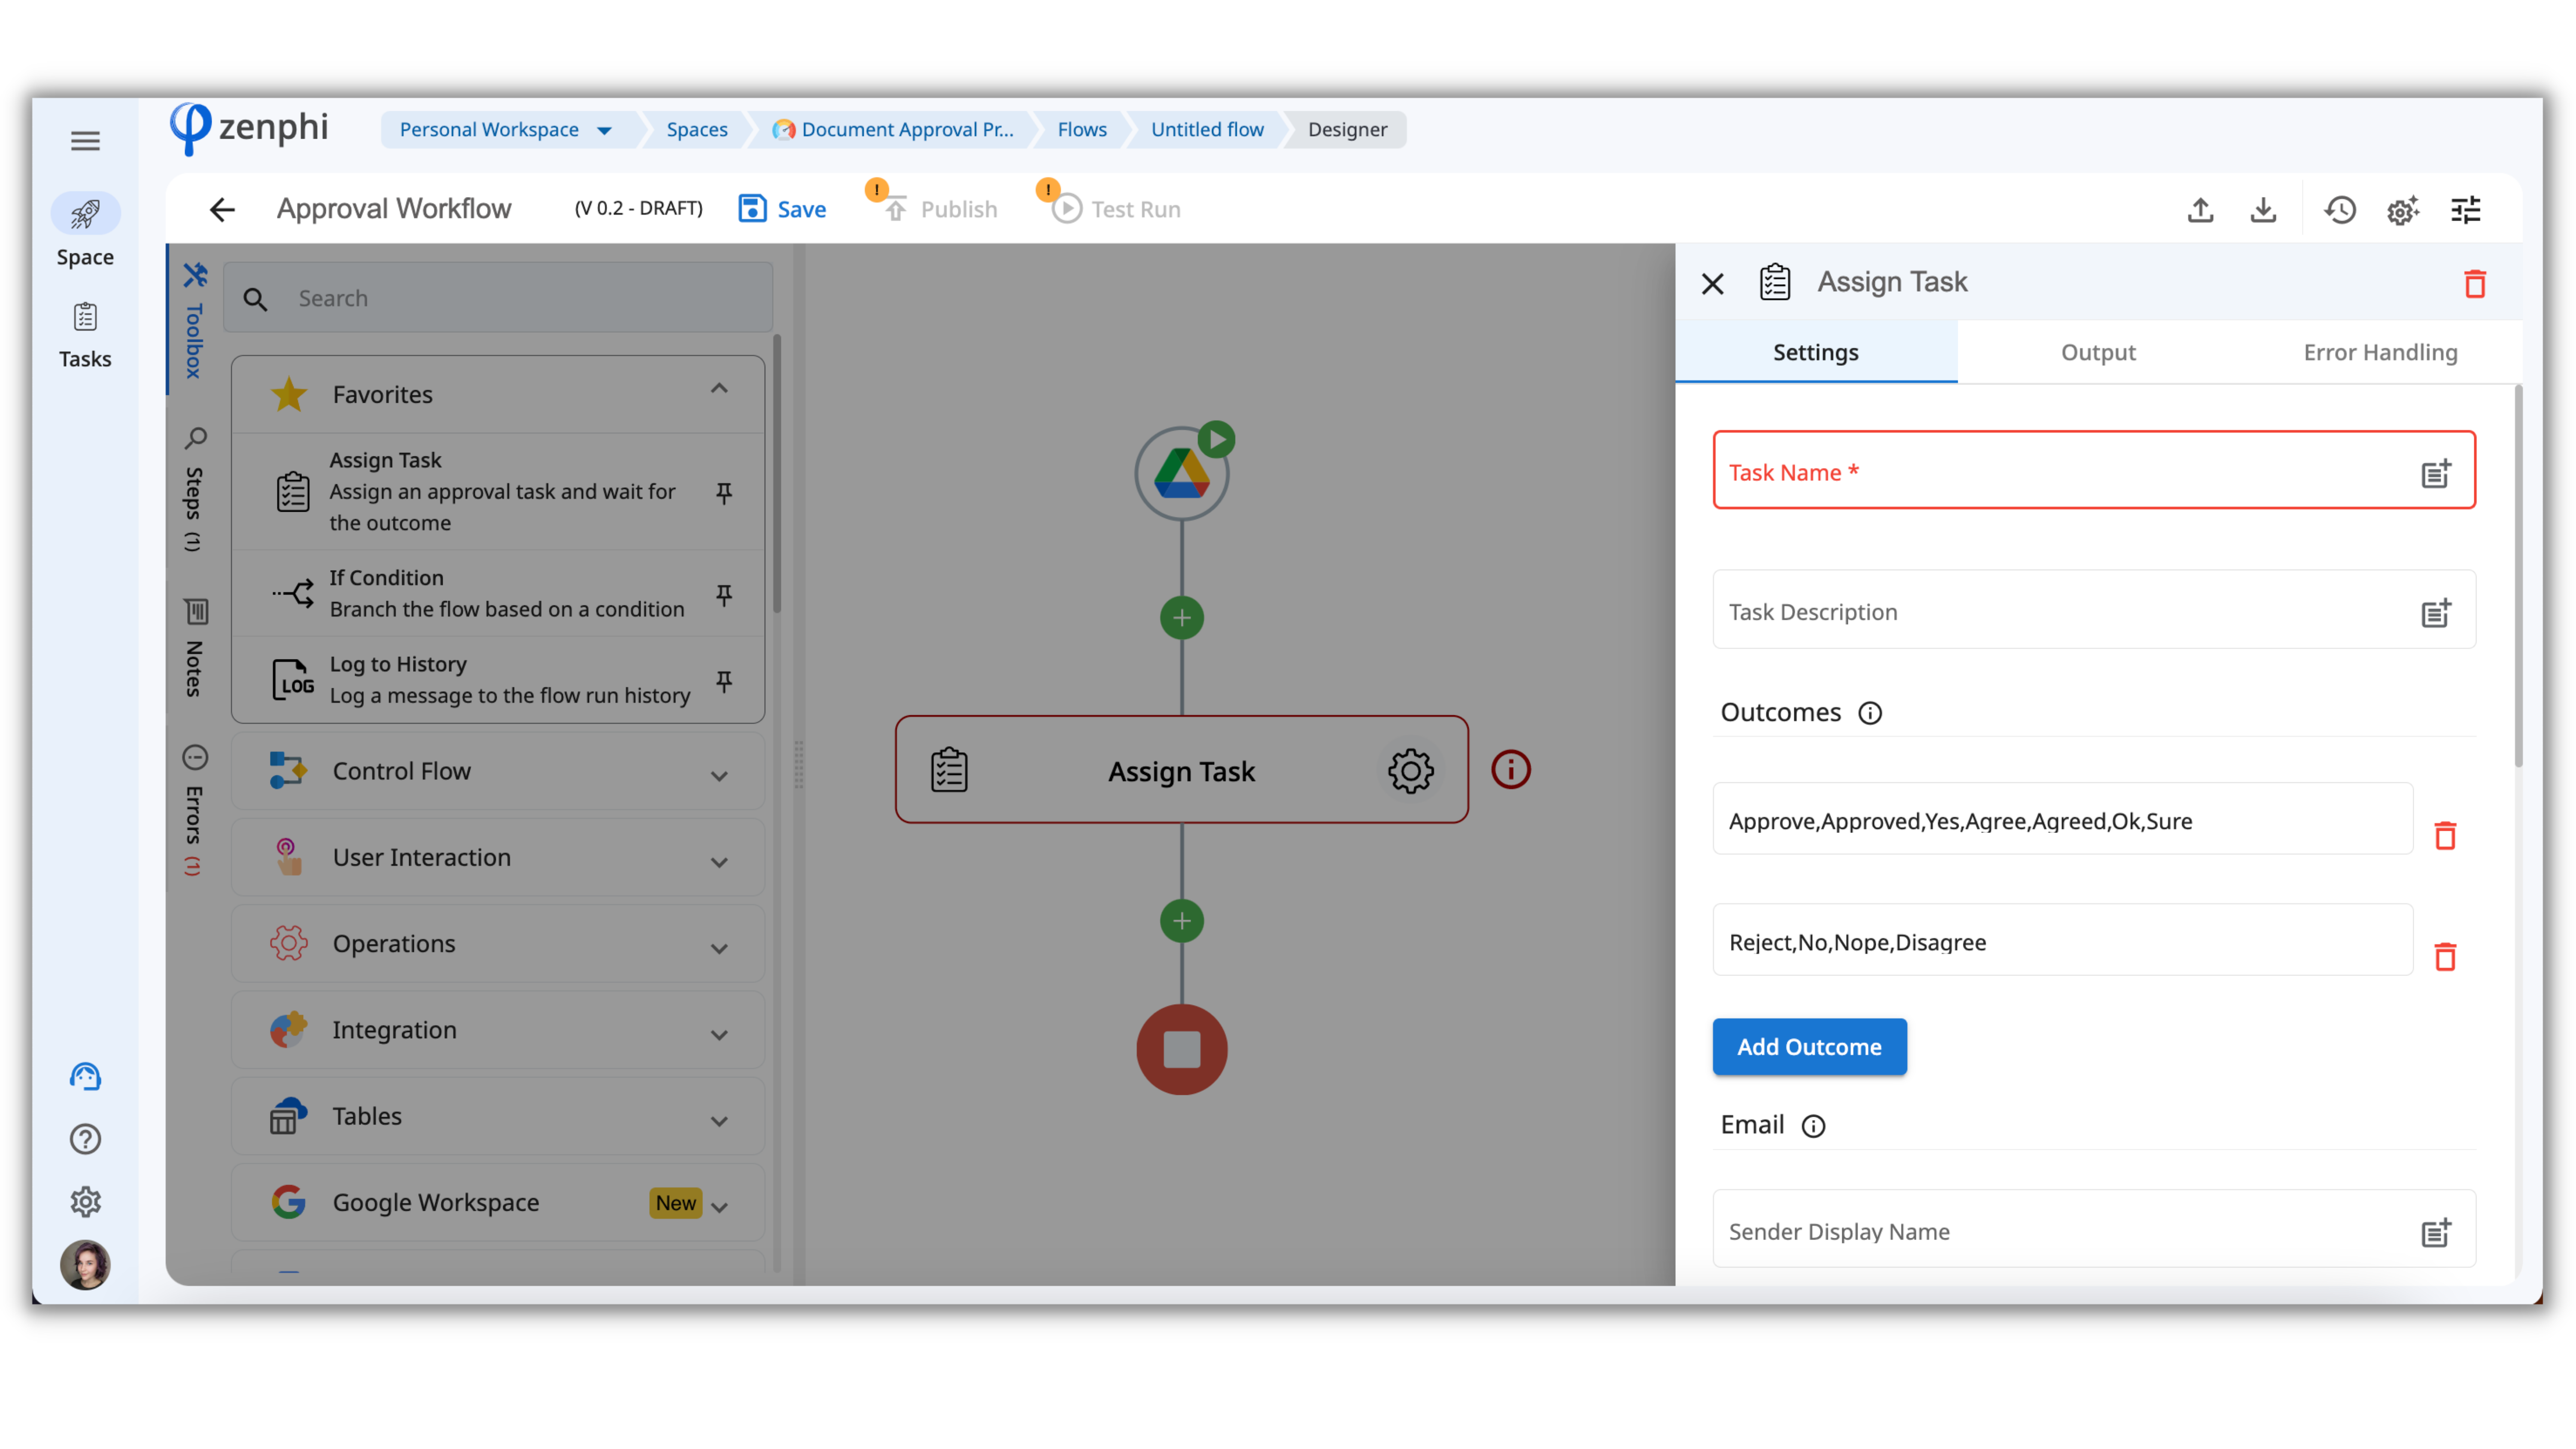
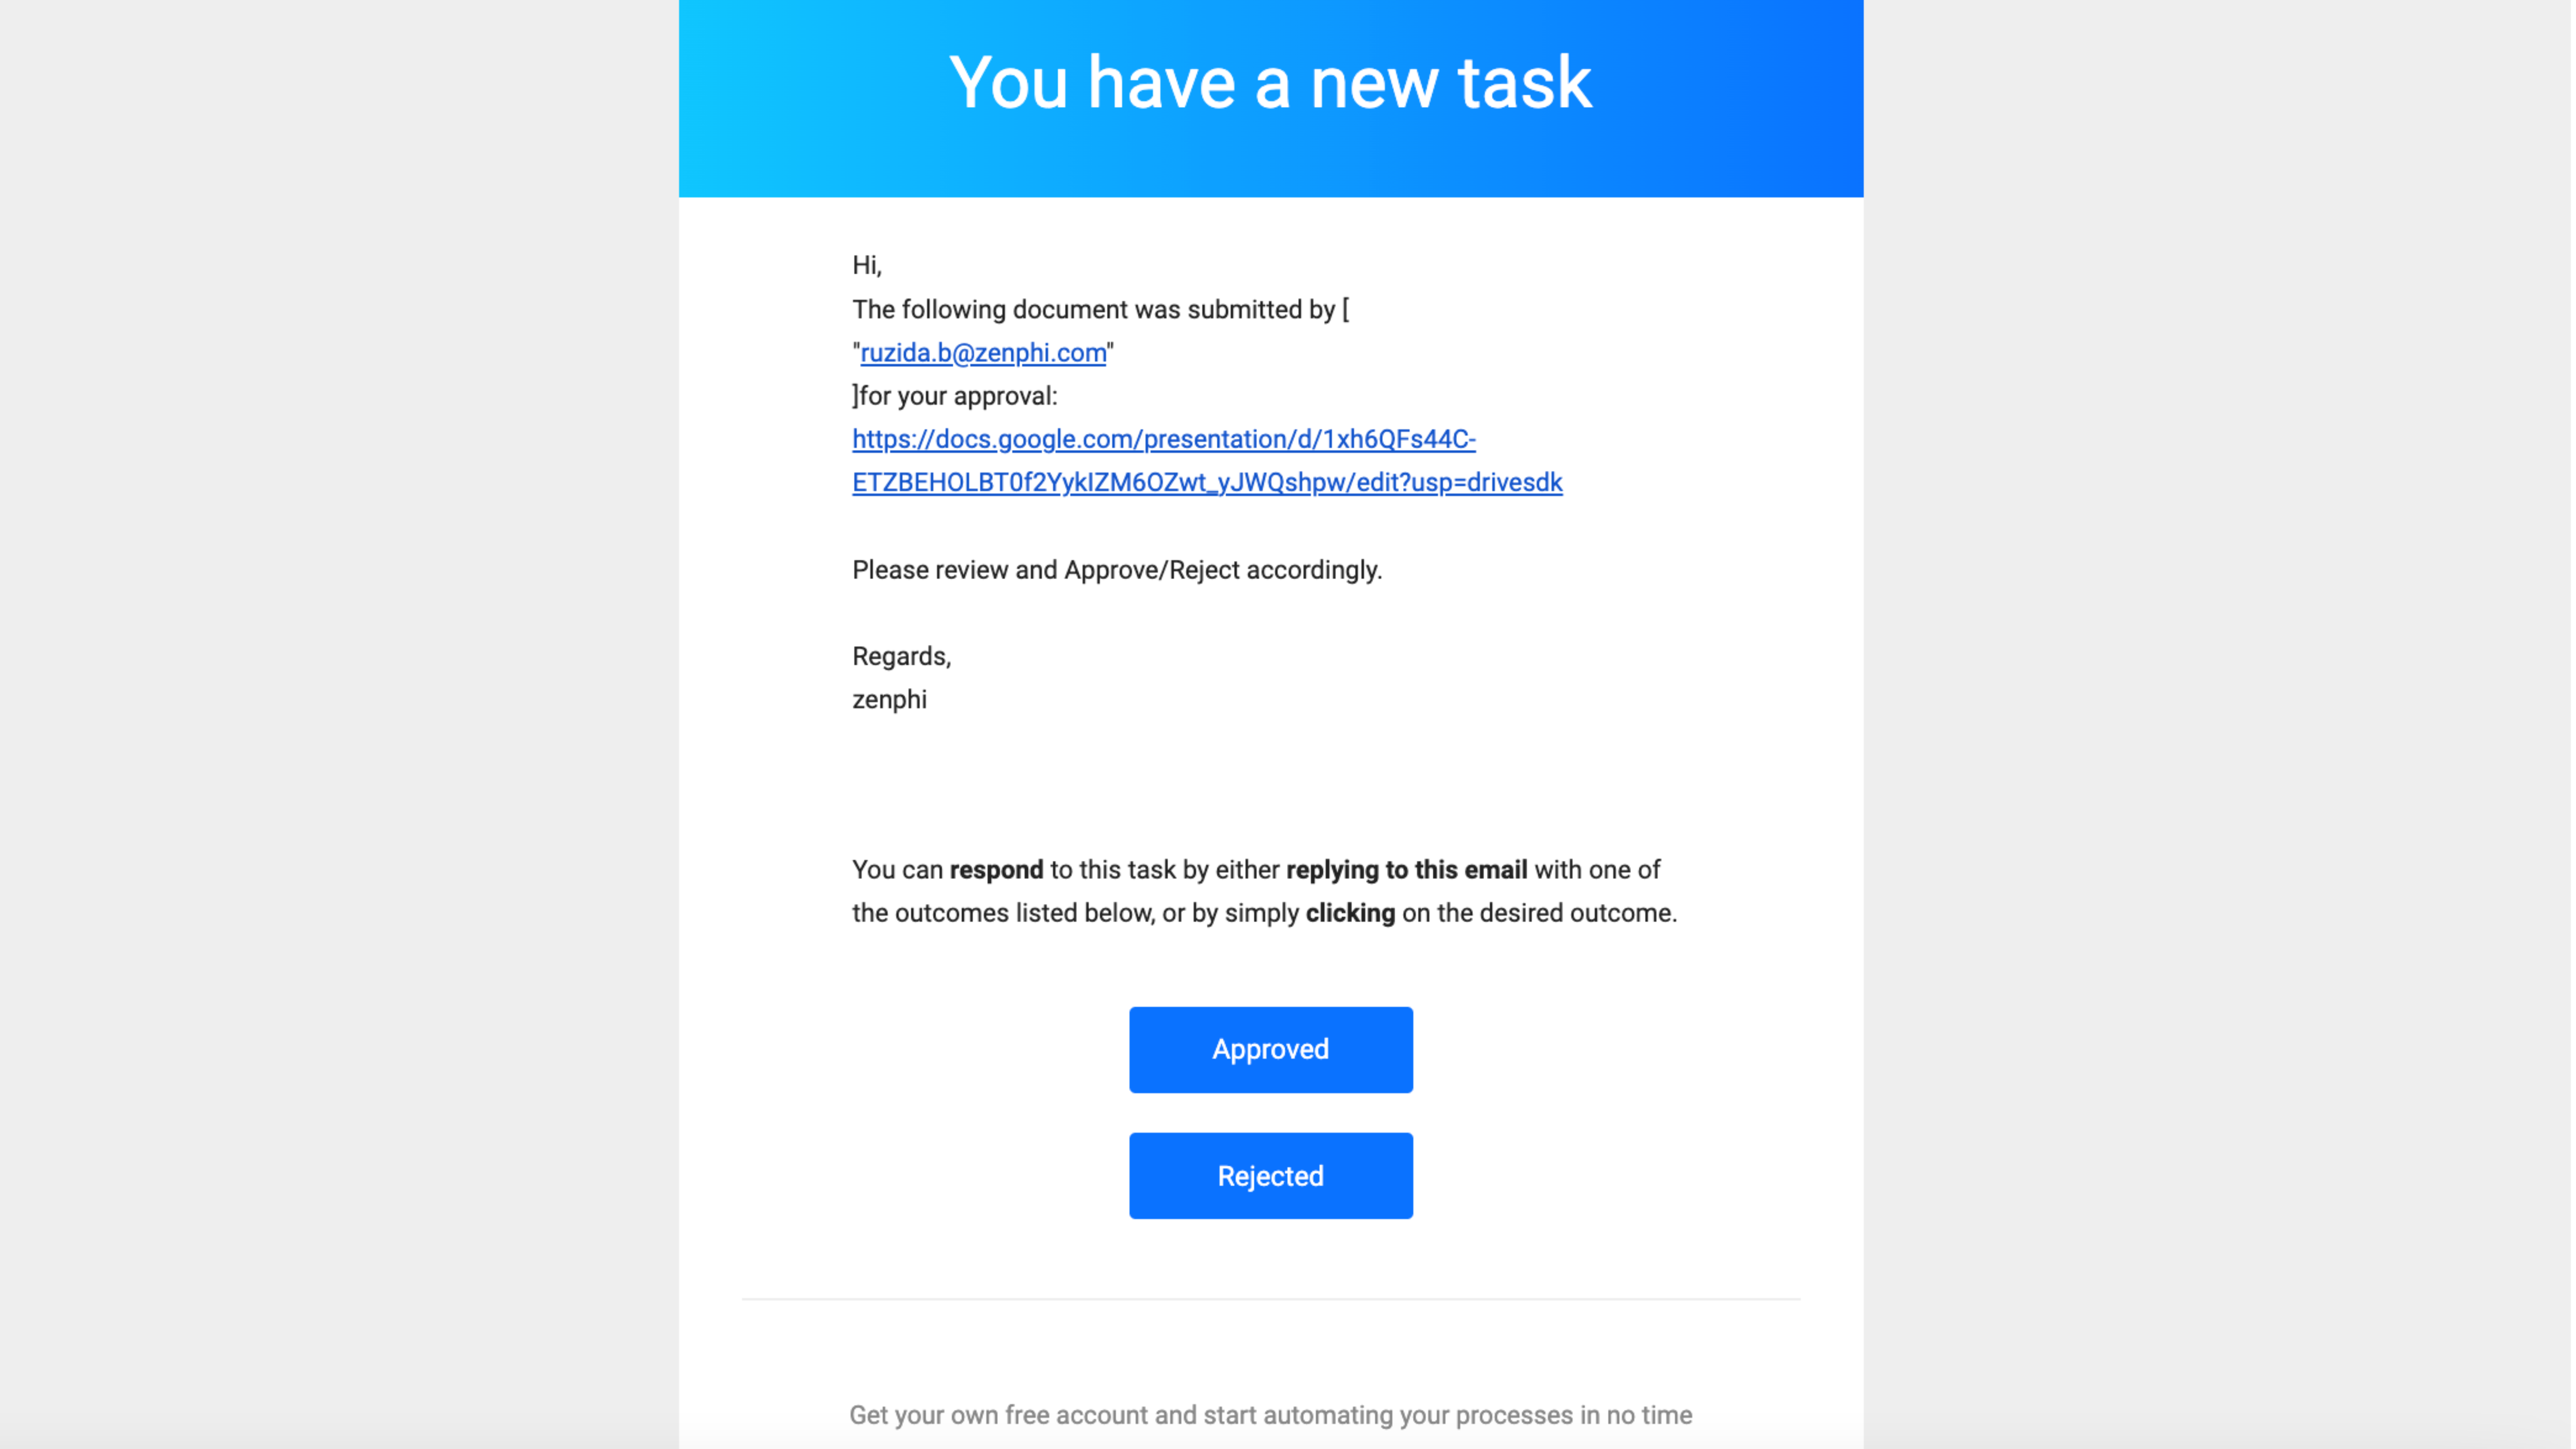
The first step of our Flow is assigning a task to a manager for approval. For that, we're going to use the Assign Task action.
To configure an Action, click on the cogs icon, and start setting values in the sliding panel.
We'll review each field in more detail shortly, but now, let's learn about one important concept - Token Picker.
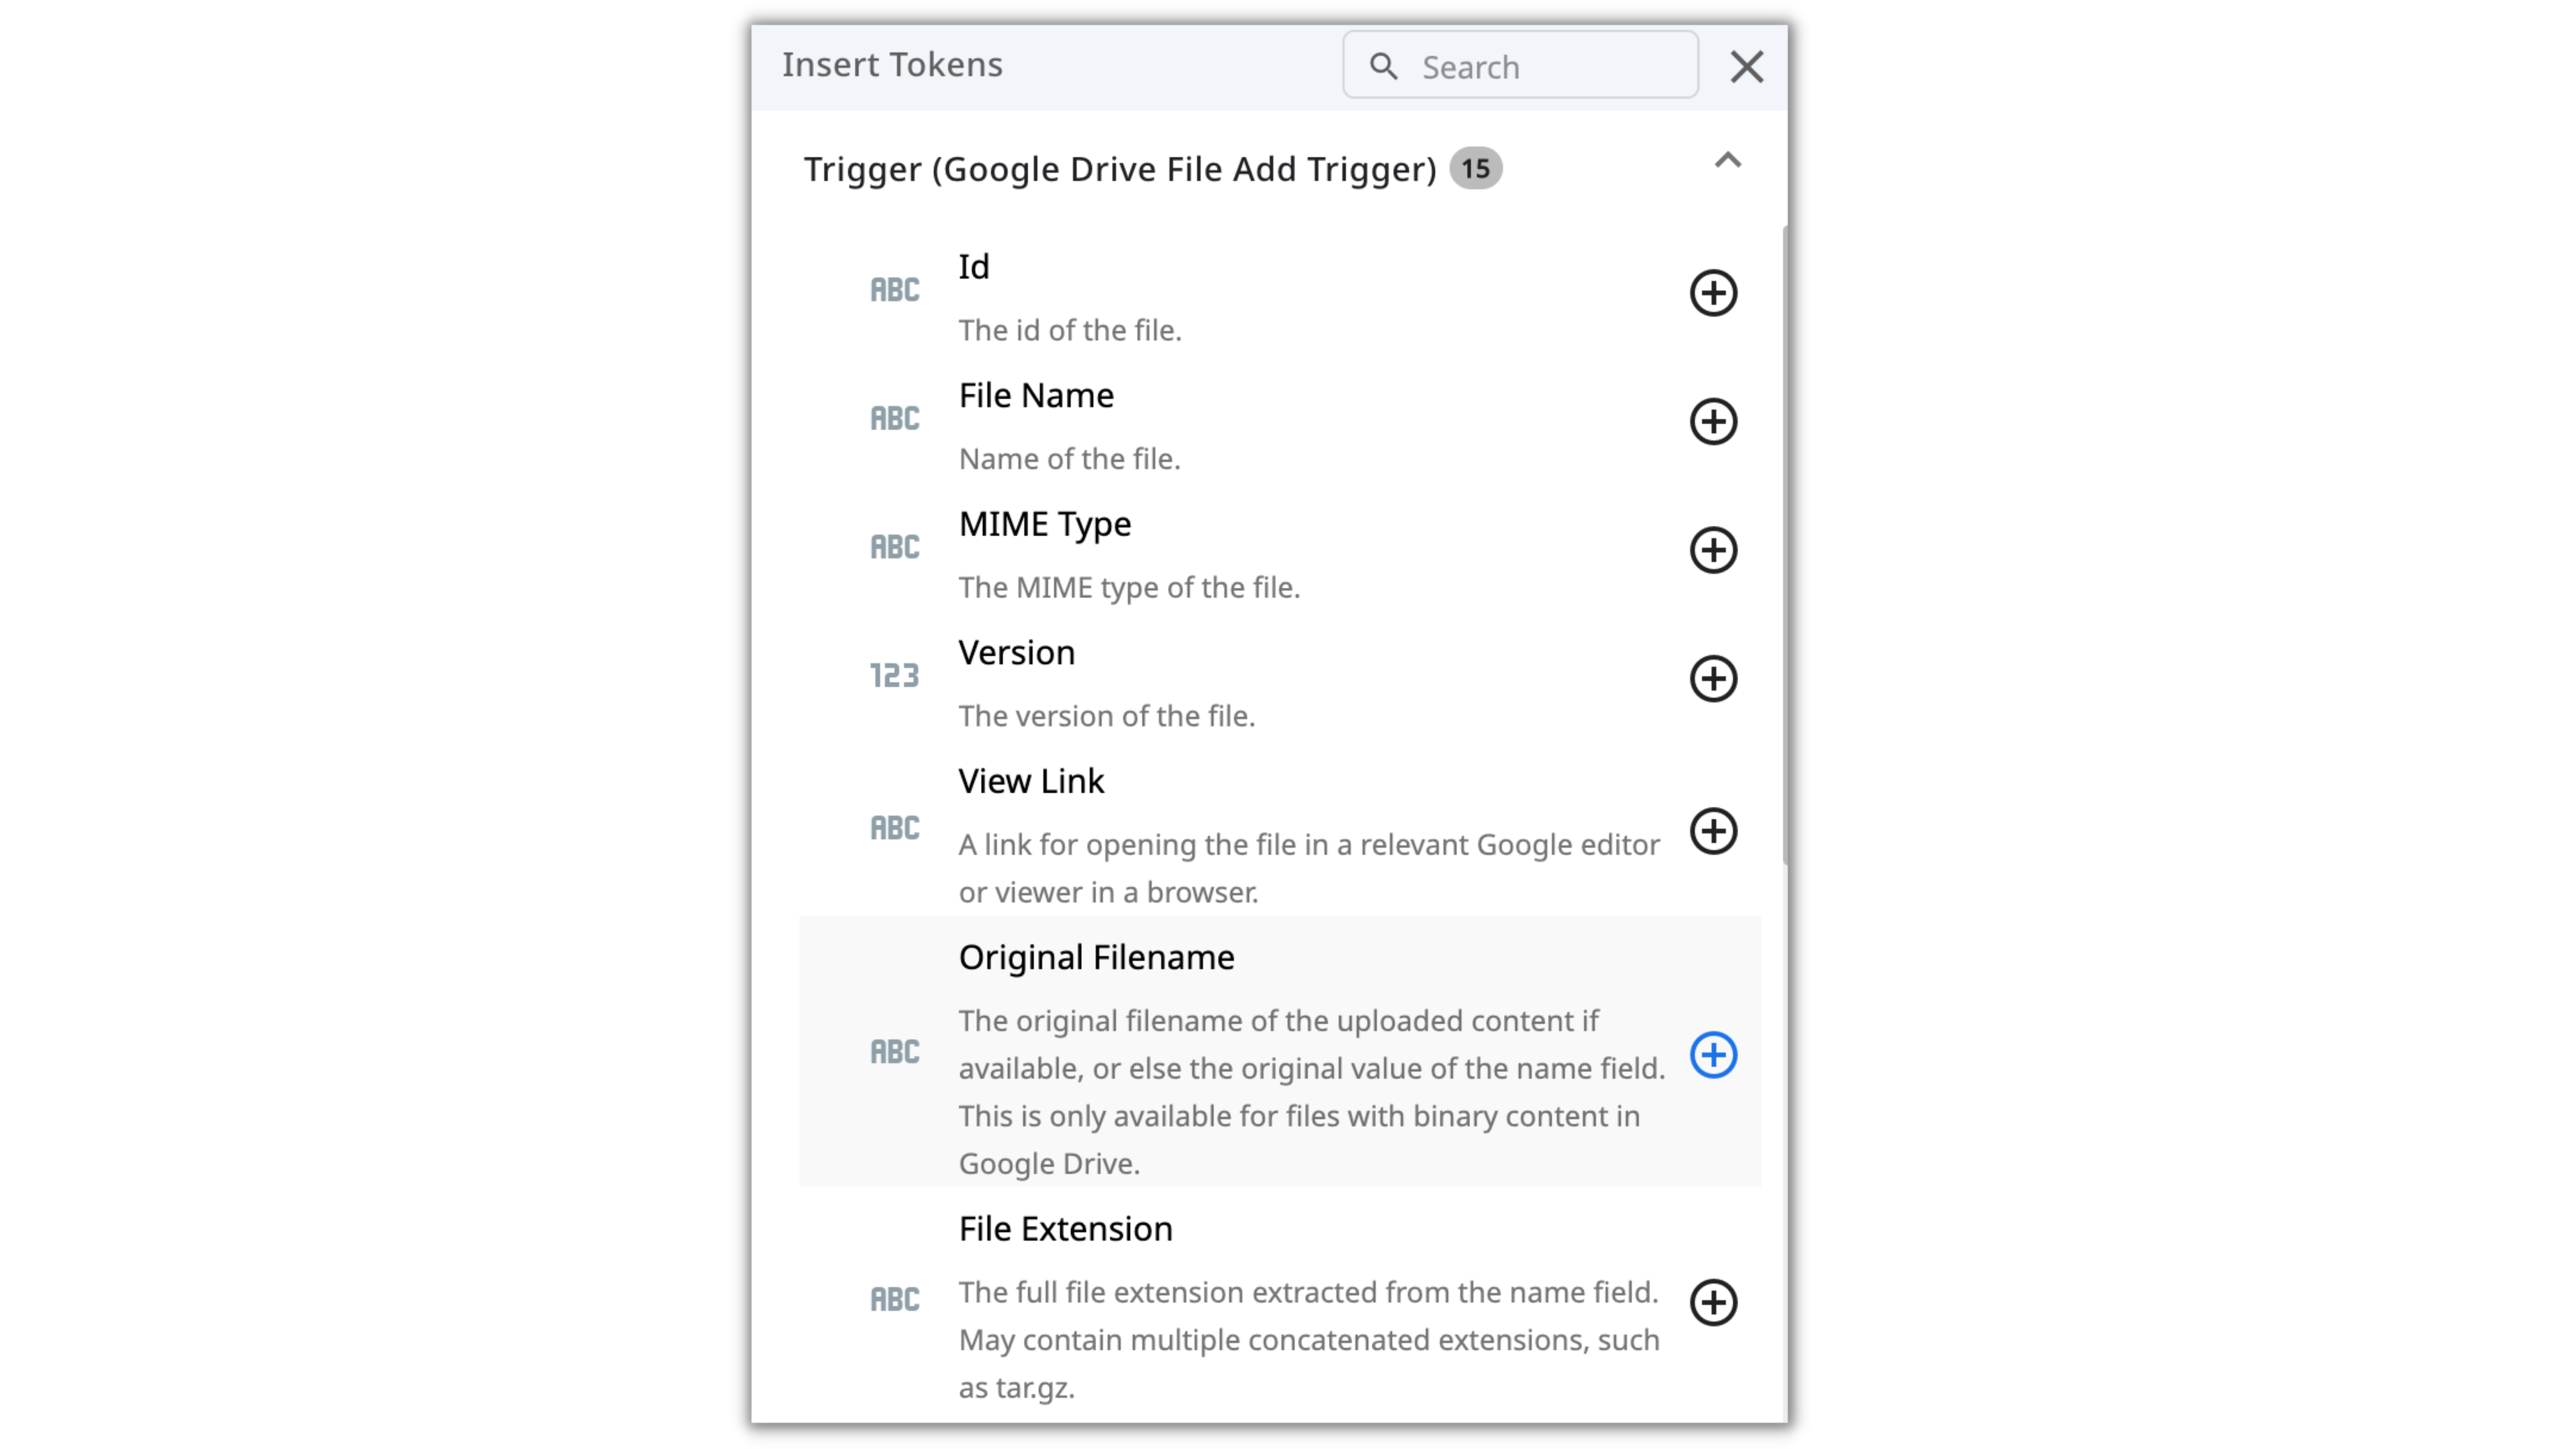
What is the Token Picker?
As we discussed earlier, most of the Triggers and Actions have Output data that you can use further in your Flow.
For example, these are the Output parameters from the Google Drive trigger:
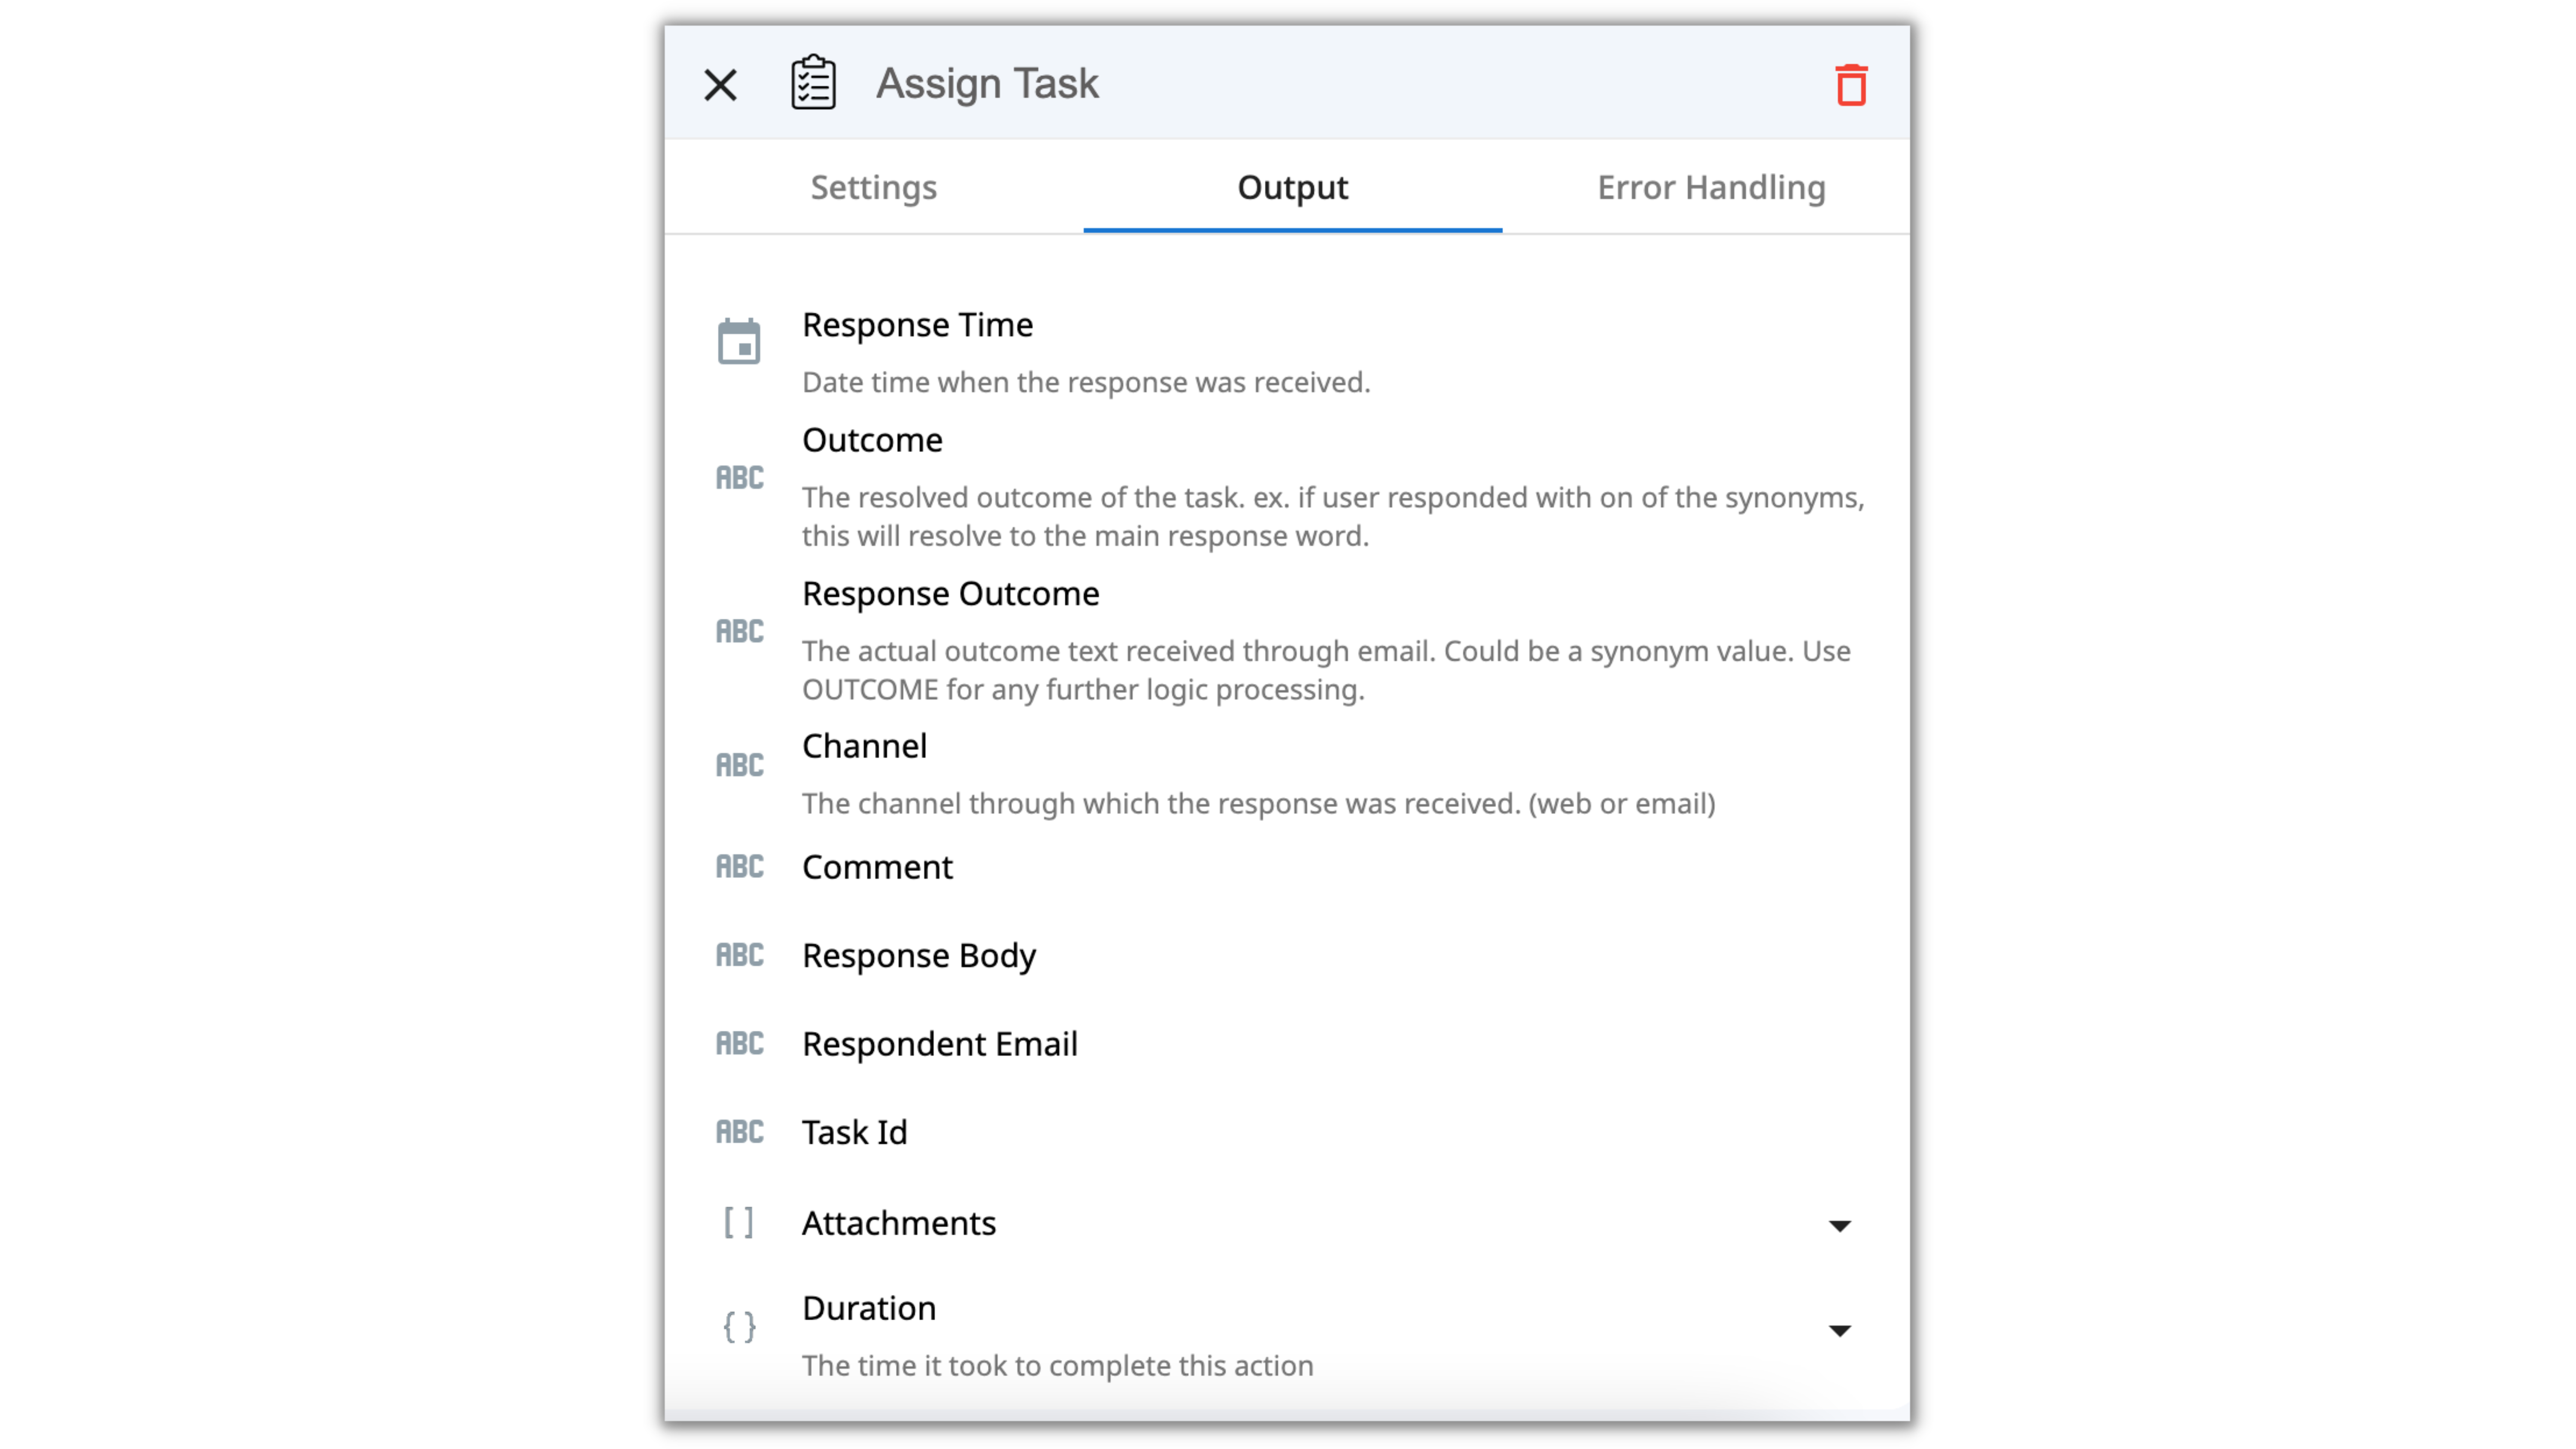
And here are the parameters from the Assign Task action. You can access and review this data right when you configure the Action.
Now, wherever you see the “Token picker” icon, it means you can dynamically configure that Action to use the output of Trigger and previous Actions.

For example, we can name a task "A new task to approve [File Name] document", where [File Name] would be the output from the Trigger.
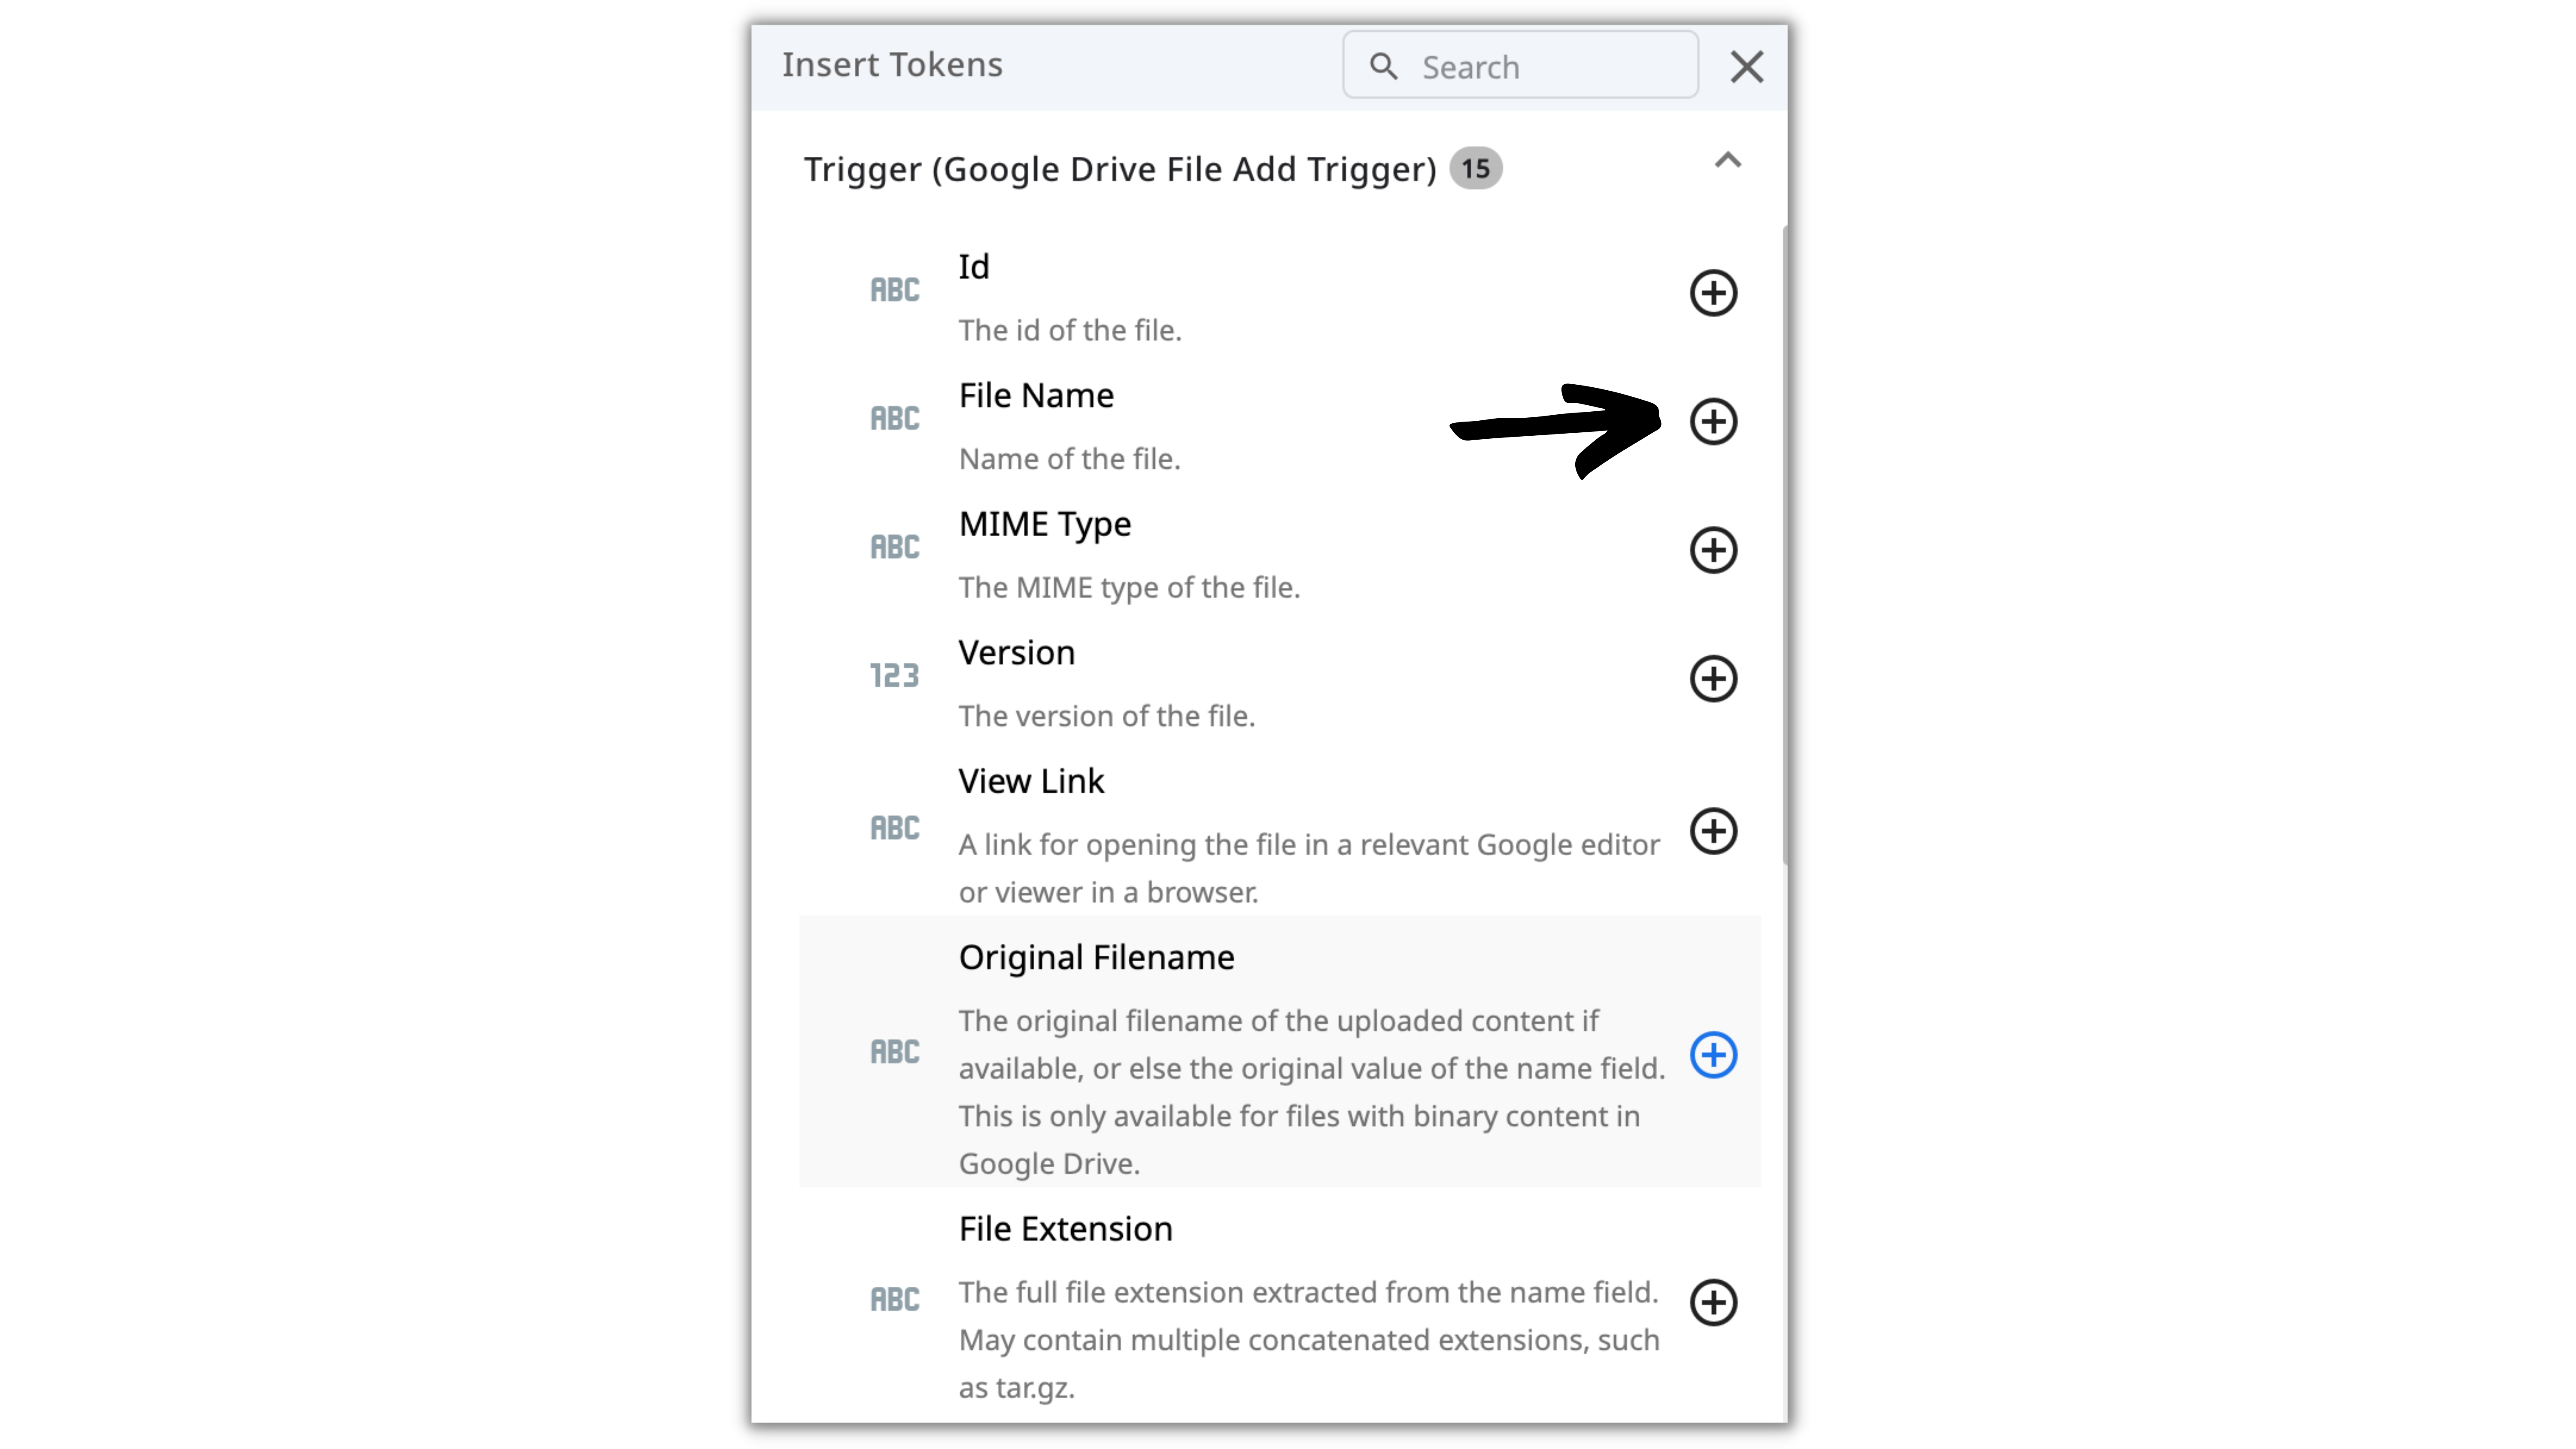
To do that, you can just click on the Token Picker icon in the Task Name field, find the output from the Trigger and click on plus near the needed parameter.
Ok, with this information, we are fully ready to configure the Assign Task action.
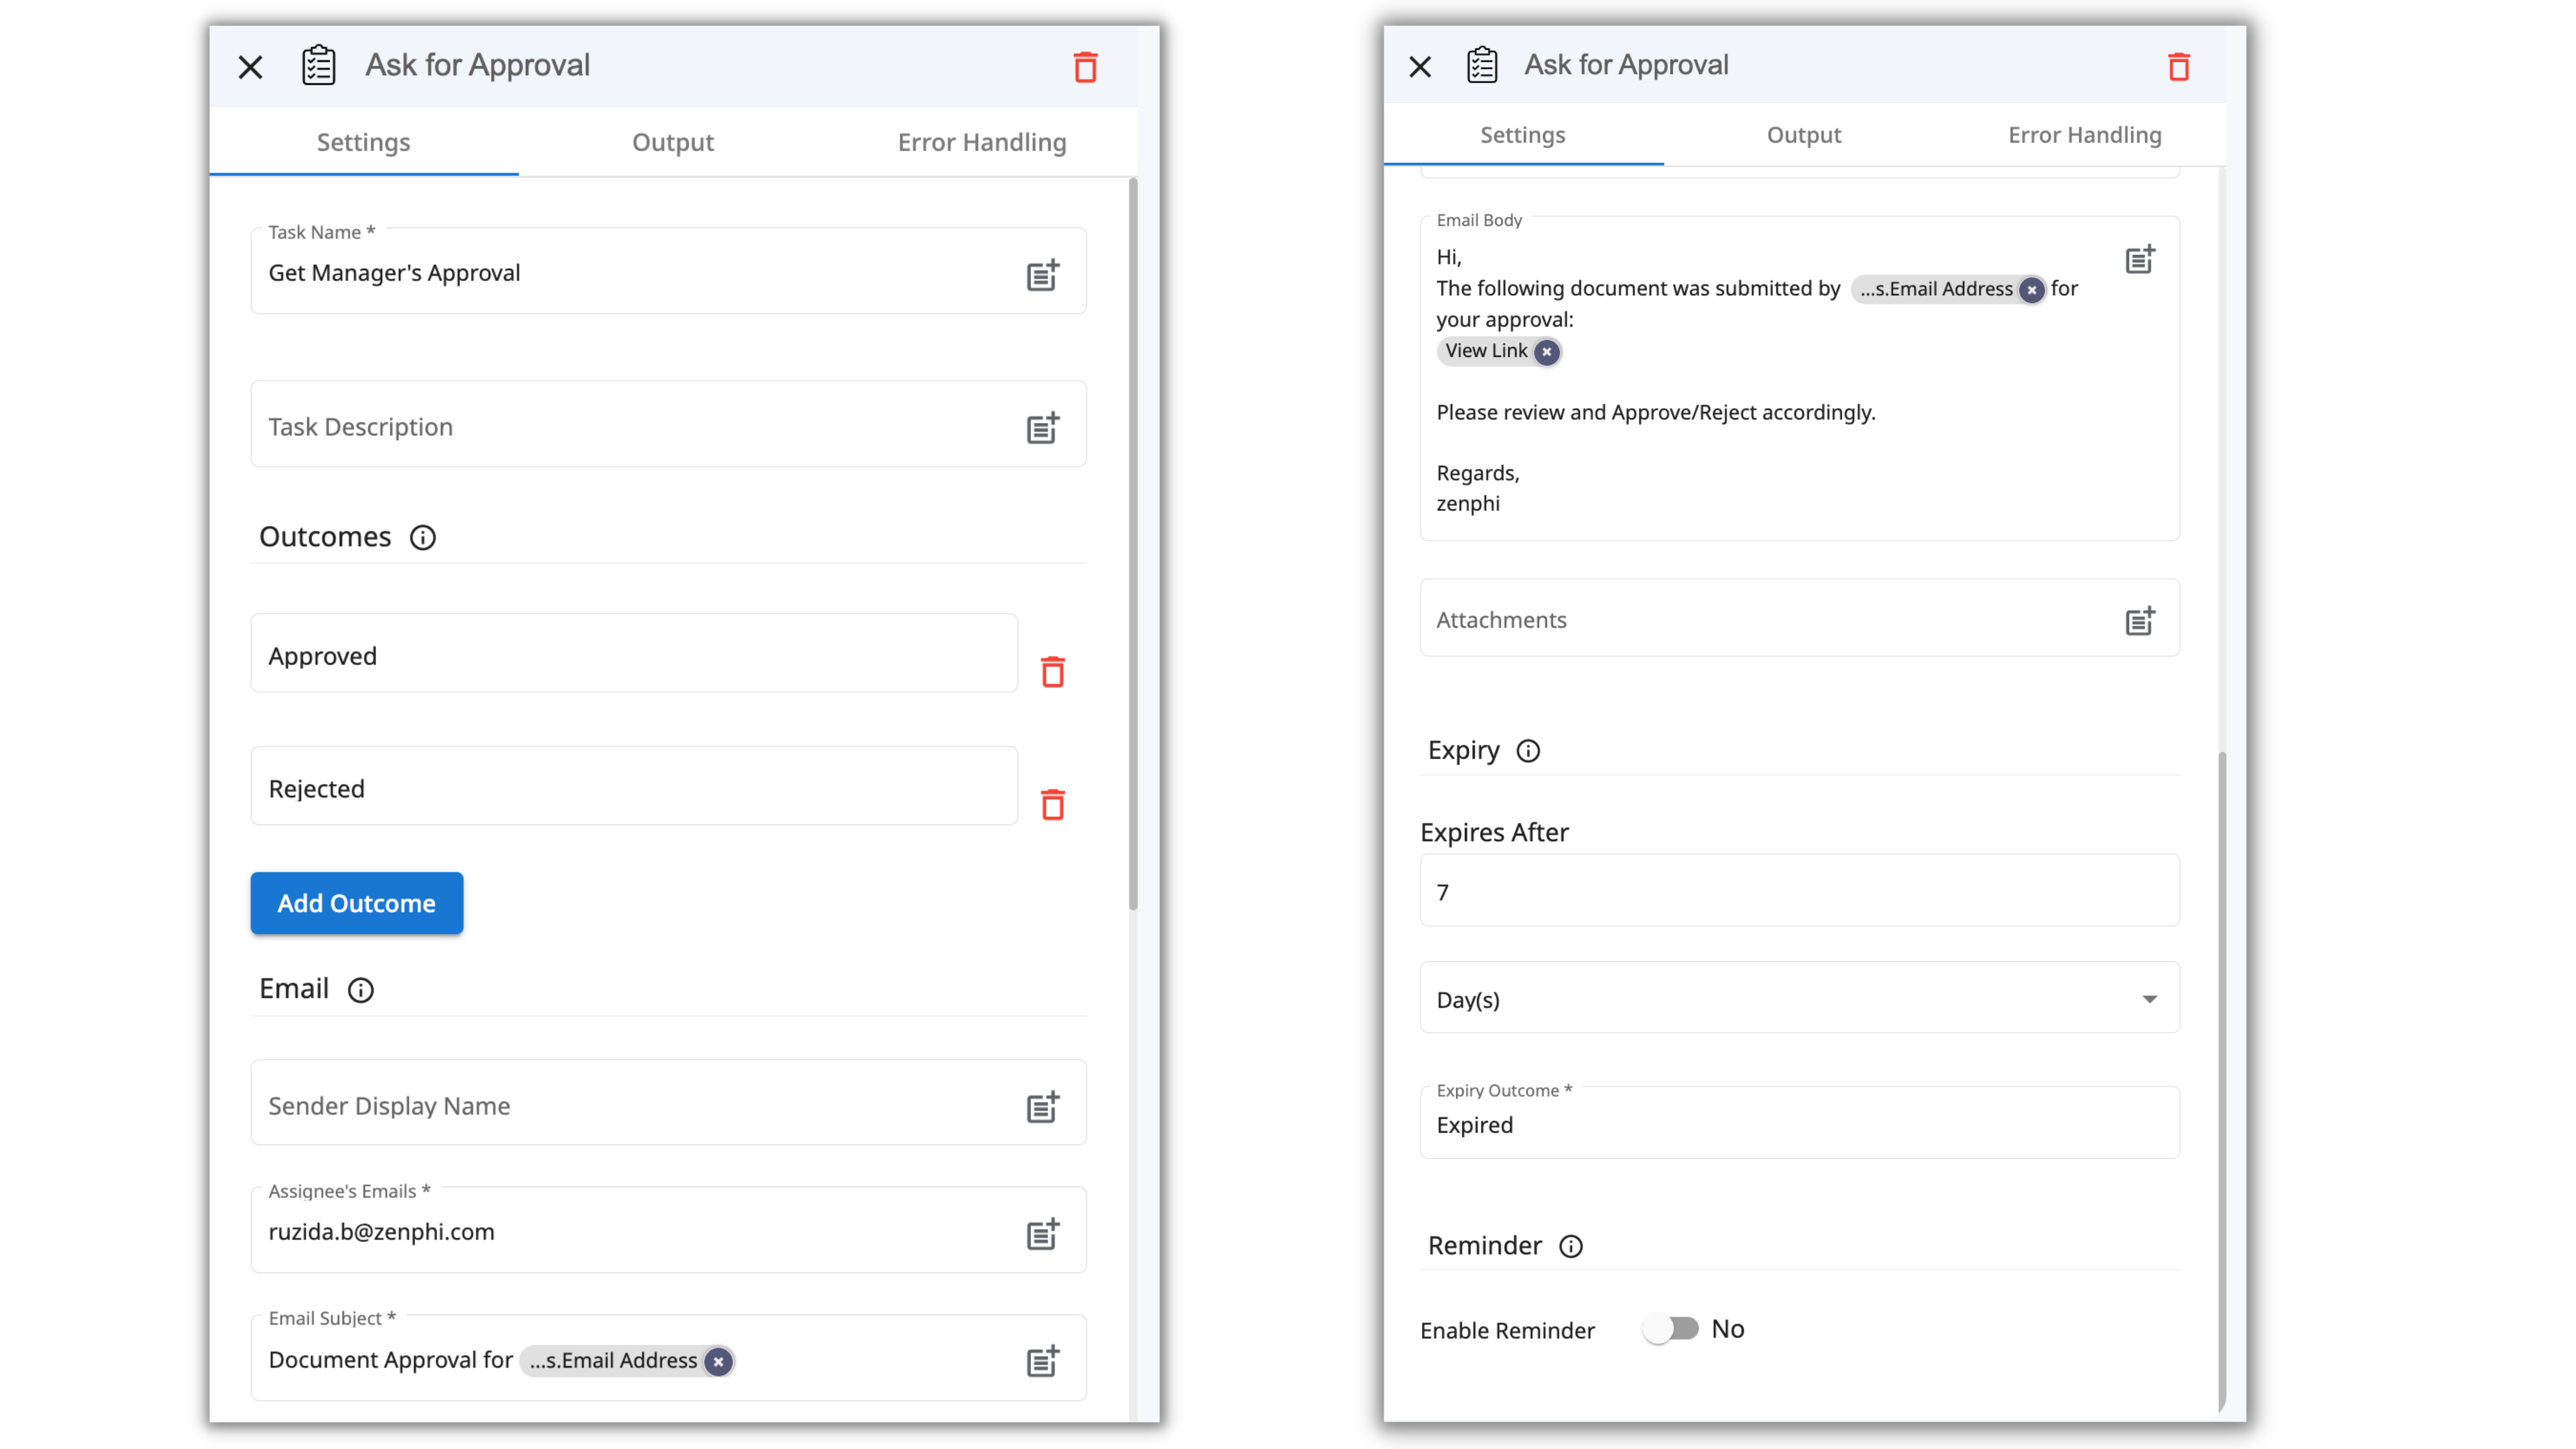
- Task Name - The task title the assignee will see once they receive the task in the form of an email.
- Task Description - You can either fill this section with further details about the task. You can also leave it blank.
- Outcomes - We want to give the assignee two options to choose from - approve or reject the document.
_Depending on the task, you can create several outcomes other than Accept/Reject. You can also use the different synonyms of the words Accept and Reject and their past tenses like Yes, Agree, Agreed, Ok, Sure or Rejected, No, Disagree, and so on. don't forget to separate them with commas.
- Assignee's Email - The email address of the person assigned to manage the assigned task.
- Email Subject - The subject of the email to be sent. As you can see, here we use the Token Picker to indicate the document requester's email that we take from the Trigger output.
- Email Body - The task description. Here we also used some Tokens as a file view link and the requester's email address.
- Attachments - Files you would like to attach to the email if needed. We'll leave it empty.
You can also set up the Expiry and Reminders for this task, but we'll leave it empty for now. You can learn about those fields in this article.
The Assign Task action is now configured. Let's move on to the next step.
The next logical step of the Flow is to log the document data to Google Sheet. For that, we're going to be using Add Row action.
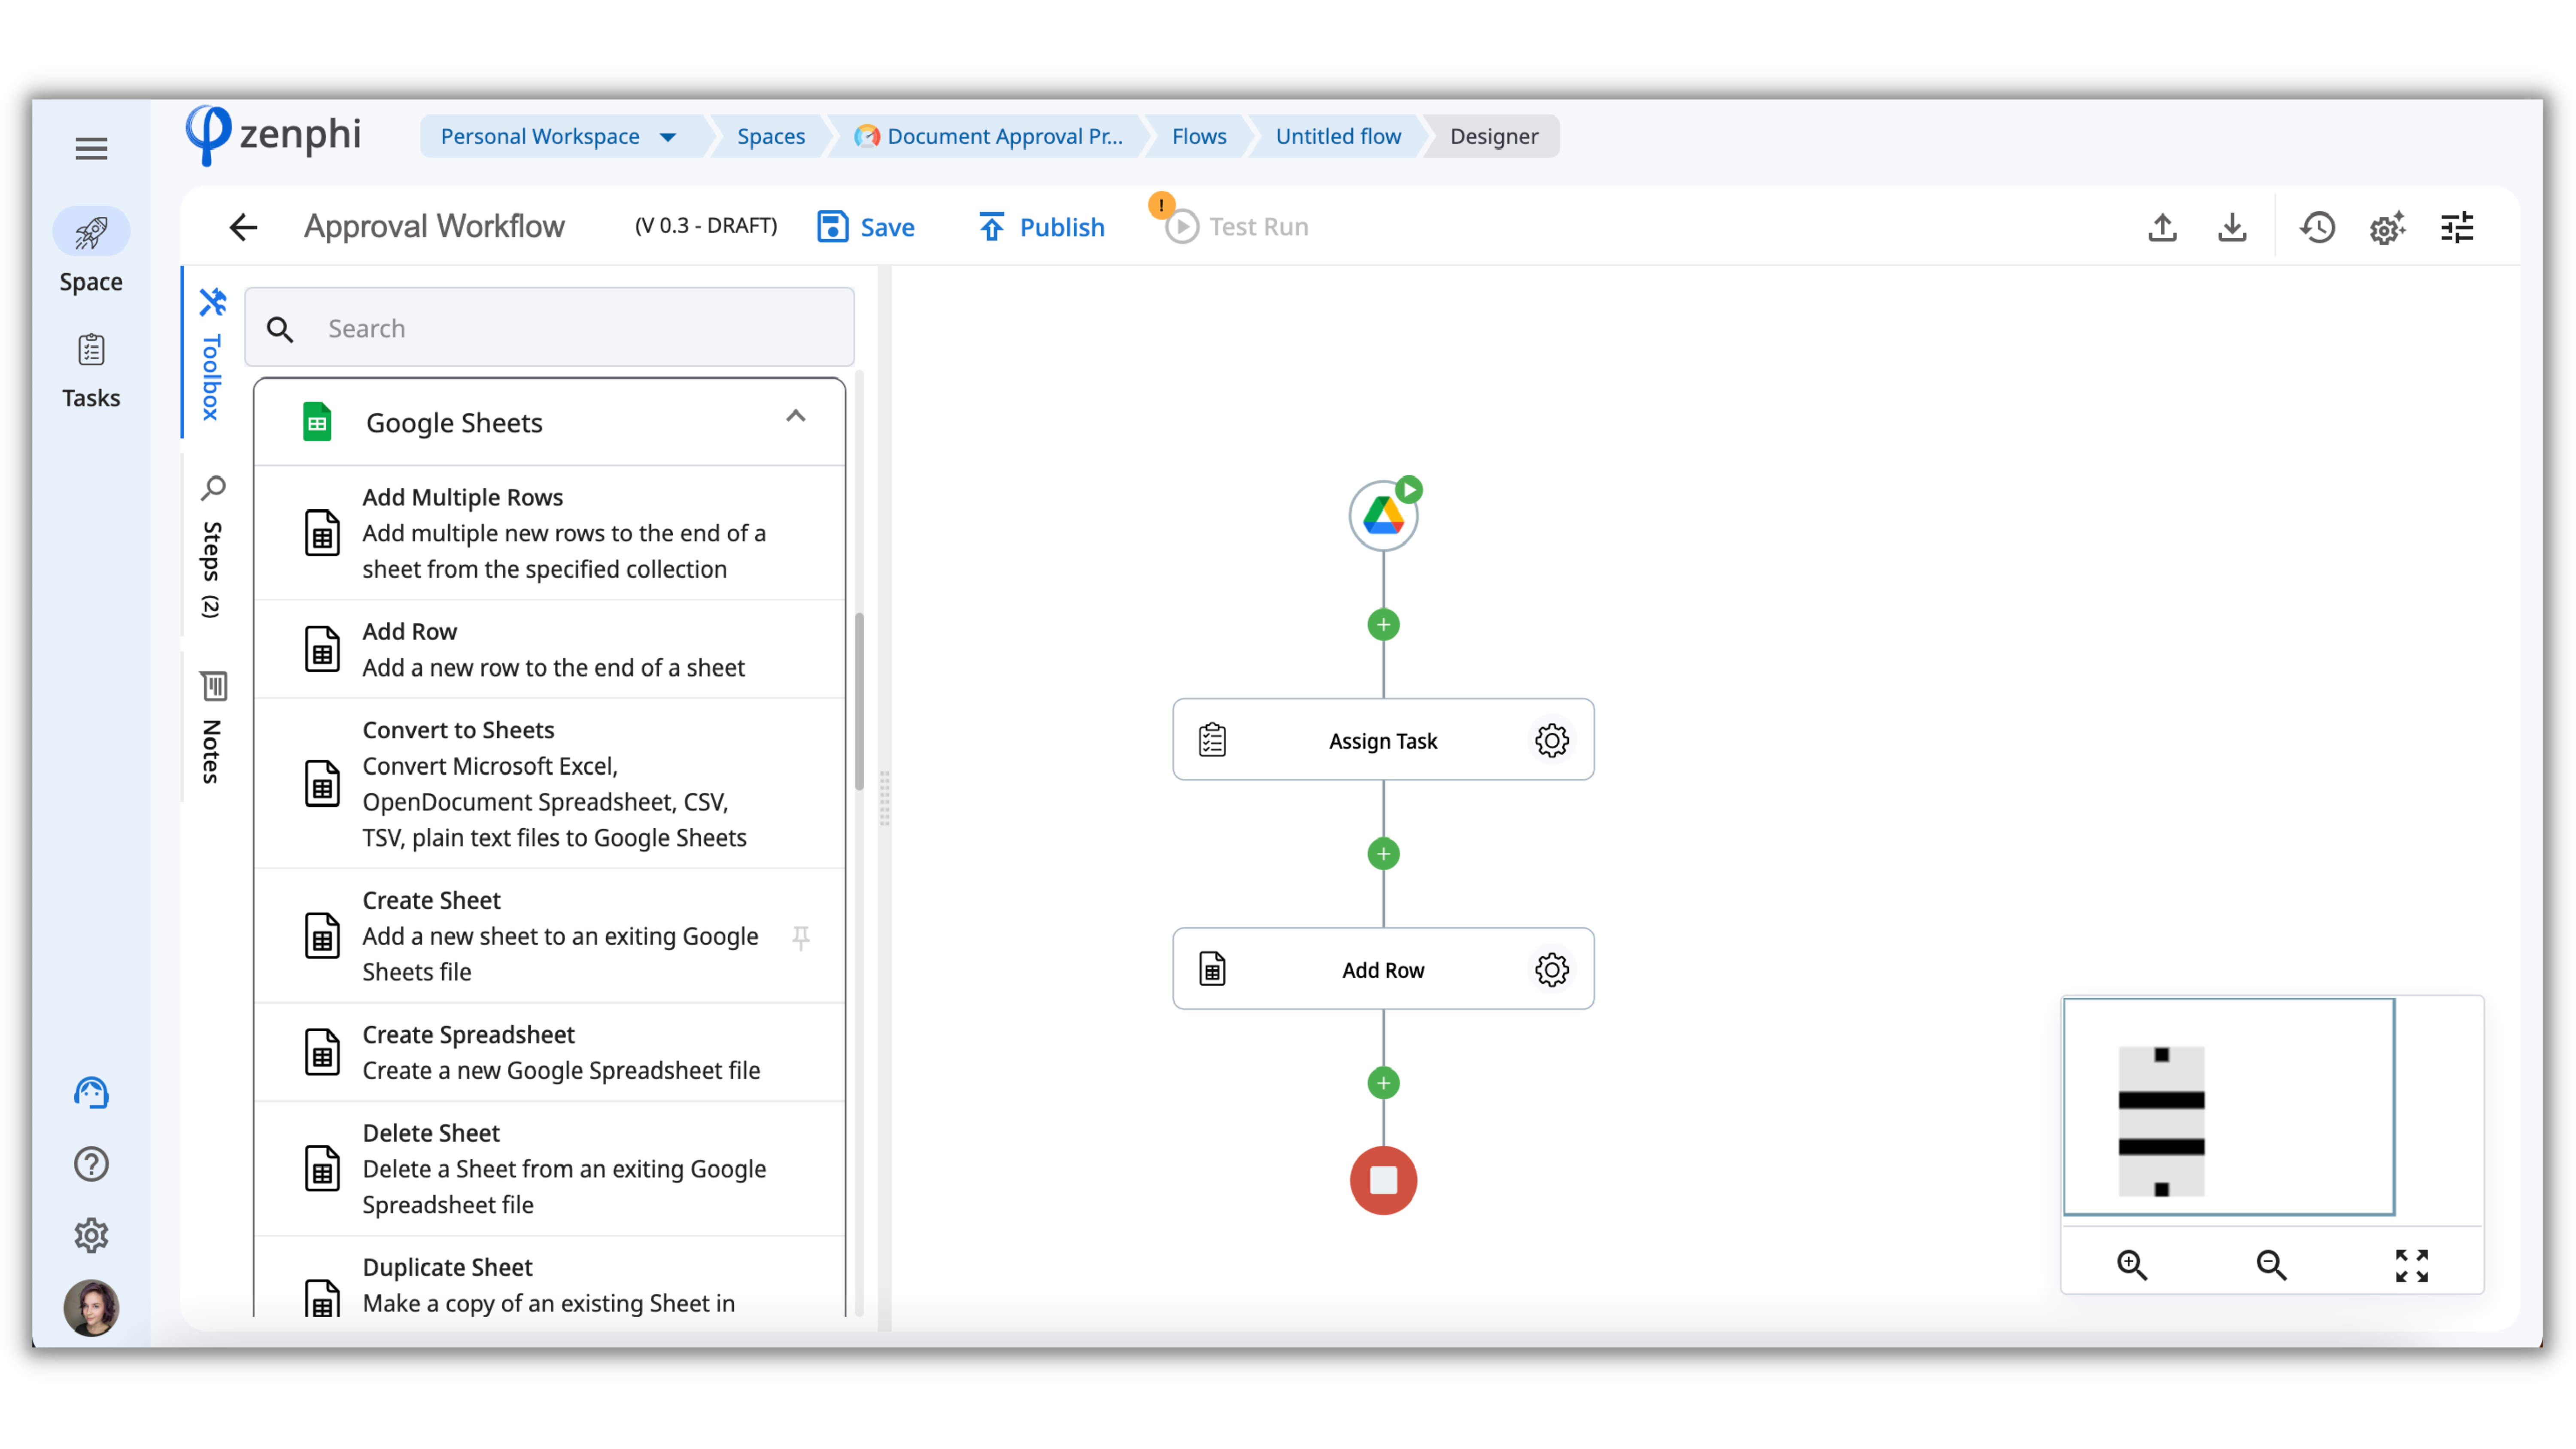
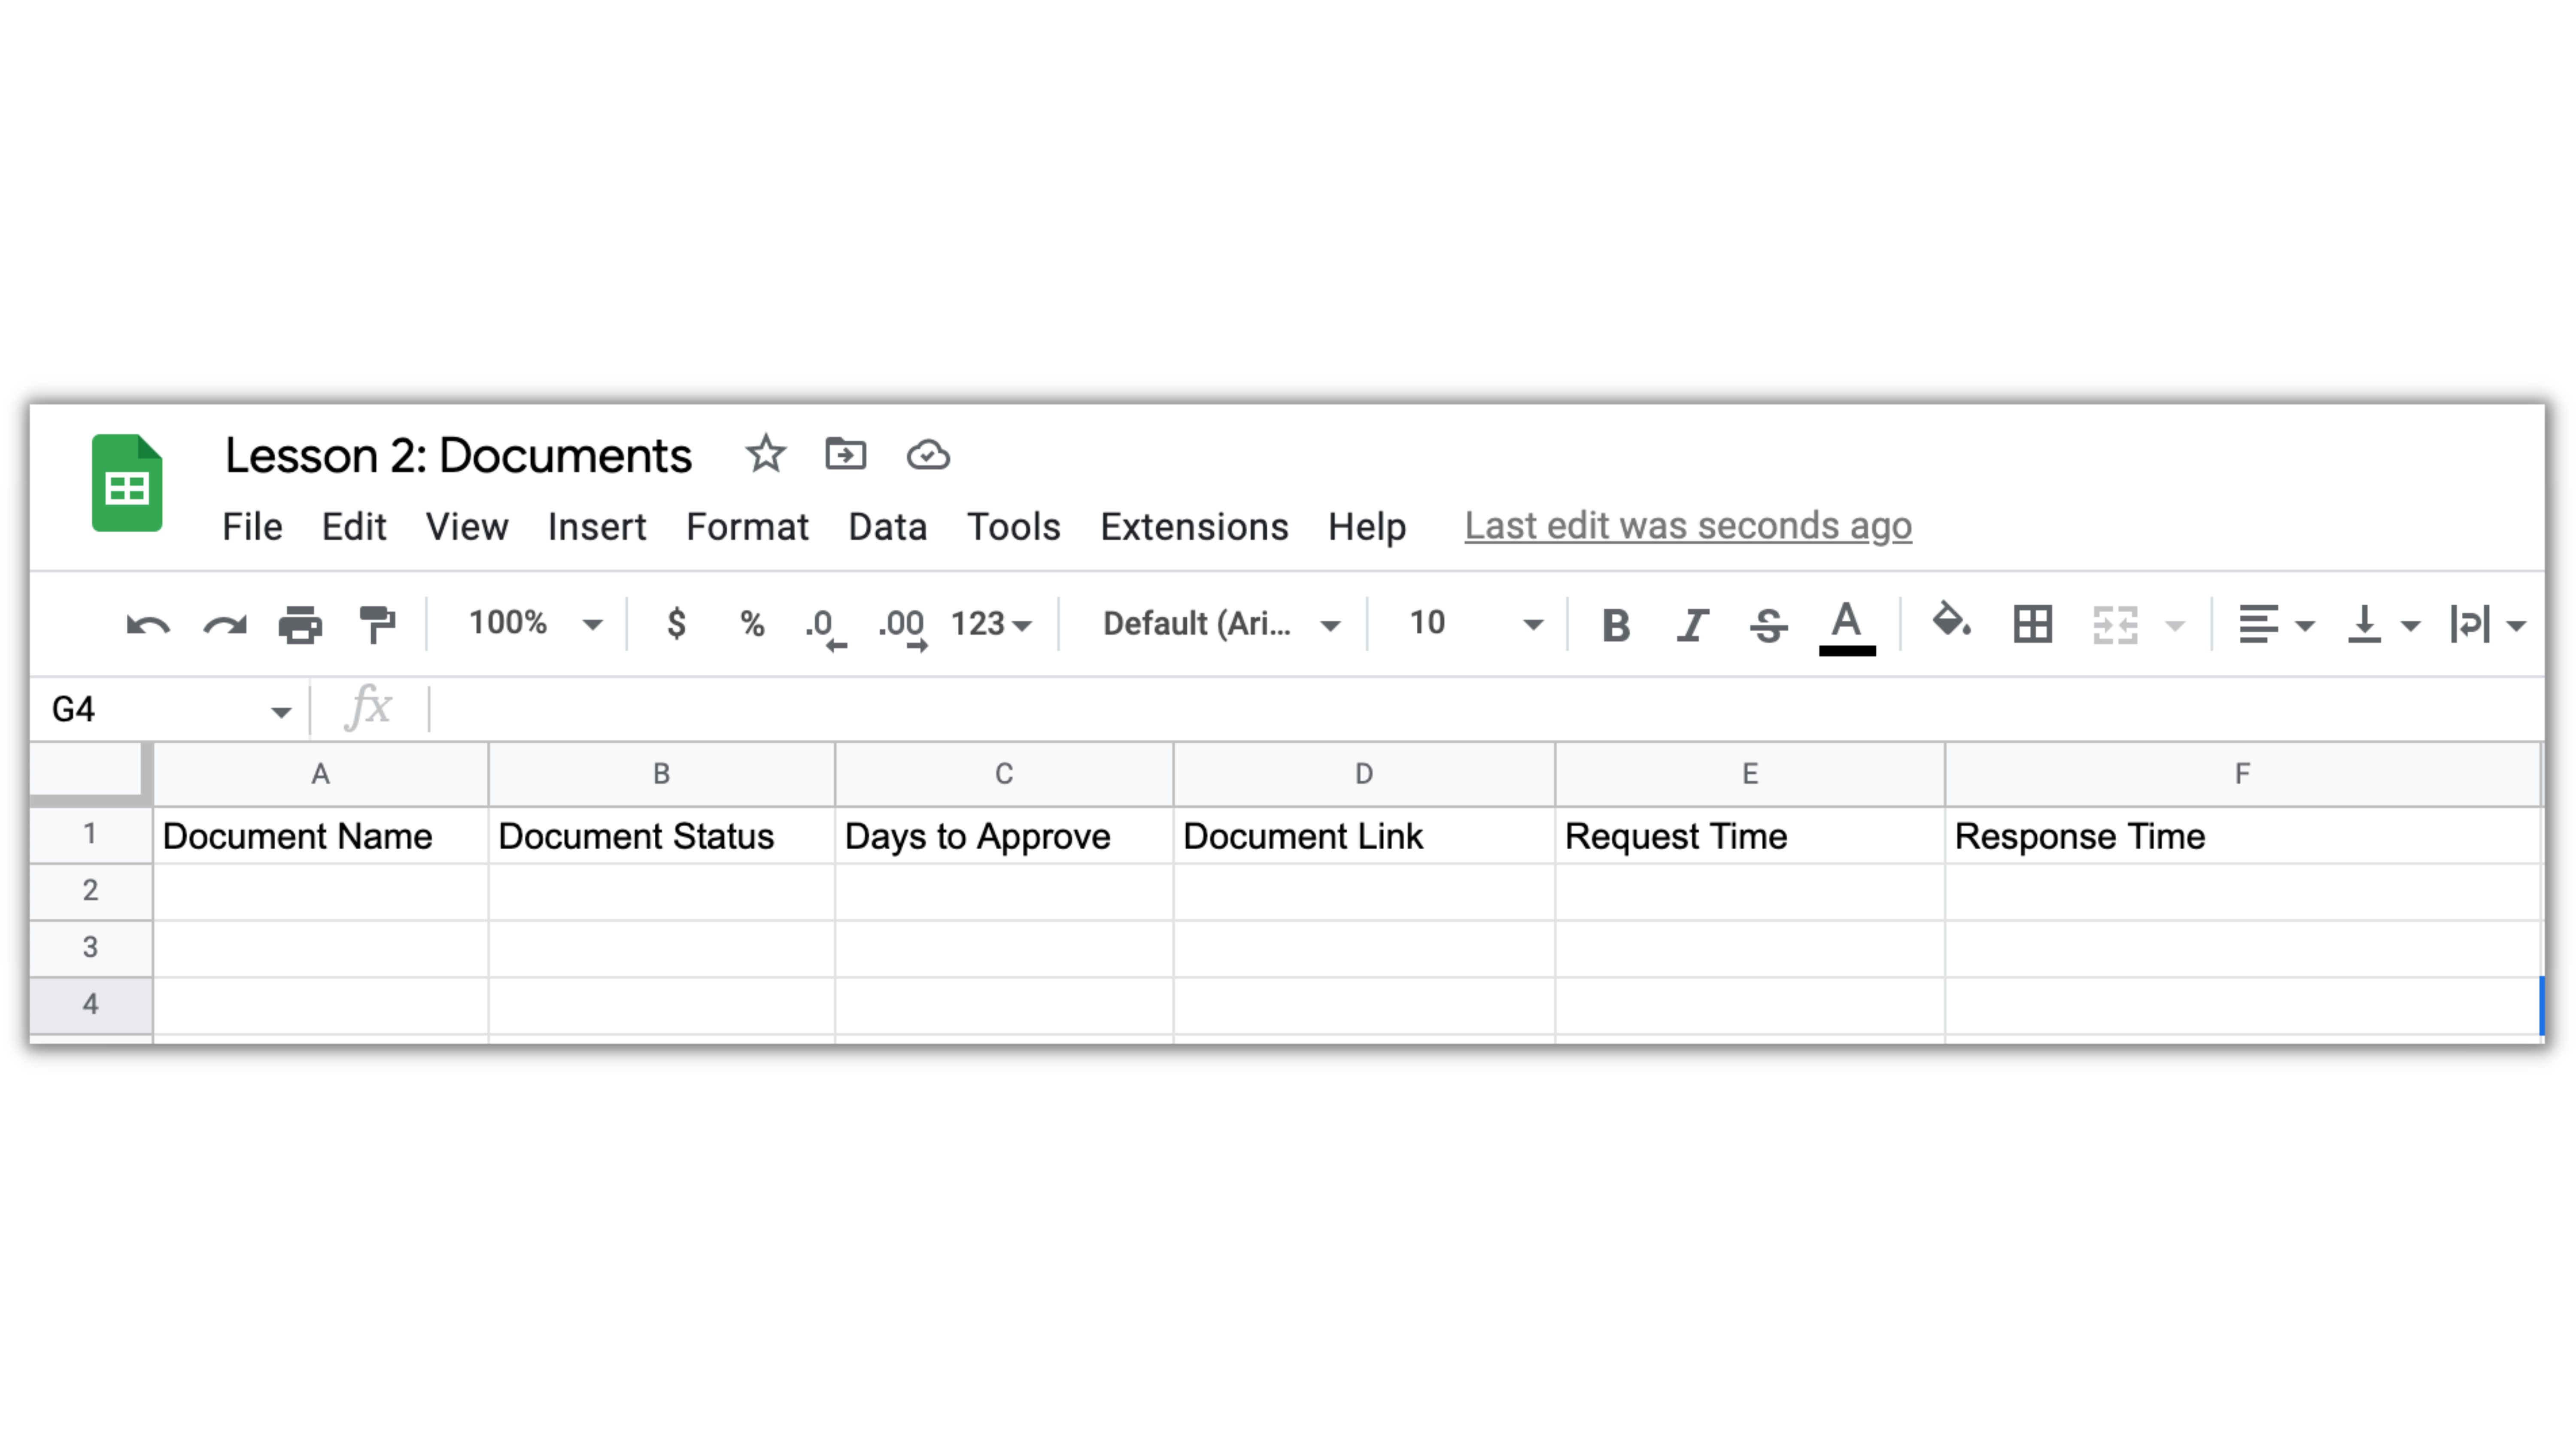
Once we attached the Action to the Flow, let's create a Sheet and indicate all the parameters we're interested in in the columns.
Now, let's configure the Add Row action:
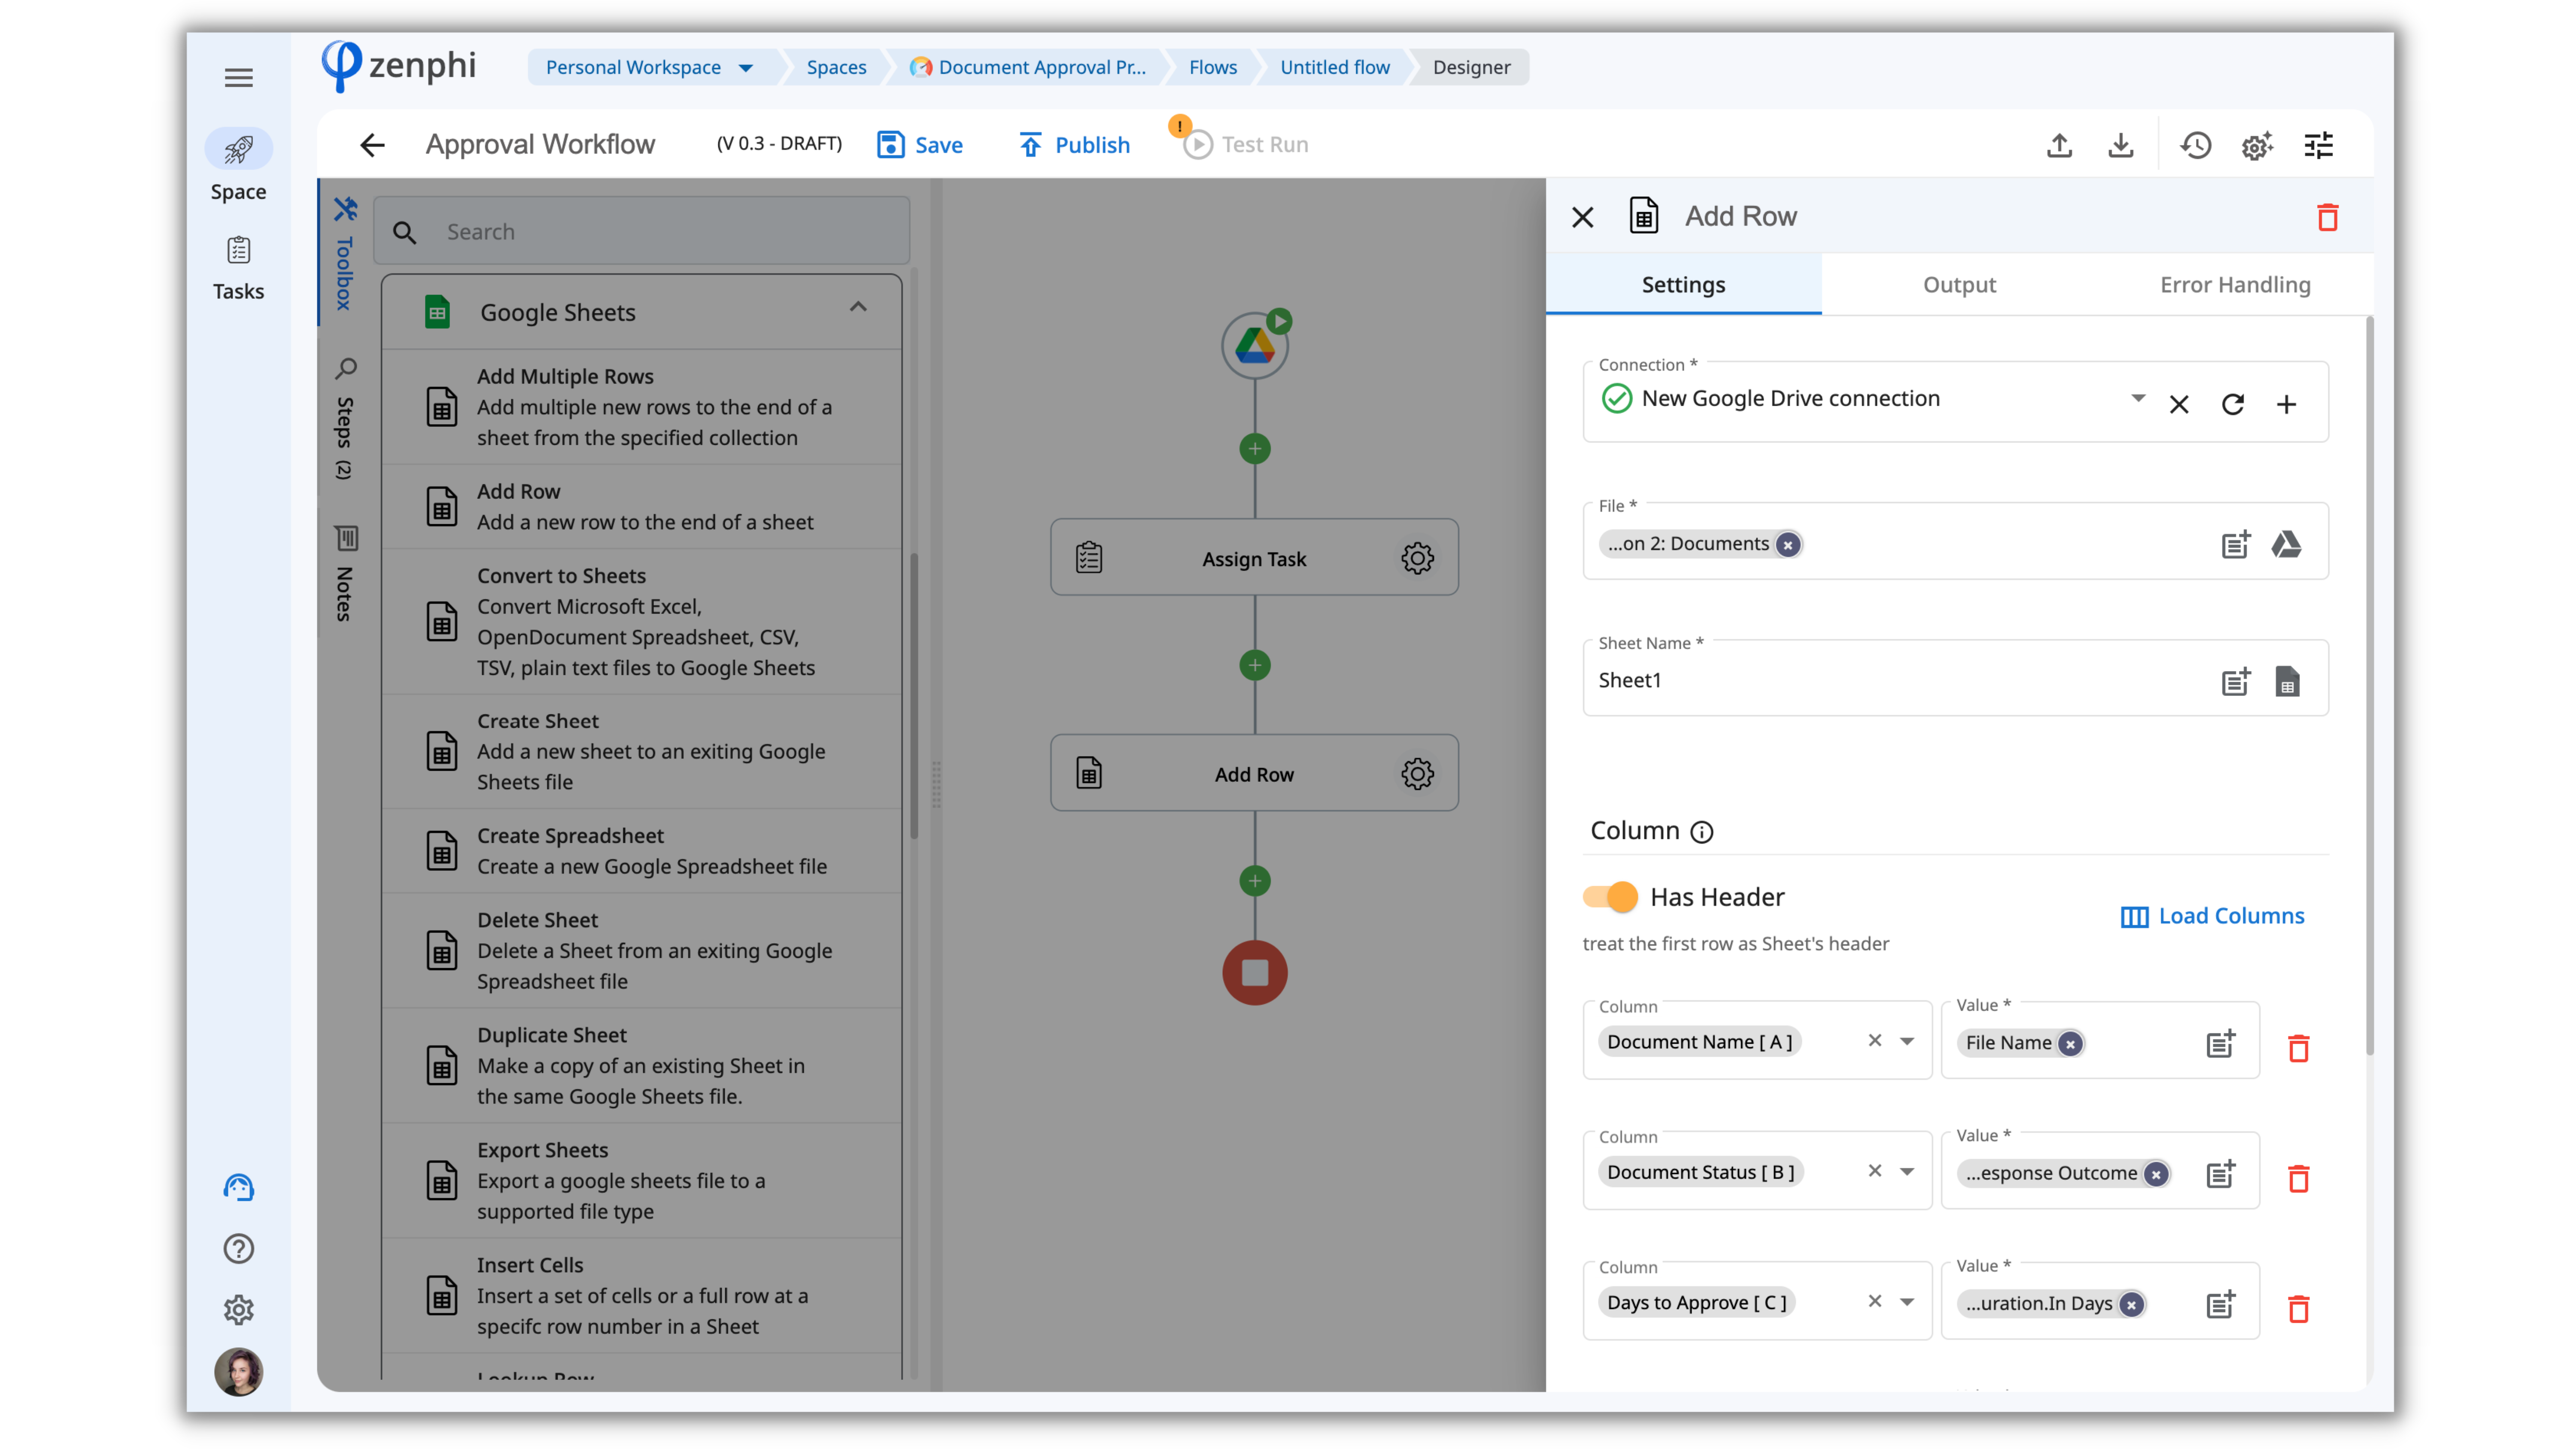
- Connection - for each new application that you integrate into zenphi you'll need to create a separate Connection;
- File - click on the Drive icon and choose Google Sheet you just created;
- Sheet Name - click on the Sheet icon and choose the Sheet from the dropdown;
- Columns - click on the Load Columns button and zenphi will automatically transfer the columns from the Sheet you indicated;
For each column, we should specify what data we need to fill in with this Action. For that, we're going to use Token Picker again and take the data from the Trigger and Assign a Task Actions outputs.
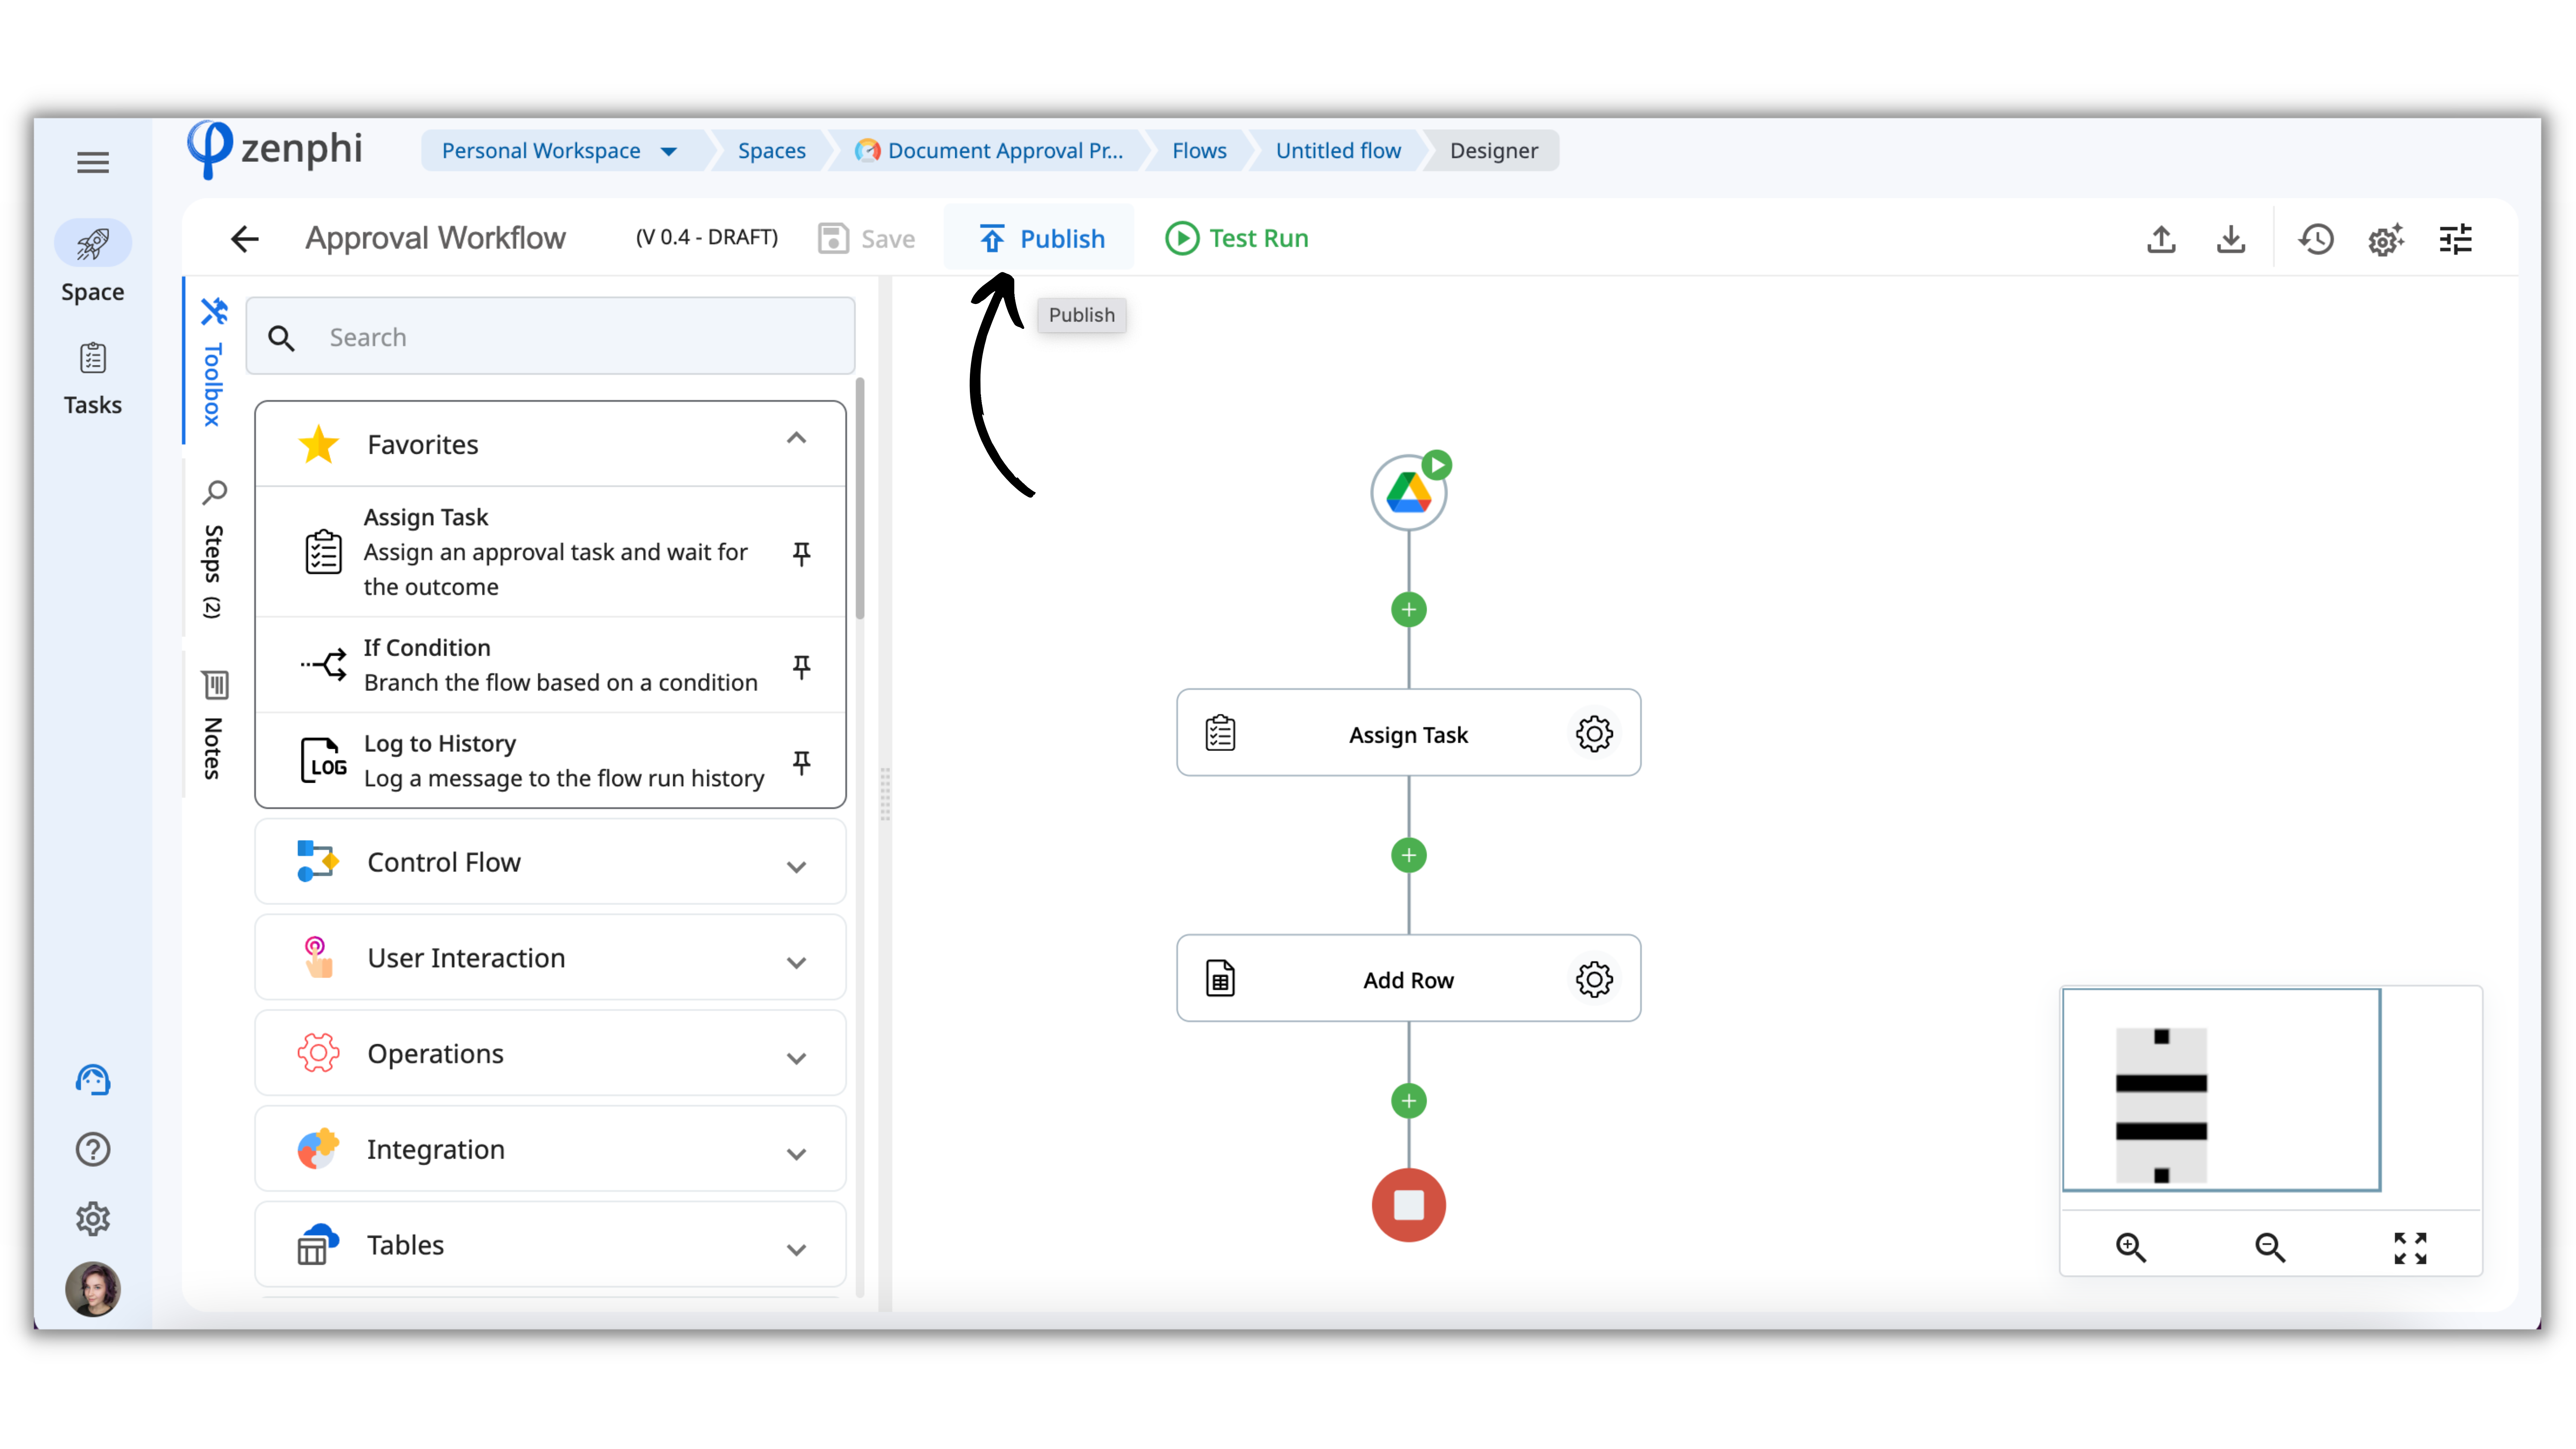
The Flow is now created. It's time to test it!
Test your first Flow
You can test your draft Flow without needing to publish it by clicking on a Test Run button. Test Run is available from within the Flow Designer and shows you the live progress of your logic.
To use the Test Run you just need to Save your changes (no need to publish them). Once you save your changes the Test Run button gets enabled.
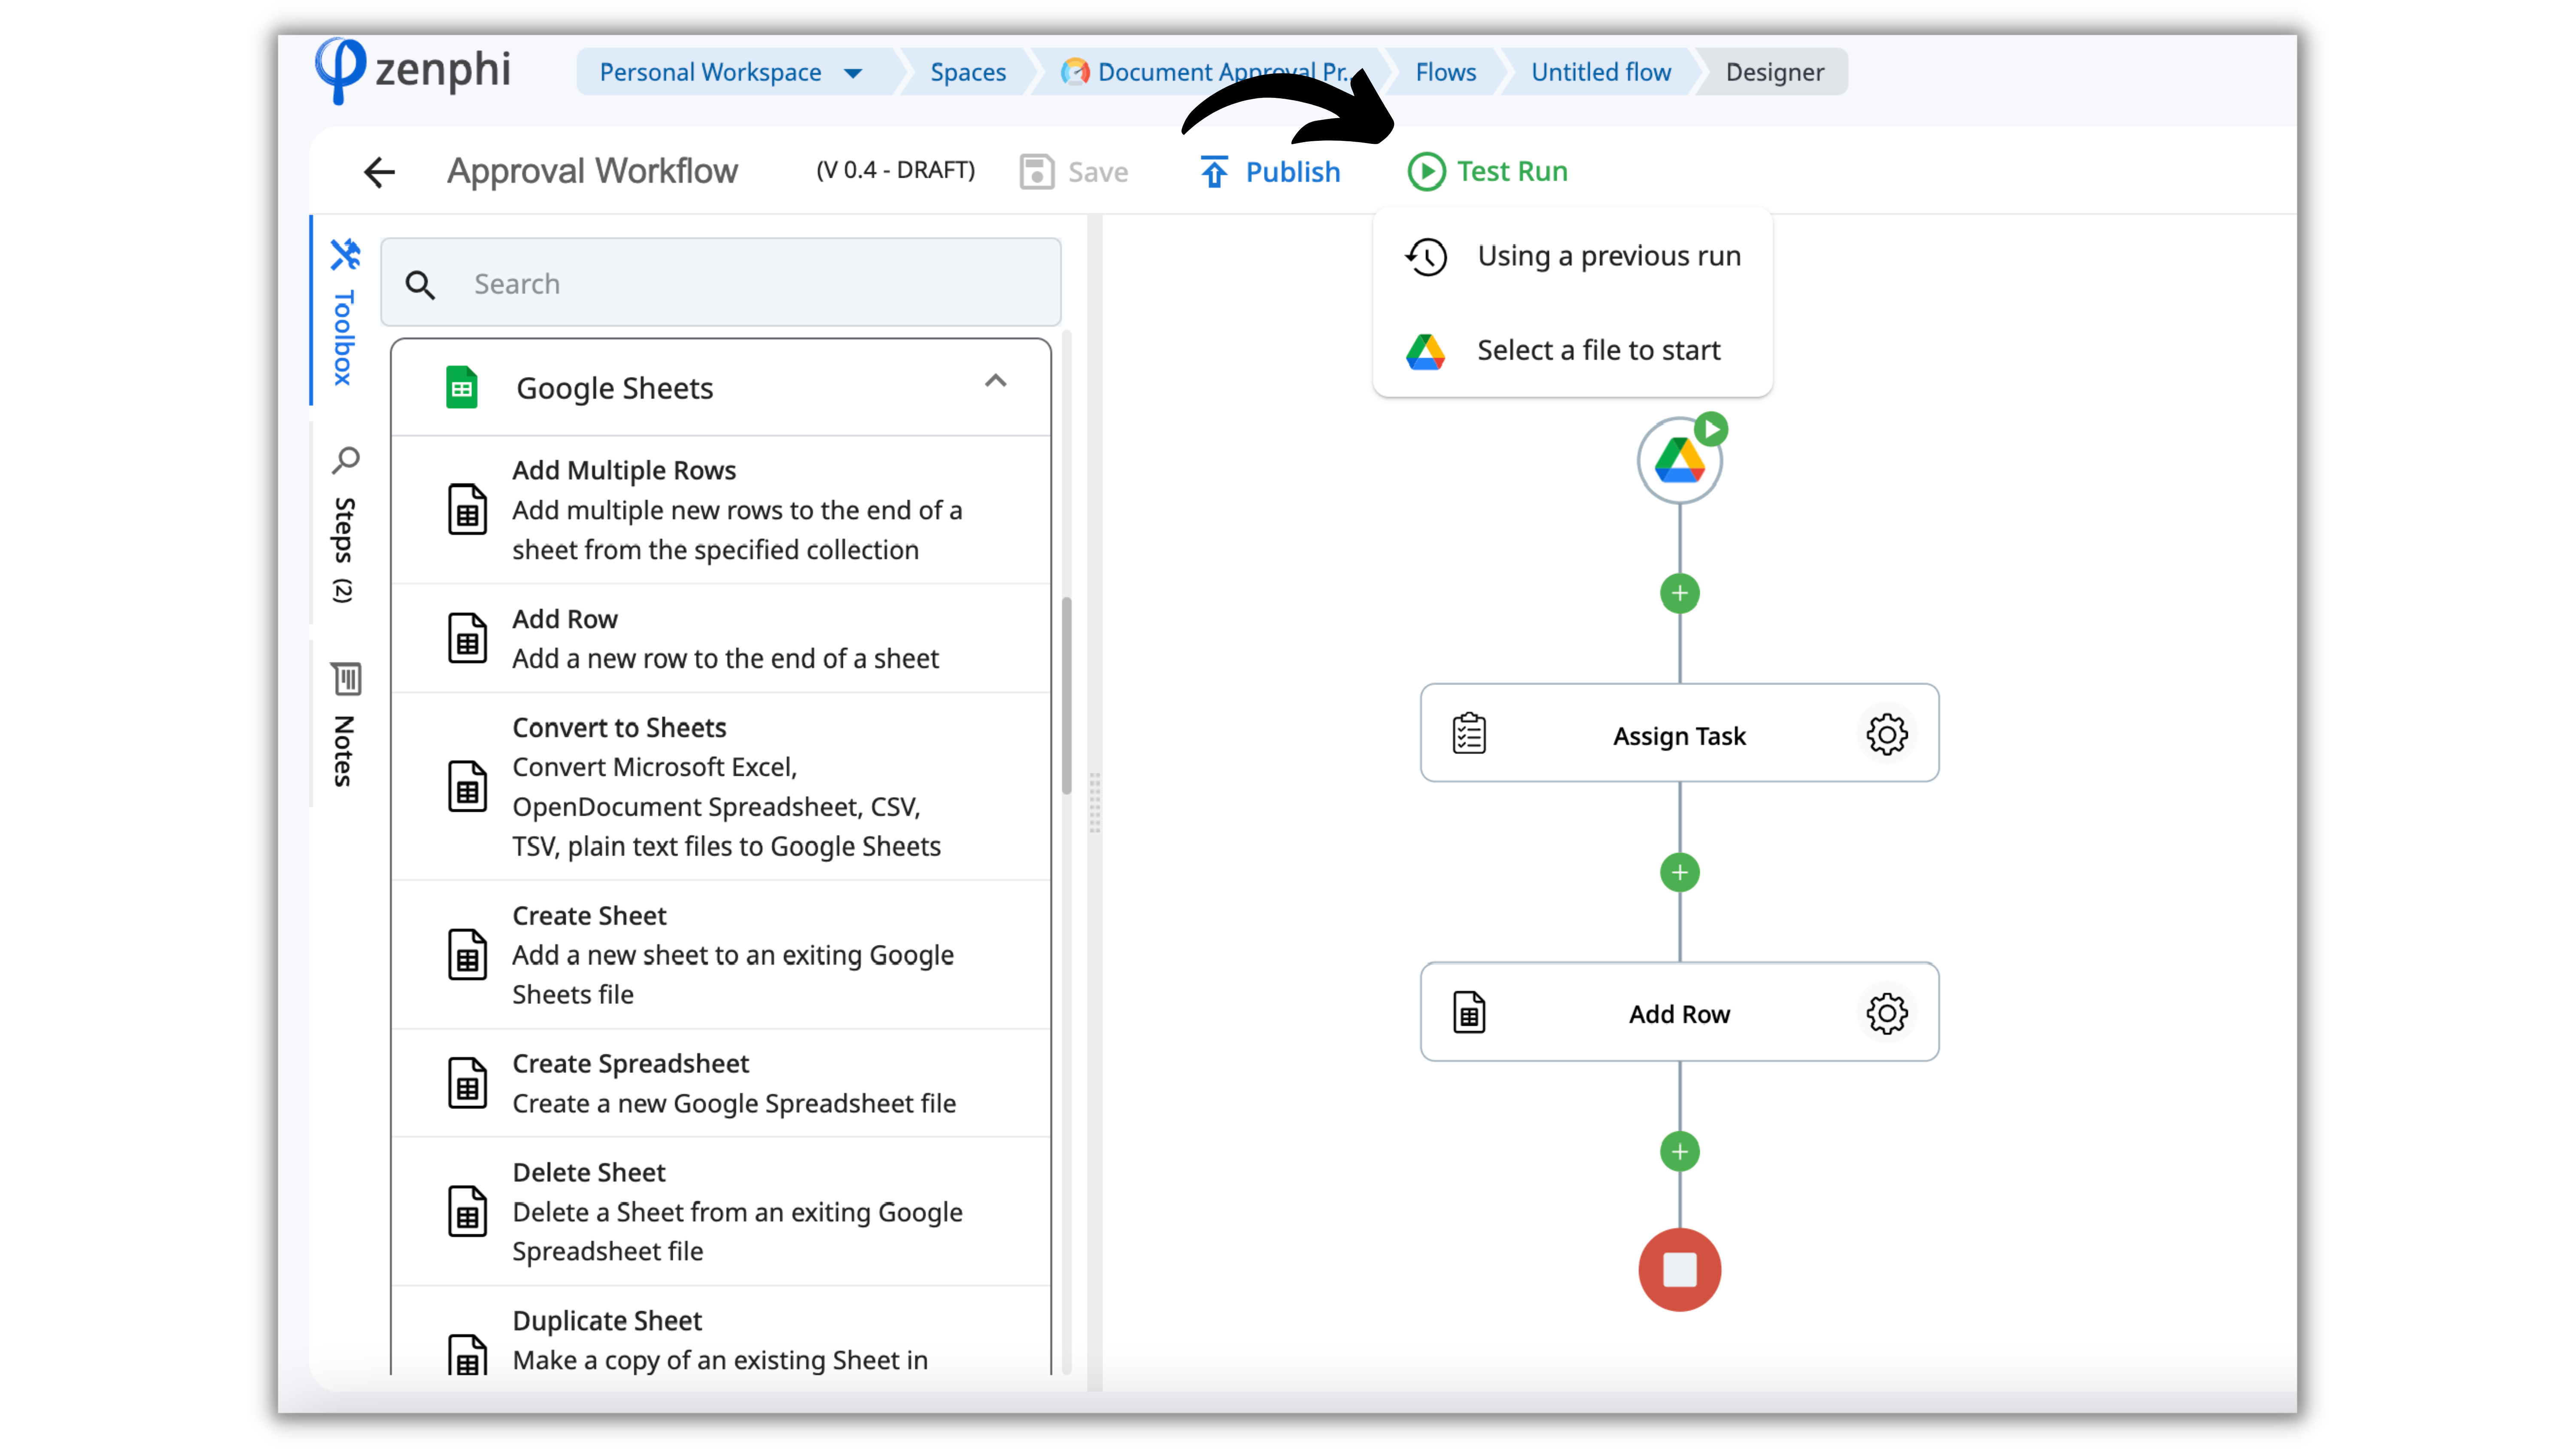
Clicking on Test Run gives you two options for data to use to start a new test run of your draft Flow:
- Using Previous Run: this option enables you to select a previously run (if any) instances and use its data to run the test. If this Flow never ran before, this one is not suitable.
- Select a file to start: this option allows you to choose a file from the Folder you indicated in the Trigger. We'll choose this option. Make sure you have at least one file in the Folder you indicated in the Trigger.
Important Note: Please note that, although this is an identifiable test run, the configured actions will actually get executed and could have an impact on the configured data. For example, if you have an action that sends an email to someone, it will actually send it.
Once you press start, the Flow Designer enters into Test Mode. On the left-hand side, you can see the live execution of each step.
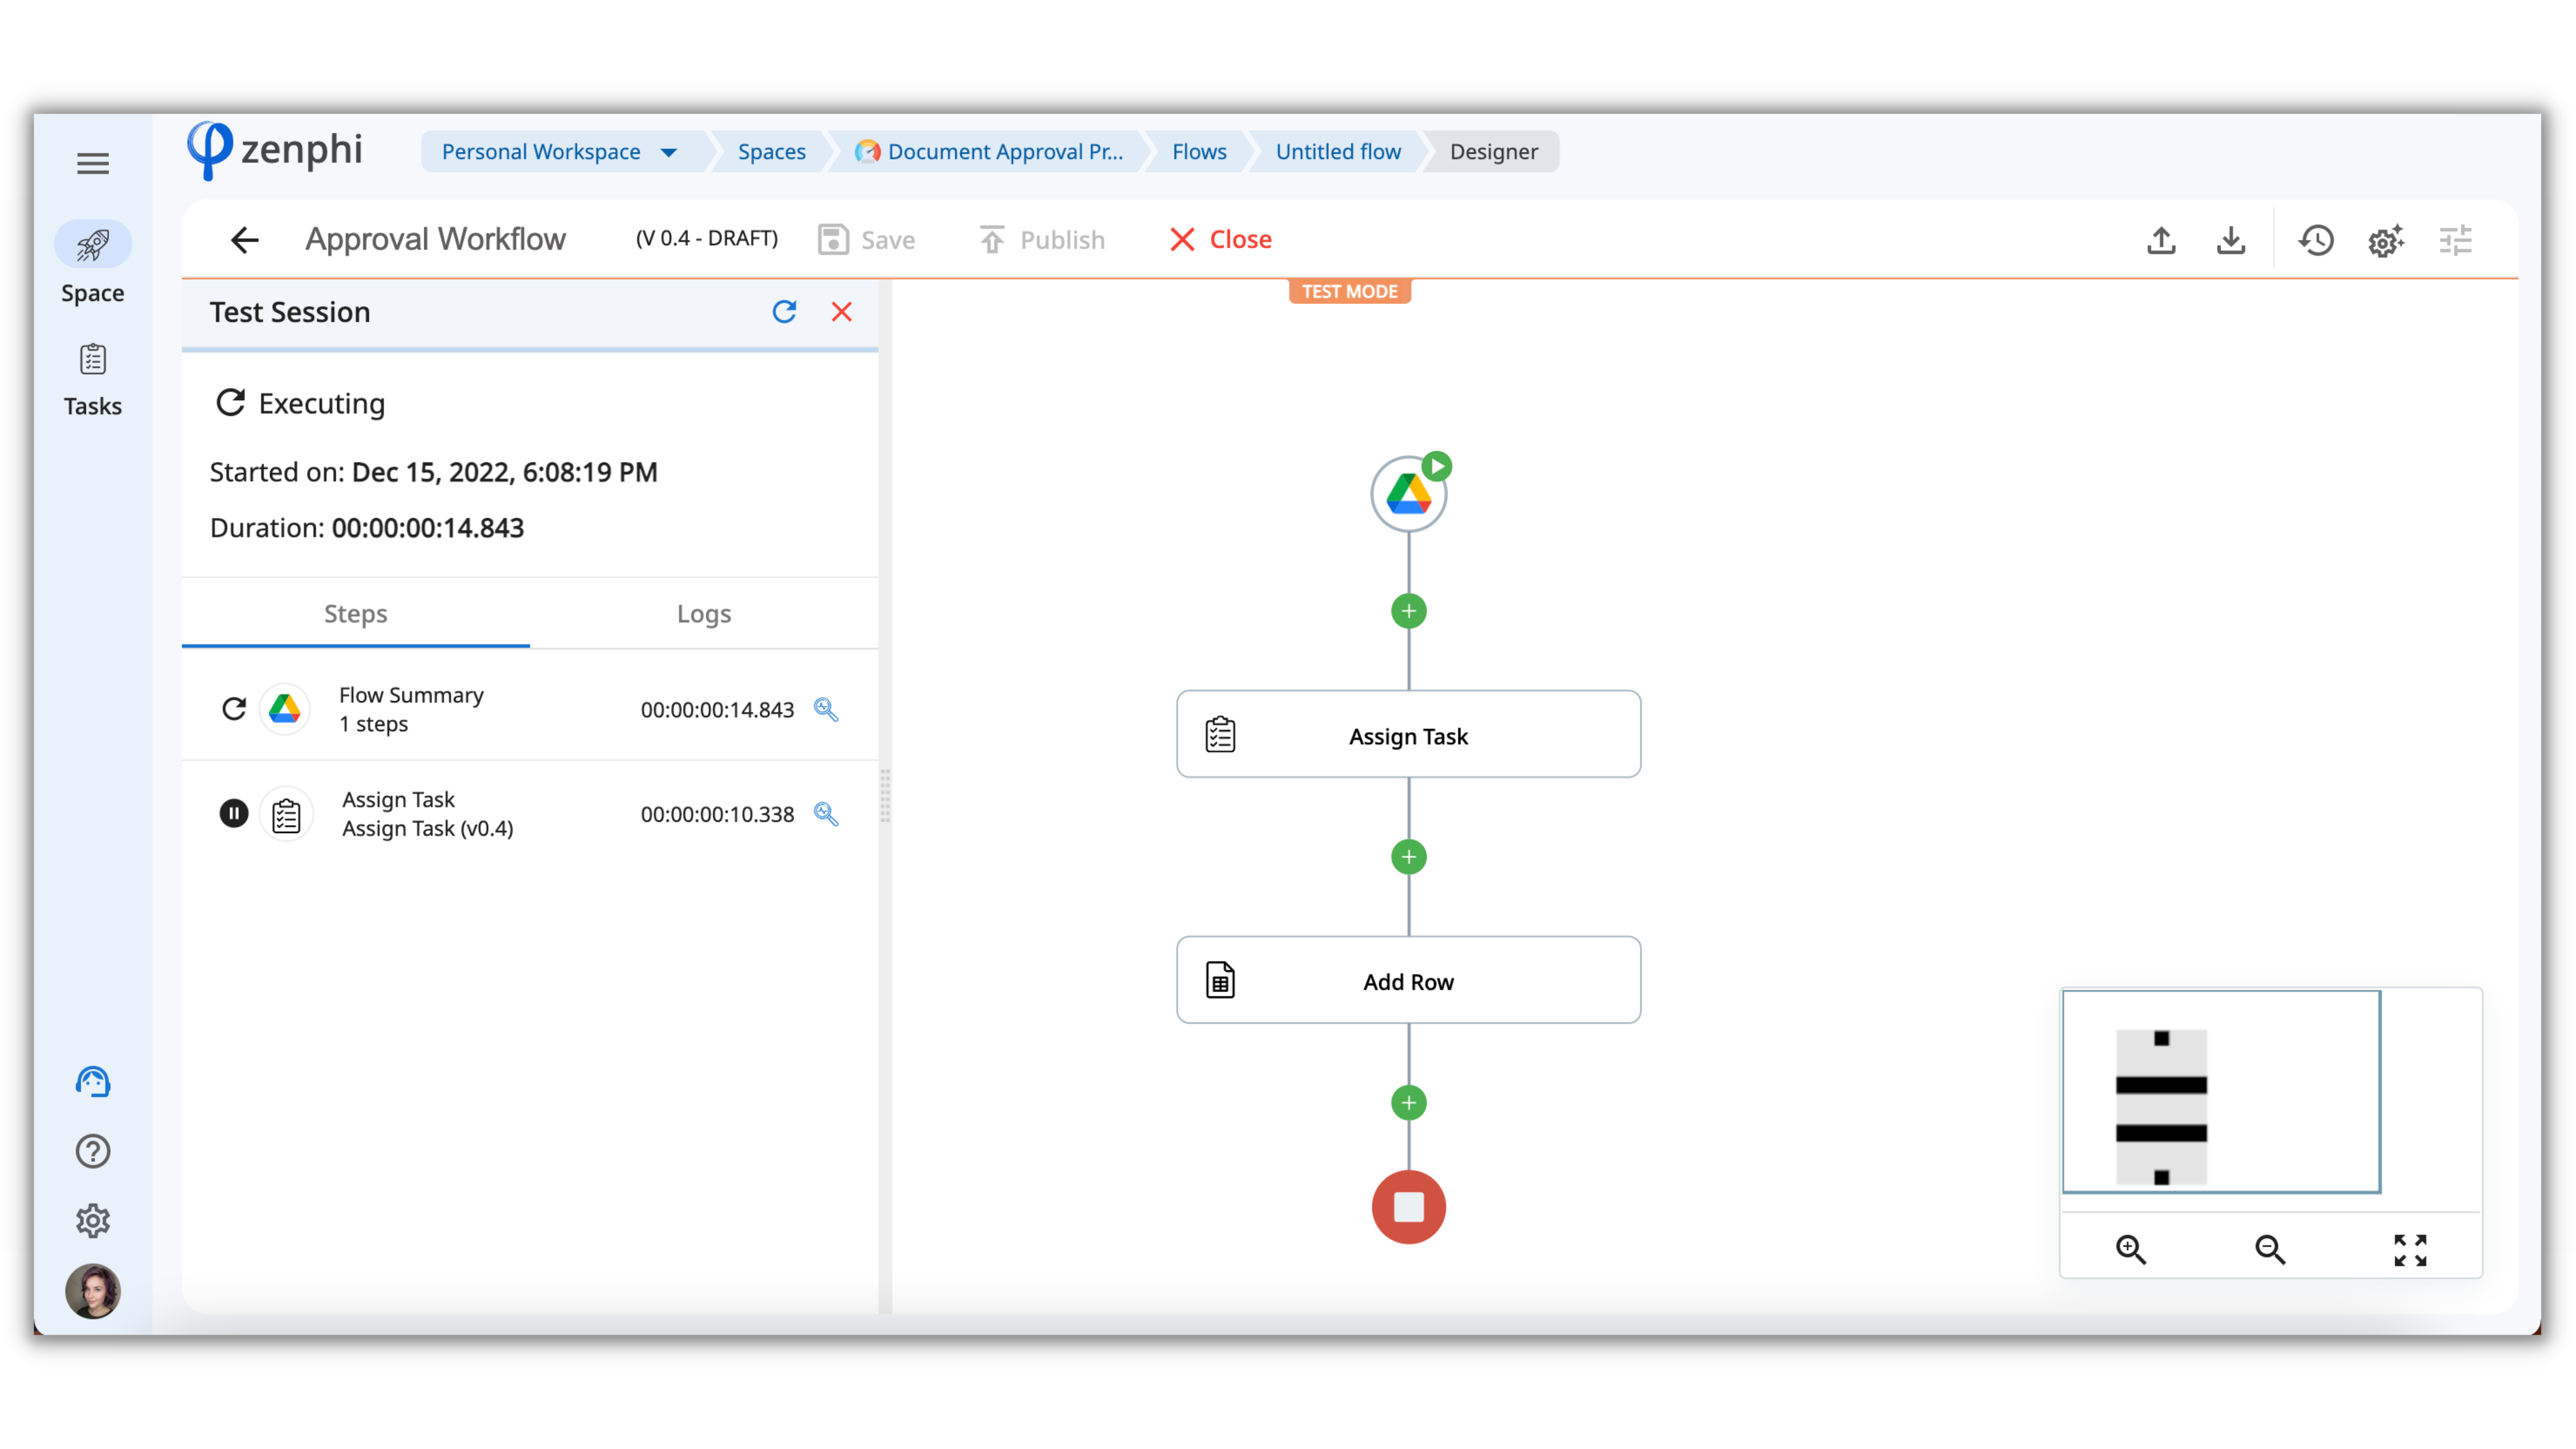
At the moment, we see that the Flow has been triggered and it assigned a task. Let's open this task (remember what email you indicated as assignee), and respond to it.
When we go back to zenphi, we see that the Flow proceeded to the next step which is Add a Row to a Google Sheet.
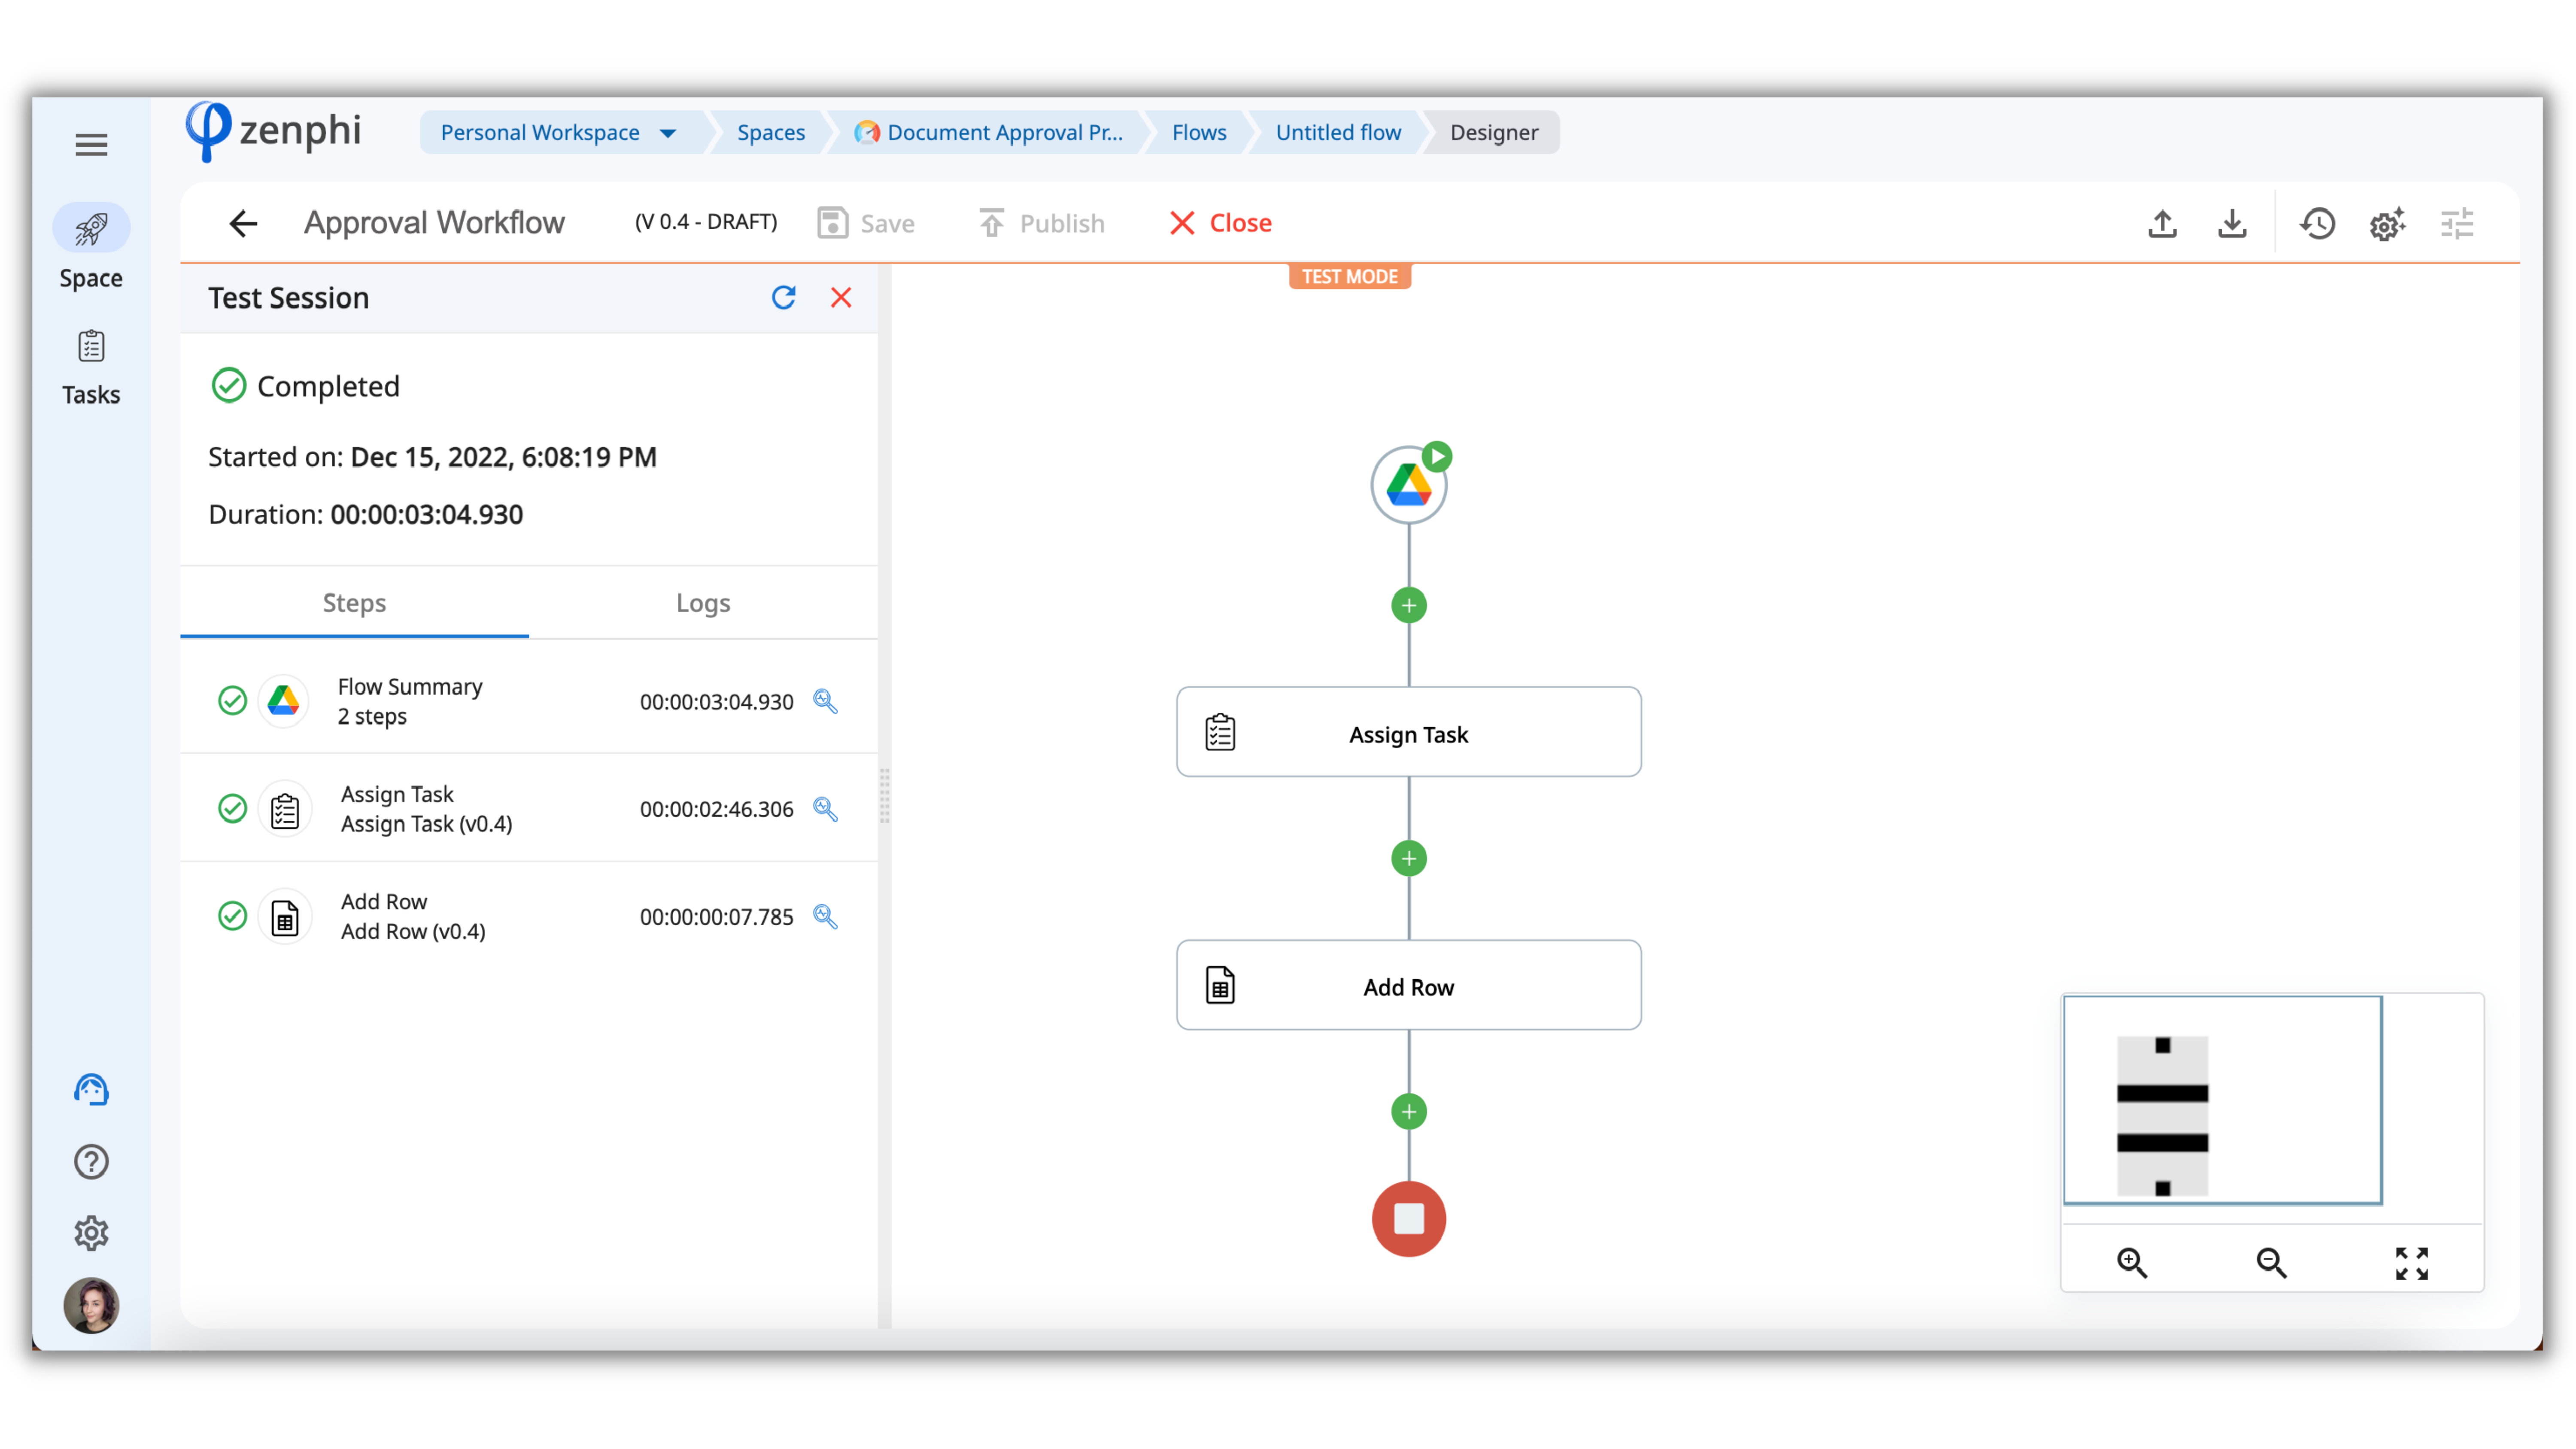
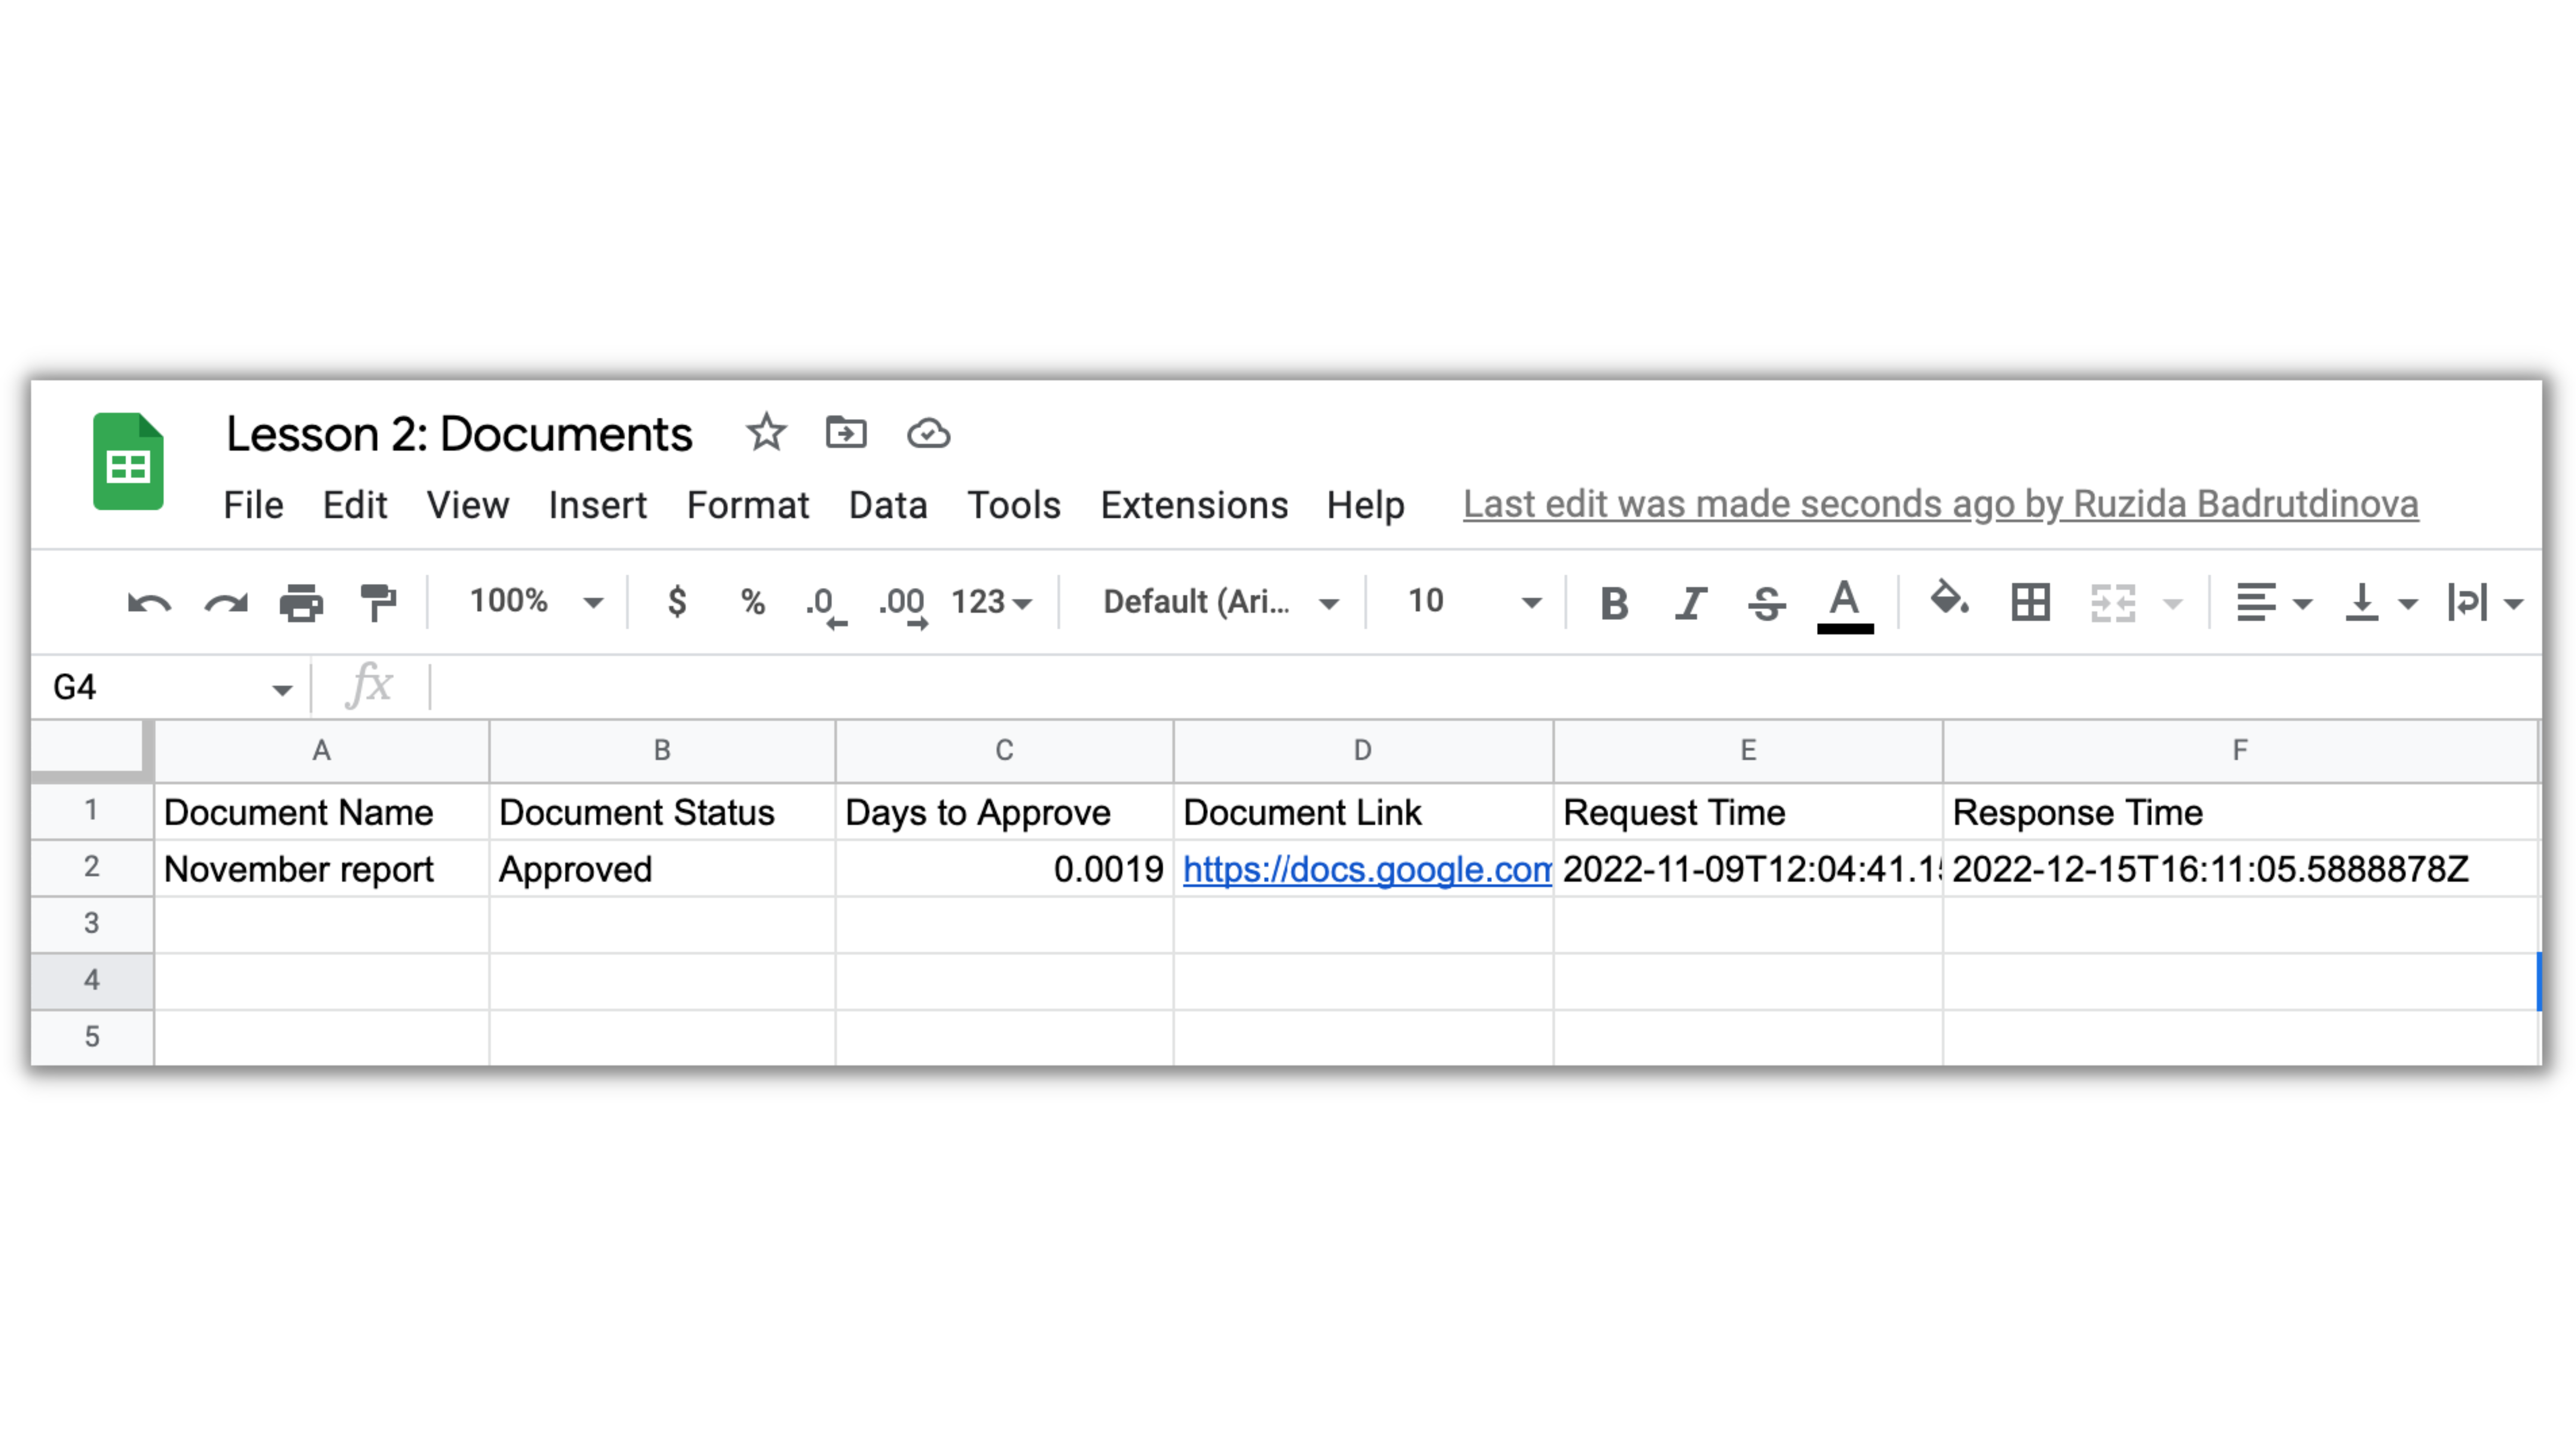
The test is completed. Let's check the changes in the Google Sheet.
Publish and manage your first Flow
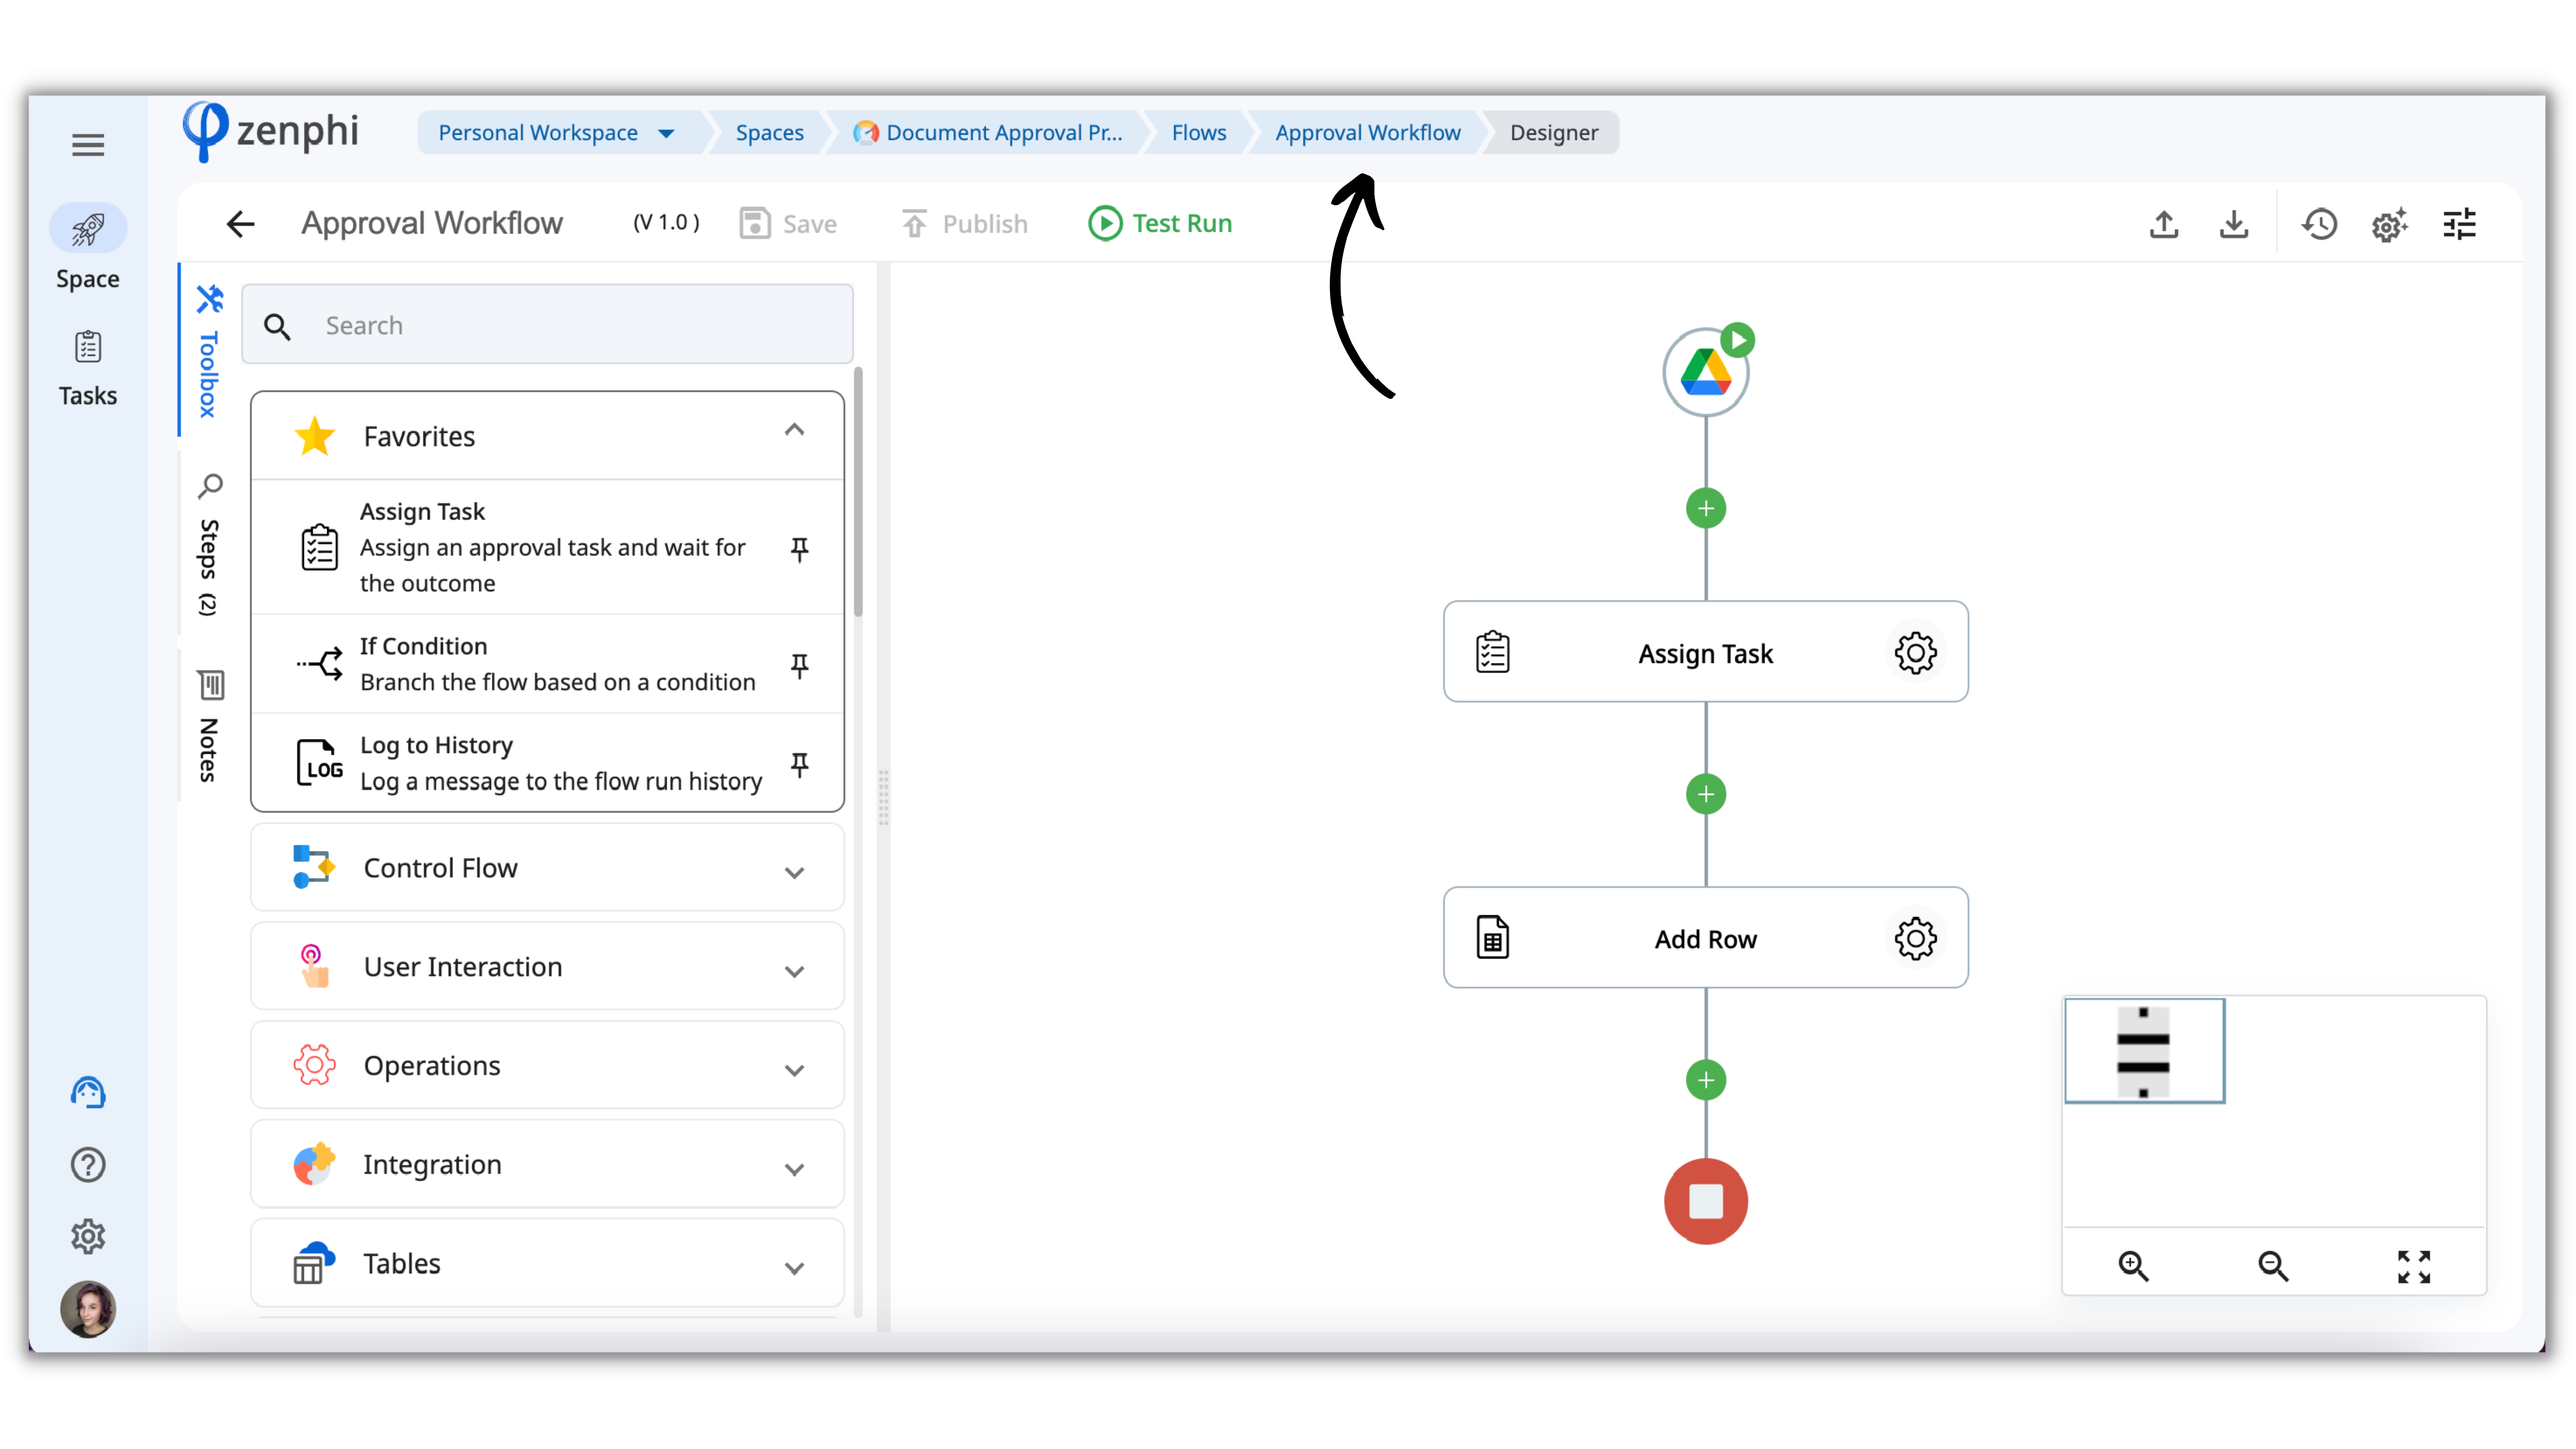
All the data has been logged correctly! It means we can Publish the Flow. Once the Flow is live all the files that are uploaded to a folder will go through this approval process.
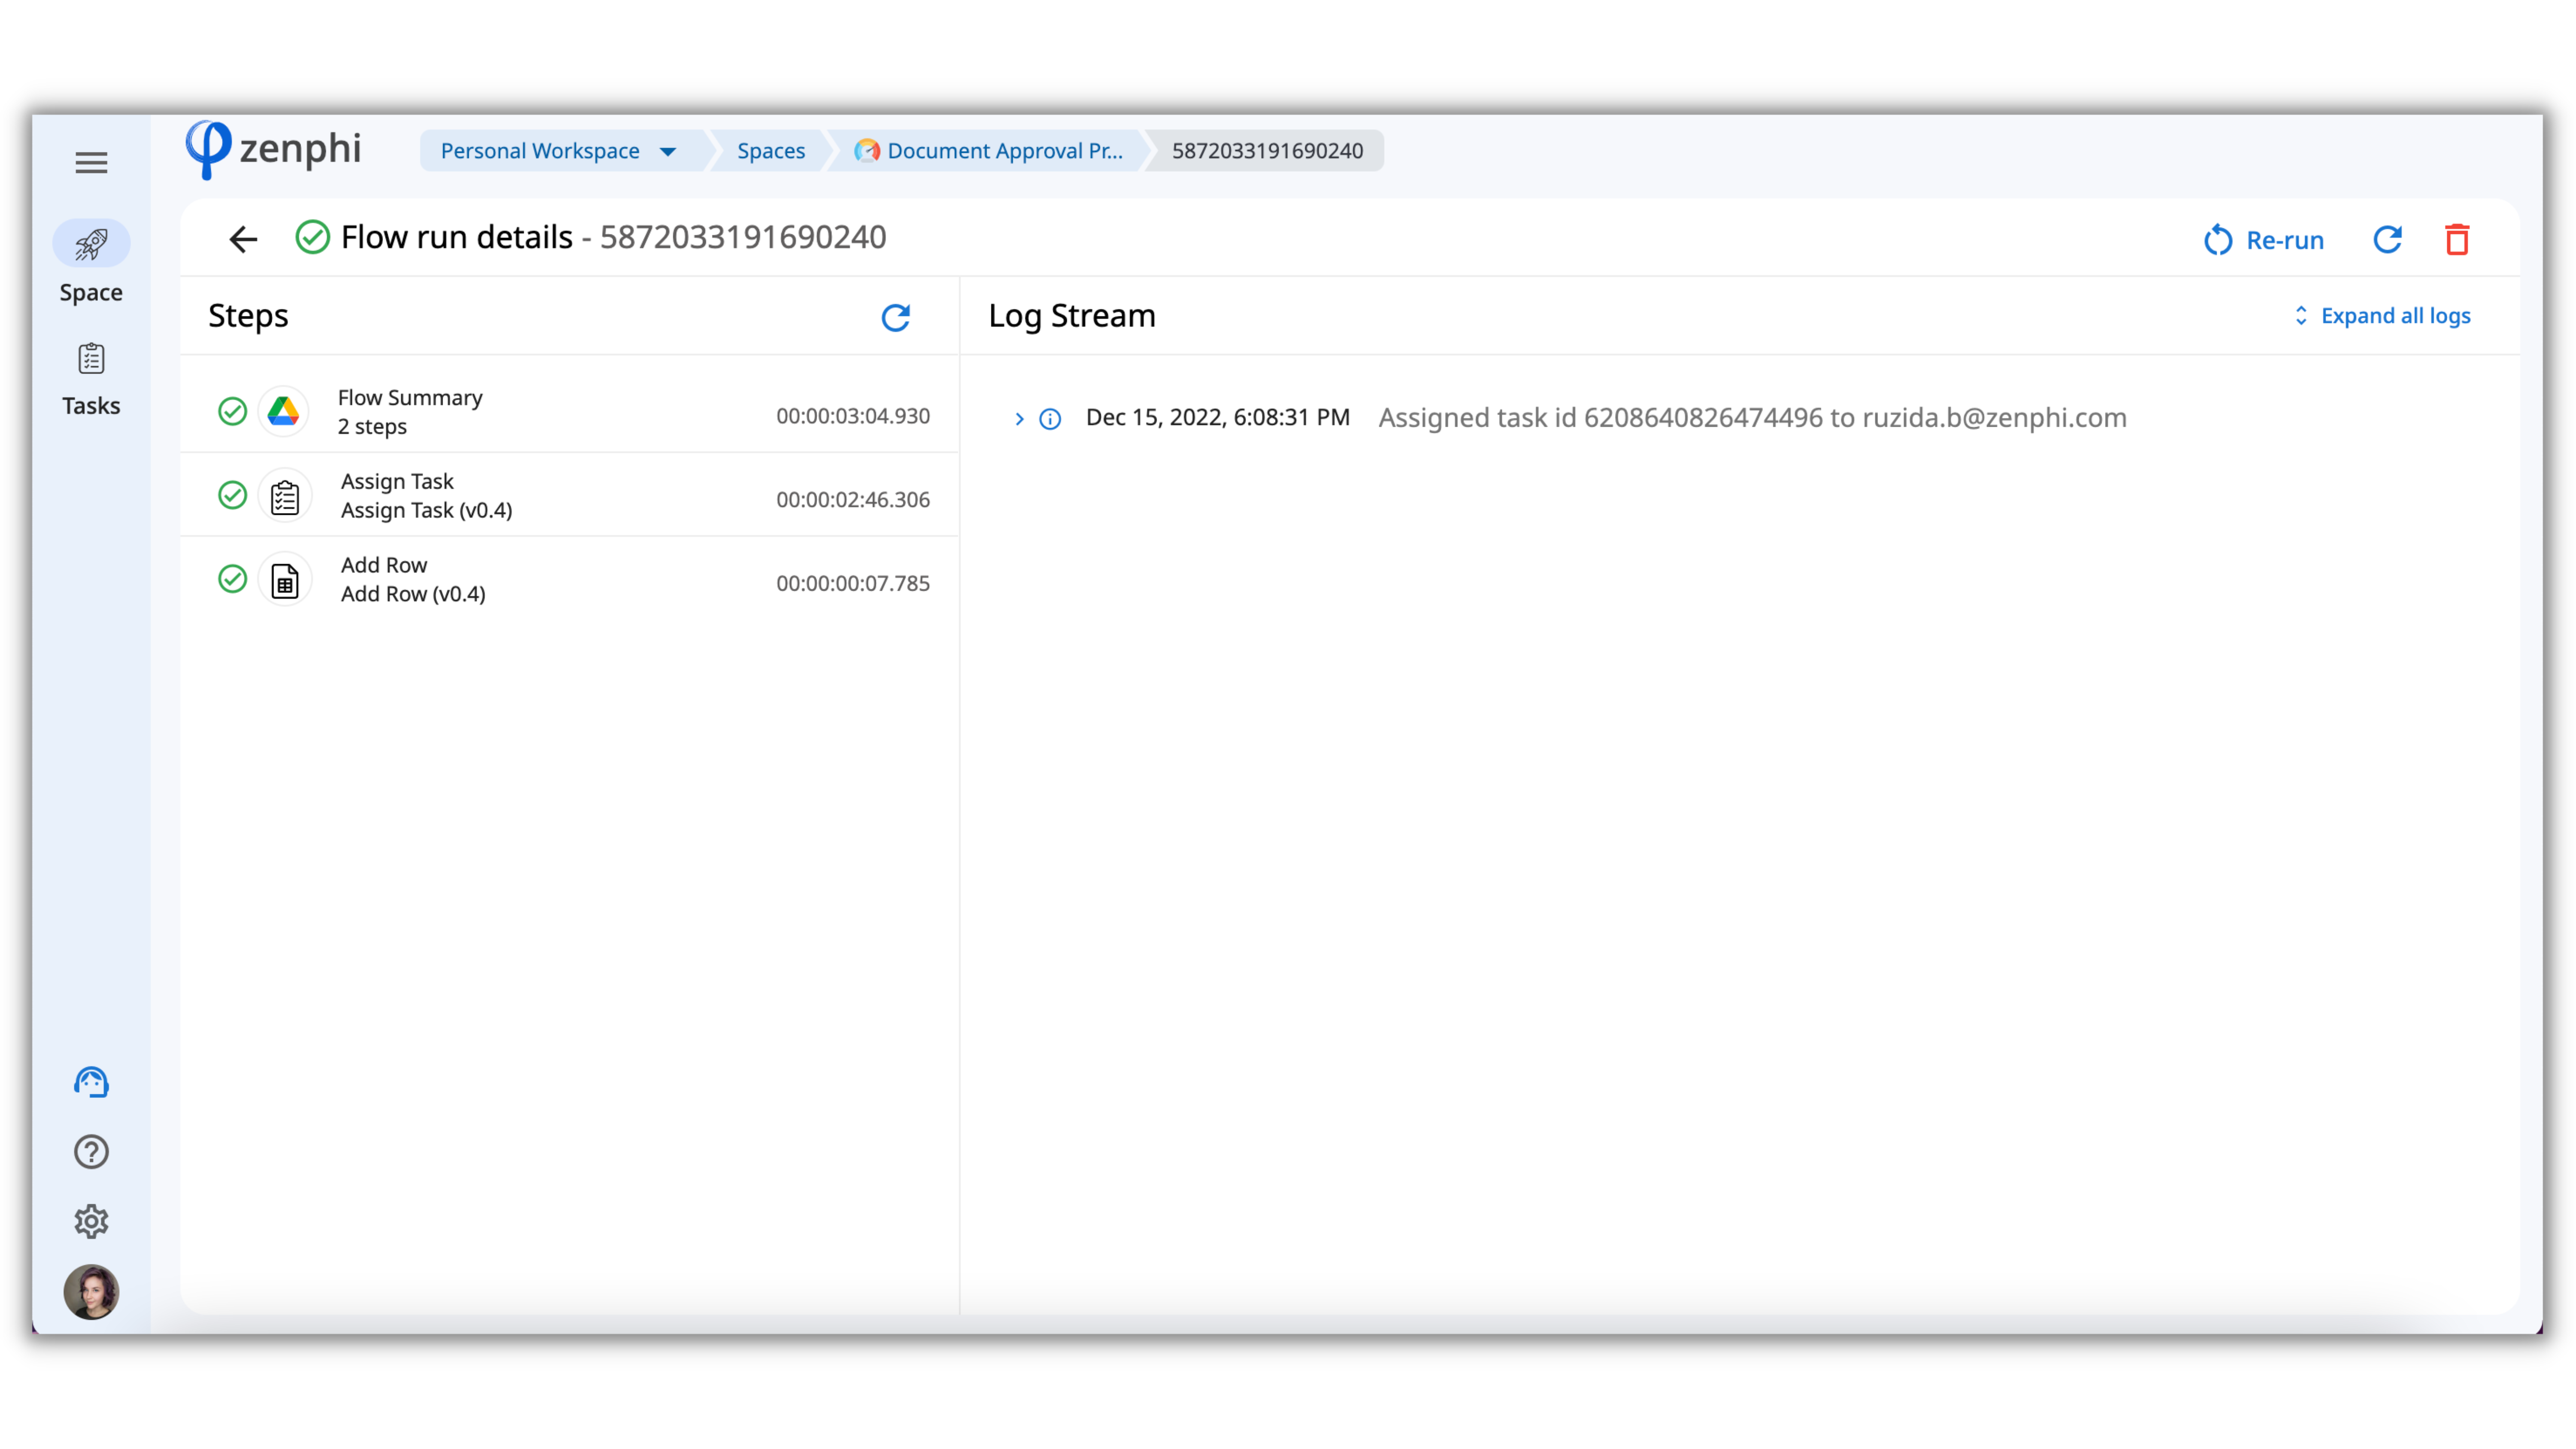
Each time the configured Trigger fires, zenphi creates an instance of the Flow and executes it. We call the execution of a Flow a “Flow Run”. To see the Flow Runs of this Flow, click back to the main Flow page:
A Flow Run can have different statuses:
- In Progress - it means that the Flow is currently executing;
- Completed - Flow executed successfully;
- Failed - when a Flow Run fails, something went wrong during the execution of the Flow. You can then identify the cause of the failure, correct it, and re-run the flow.
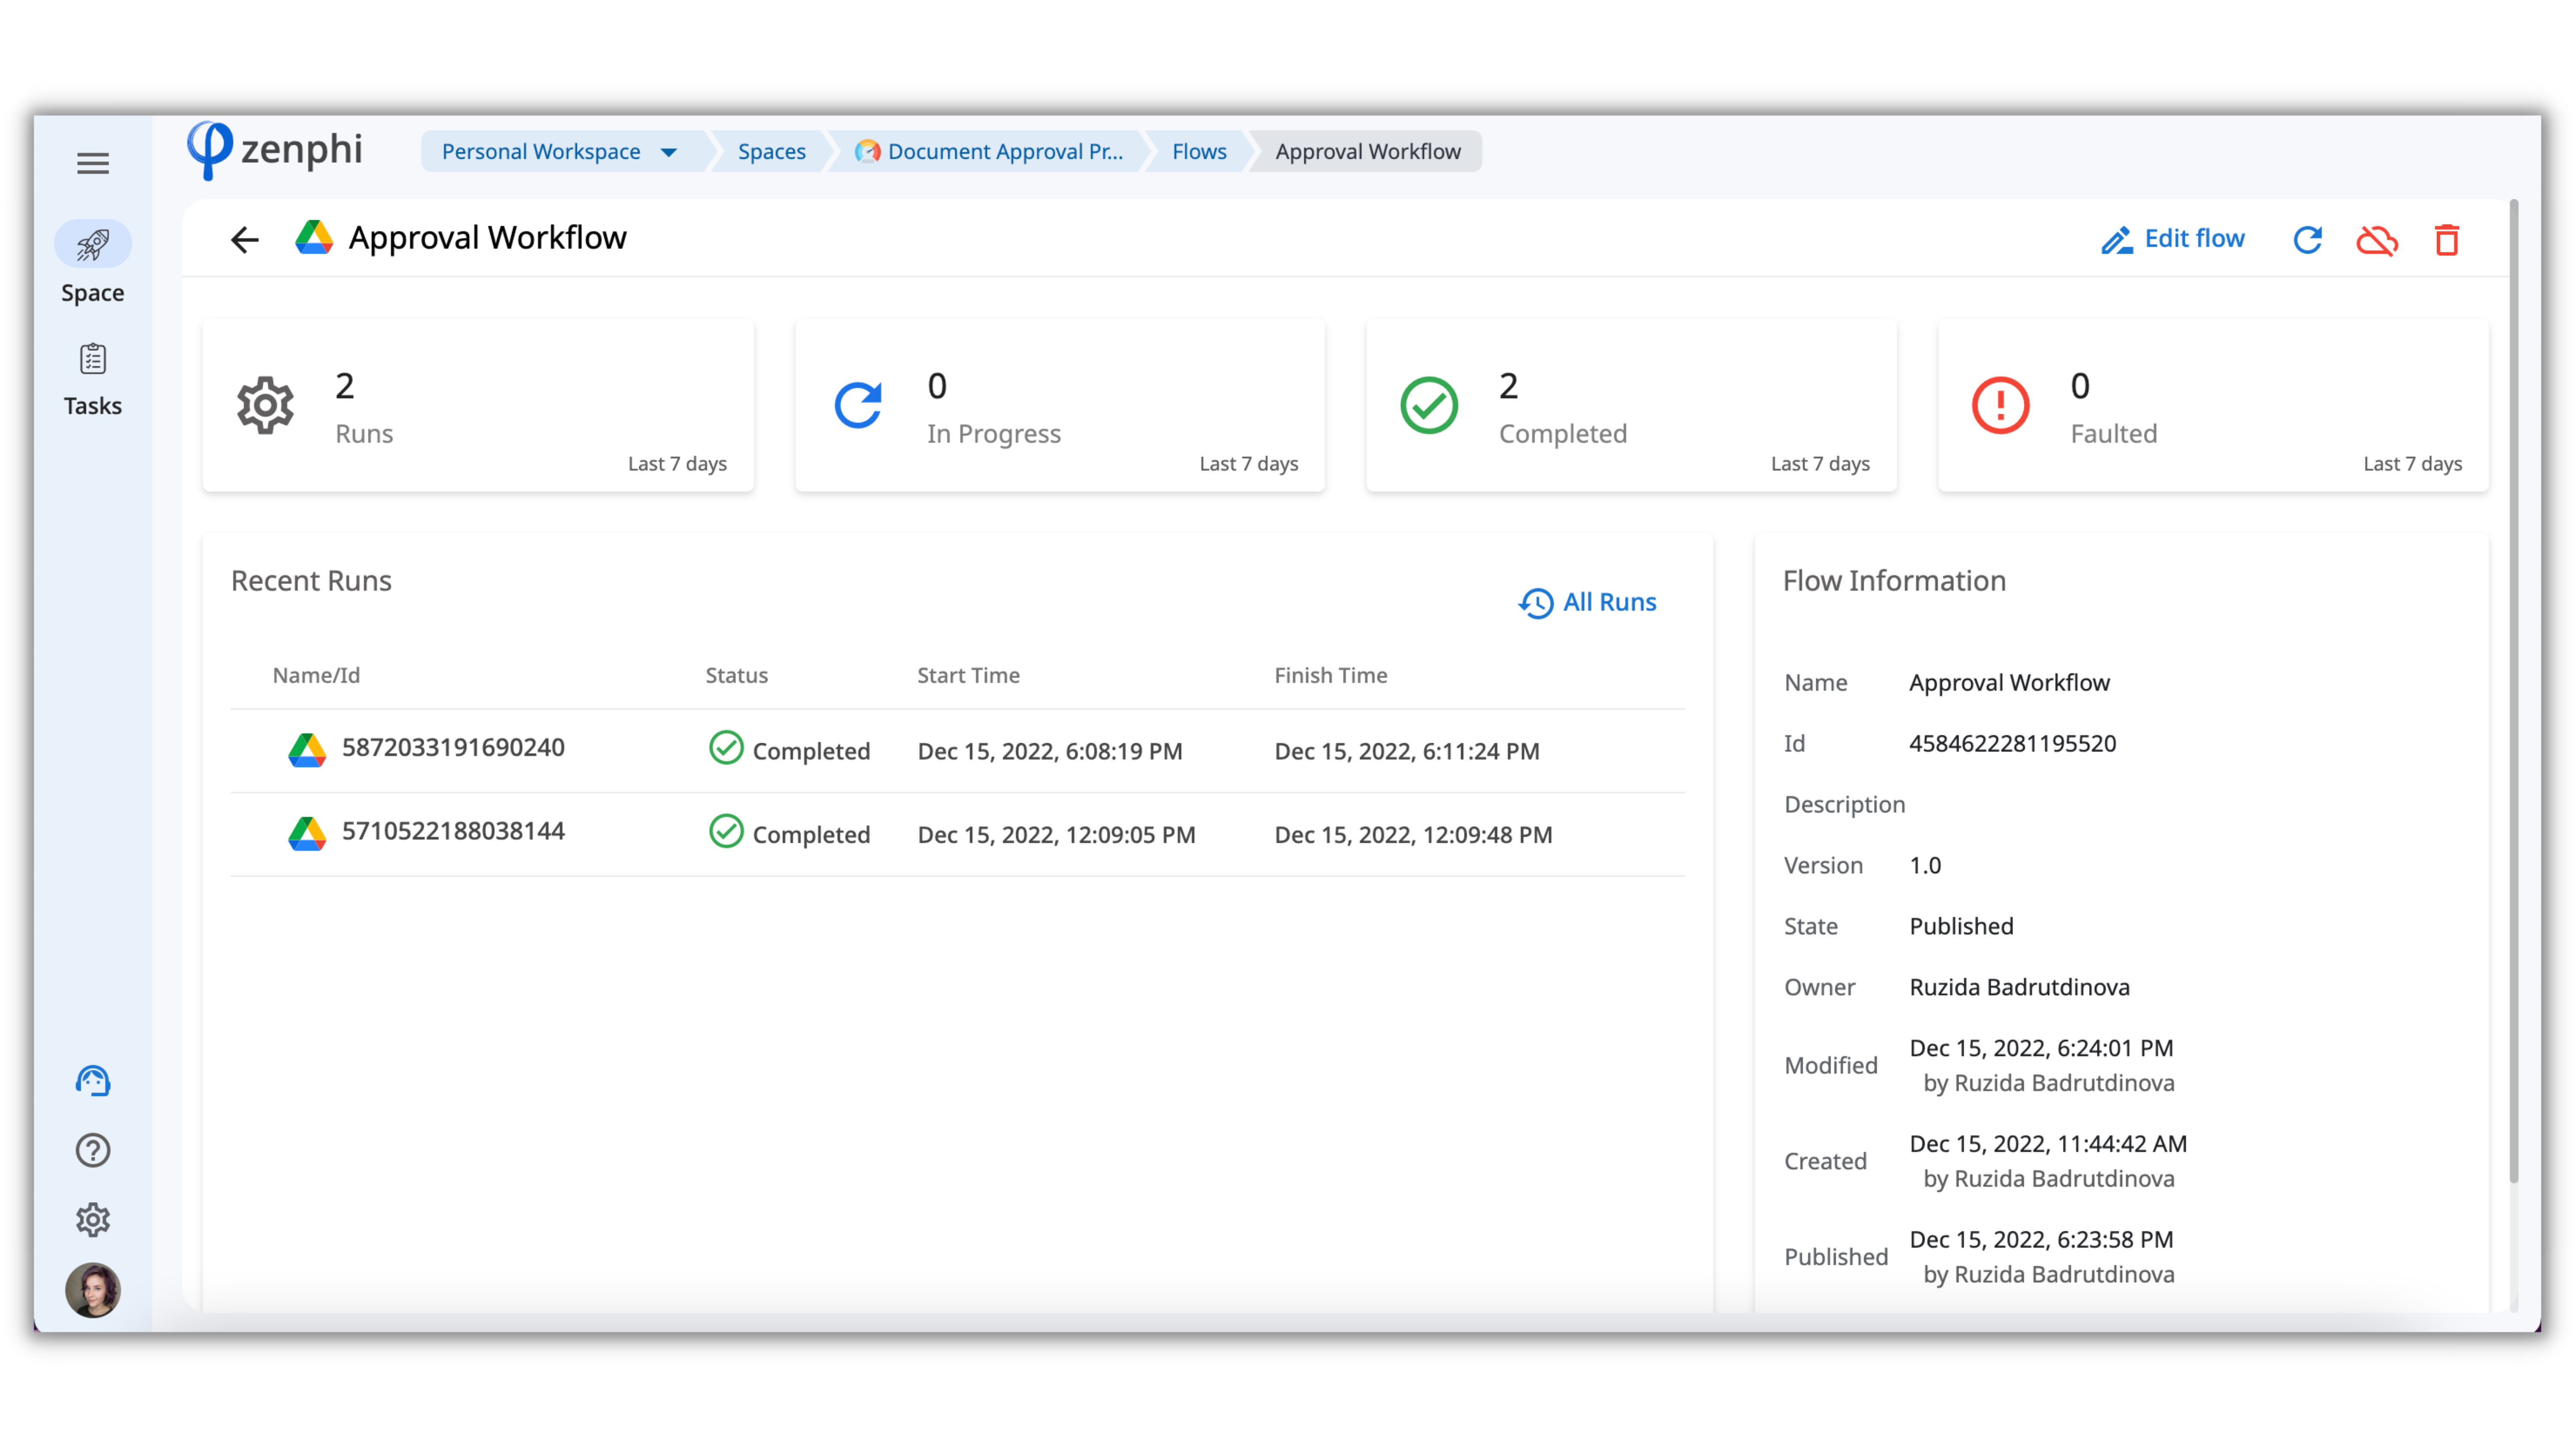
If you would like to see the details of a Flow Run, you can click on it and see the executed Actions, how long it took, and more information about the Flow Run.
Congrats! You went through one of the most essential parts of process automation in zenphi. Now, endless possibilities are opened for you.
To train a bit more, we also recommend going through these two simple tutorials to try other Triggers and Actions.
Send a Thank you email after the Google Form Submission
Save Email Attachment to Google Drive Folder
Dynamically Generate Google Slide Using Google Sheets Data and Export it to PDF.
Updated 10 months ago
In the next lesson, we'll learn what are zenphi Table and Dashboards and how you can use them to get the full analytics of your processes at your fingertips.