Create Event
Usage
set up workflows to create calendar events with specific details such as the event title, location, start time, end time, description, and any other relevant information. This can be useful for automating scheduling processes, event management, or any other scenario where you need to add events to your Google Calendar programmatically.
Fields
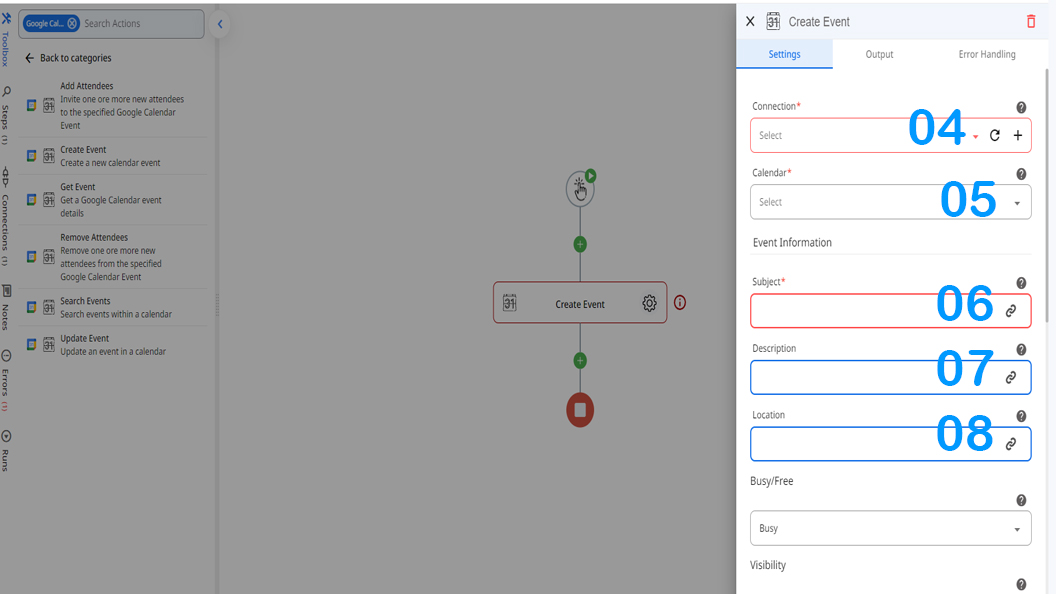
1.Connection - Connection is the way to authorize zenphi to interact with the specified system on your behalf, If your process needs to interact with another system, in this case Google Calendar.
2.Calendar - Select a calendar from the linked calendars.
Event Information
3.Subject - This field is used to specify the title or name of the event. It should be a brief and descriptive summary of the event.
4.Description - This field allows you to provide additional details or information about the event. You can include a description, agenda, or any other relevant information.
5.Location - This field is used to specify the physical or virtual location where the event will take place. You can enter an address, venue name, or online meeting link.
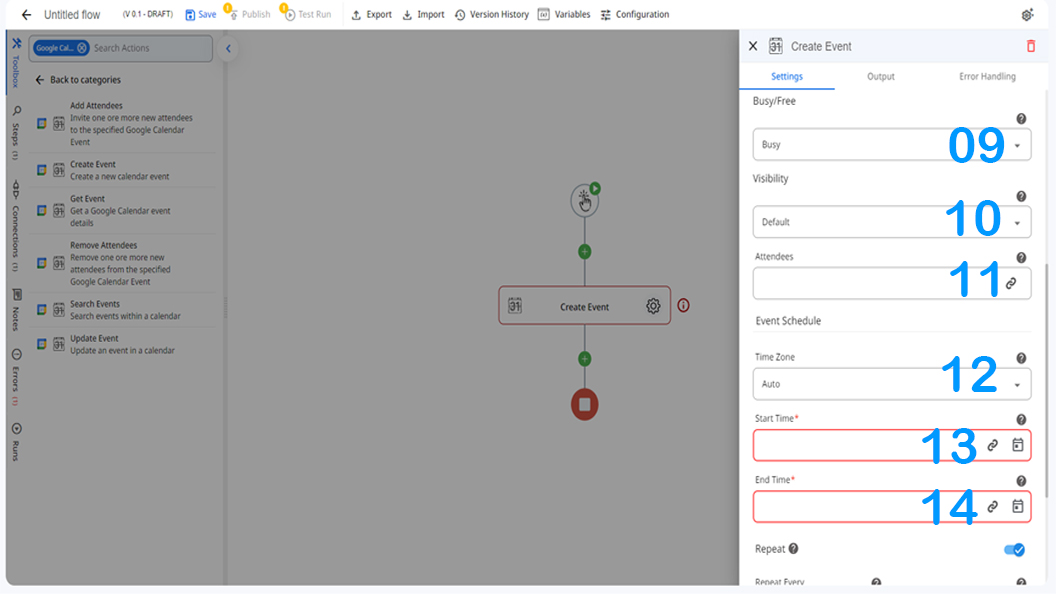
6.Busy/Free - Busy does block time on the calendar. Free does not block time on the calendar. This is equivalent to setting Show me as to Available in the Calendar UI.
7.Visibility - "default" - Uses the default visibility for events on the calendar. This is the default value.
"public" - The event is public and event details are visible to all readers of the calendar.
"private" - The event is private and only event attendees may view event details.
"confidential" - The event is private. This value is provided for compatibility reasons.
8.Attendees - This field allows adding the email addresses of the people you want to invite or include in the event. They will receive an invitation and can RSVP. You can add more that one people by comma separating email addresses.
Event Schedule
9.Time Zone - This field allows you to specify the time zone in which the event will take place. It ensures that the event's start and end times are accurately reflected based on the selected time zone.
10.Start Time - The (inclusive) start time of the event. For a recurring event, this is the start time of the first instance.
11.End Time - The (exclusive) end time of the event. For a recurring event, this is the end time of the first instance.
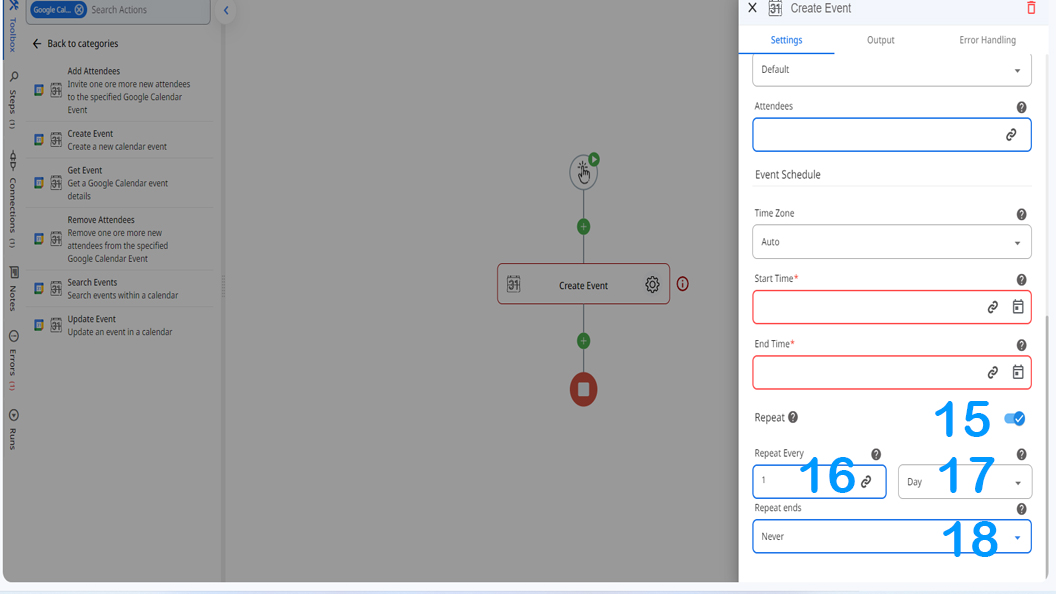
12.Repeat - enable this field If you want this event to repeat .
13.Repeat every - Specify time unit and number of repeats for the event.
14.Repeat Ends - Select which way you want the repeating to end.
Demonstration on how to use it in a flow
1.Drag and drop the Create Event action into the flow.
2.Set the name of your choice or let it be as default
3.Click the gear icon to open its settings.

4.Authorize Zenphi to use your desired Google Calendar.
5.Select a calendar from the linked Calendars.
6.Specify the title of the event.
7.Provide Additional information about the event ,if required.
8.Specify the physical or virtual location of the event.
9.Choose whether you want to block time on calendar or not.
10.Specify whether the event is visible to everyone or to a specified group of people.
11.Add email addresses of the attendees.
12.Specify the time zone of the place where the event takes place.
13 & 14. Specify the start time and end time of the event.
15.Enable this button if your event is going to repeat in the future.
16 & 17. Specify the Interval of repeats and the unit of time for the Interval.
18.Here you can determine and end point for the repeats, which can be on a certain date or after a certain number of occurrences.
Updated 9 months ago